8 Basement Finishing Before and After Case Studies
Explore 8 basement finishing before and after case studies with scopes, costs, challenges, design decisions, and practical results.
By Excellent Home Improvement & Remodeling

A finished basement can add hundreds of square feet that didn't count as living space the day before, and that's not a cosmetic distinction. The U.S. Census Bureau defines finished floor area as space with completed walls, floors, and ceilings, explicitly including finished basements and excluding unfinished basement areas, a definition that makes basement finishing before and after a measurable change in recognized living area rather than a photo upgrade. You can review that standard in the U.S. Census Bureau definitions for finished floor area, which also set the baseline for judging every case below.
In the 2020 Residential Energy Consumption Survey, 36.83% of homes reported a finished basement while 15.12% reported an unfinished basement, and homes with finished basements had an average finished-basement area of 958 square feet, compared with 1,027 square feet for unfinished basements. Those figures explain the central trade-off in these projects. Framing, insulation, ceilings, and moisture control consume a little raw space, but they convert excluded square footage into rooms you can heat, occupy, and document.
Each basement finishing before and after case here follows the same framework so you can compare them directly. You'll see the existing condition, the scope, the constraints, the cost drivers, the tactical response, and the realized outcome. The finish matters less than the problems solved first, because drywall over a wet wall or a bedroom without legal egress isn't a successful after. It's a liability with better lighting.
Table of Contents
- 1. Damp Storage Cellar to Dry Living Space (Moisture-First Transformation)
- 2. Legal Basement Apartment with Separate Egress (Accessory or Rental Unit)
- 3. Basement Bedroom with Code-Compliant Egress Window Retrofit
- 4. Basement Bathroom Addition Using a Macerating Toilet or Ejector Pump
- 5. Home Office or Studio Conversion with Acoustic and Lighting Upgrades
- 6. Basement Recreation Room, Wet Bar, and Media Lounge
- 7. Basement Home Gym with Impact Flooring and Sound Control
- 8. Laundry and Utility Room Reconfiguration in a Finished Basement
- 8 Basement Finishing Before-and-After Transformations Compared
- Build the Invisible Infrastructure Before Chasing the Reveal
1. Damp Storage Cellar to Dry Living Space (Moisture-First Transformation)
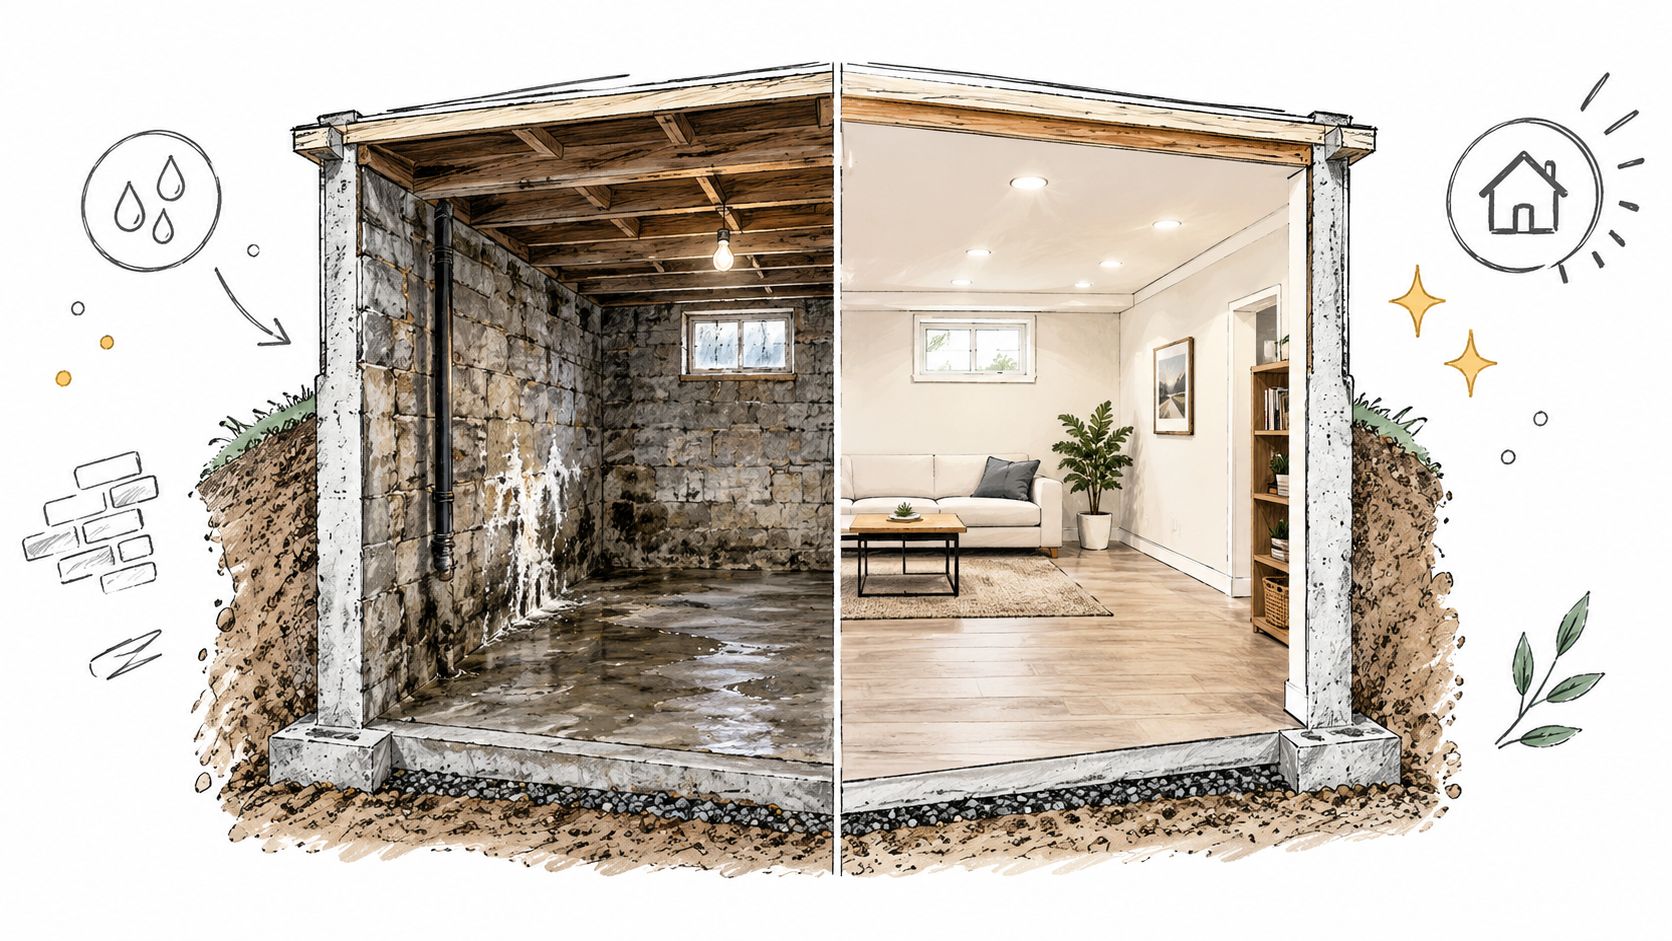
Existing condition. A pre-war Bronx row house cellar had exposed masonry, efflorescence, cold concrete, and seasonal seepage at the cove joint where wall meets slab. Boxes sat on pallets, and the musty smell returned after every heavy rain. The owner wanted a family room, but framing that wall as found would have trapped moisture behind new drywall within one season.
Scope and constraints. The tactical response came before any finish selection. The crew installed interior drainage, a sump pump, and a dimpled membrane, then framed and insulated only after test readings stabilized. That sequence mirrors the Pacific Northwest National Laboratory case study of a 1928 Minneapolis home, where a dimpled drainage mat, closed-cell spray foam, and an interior footing drain were installed before the basement was finished.
What Drove Cost and What Worked
Cost drivers were drainage, discharge routing, and insulation, not paint or flooring. In a contrasting Westchester split-level, downspout extensions and regrading resolved most intrusion from outside, so interior work stayed simpler and cheaper. Comparing those two basements shows why you can't price moisture work from a photo. The source of water decides the budget.
Practical rule: Don't cover a foundation wall until you can explain where its water goes on the worst rain day of the year.
For pre-1978 buildings, demolition adds another layer. One project used containment, wet methods, HEPA vacuuming, and cleaning verification before framing, with HVAC returns closed off during work. Ask for the certified renovator's name and EPA firm certification, confirm the sump discharge point is legal and away from the foundation, and track humidity with a hygrometer before you commit. Avoid a plastic vapor barrier on the interior face of insulation in most New York area walls without discussing the full assembly first.
Realized outcome. The Bronx cellar became dry, warm living space because drainage and vapor control were treated as the renovation, not as prep for it. That discipline is the core of any durable basement renovation plan that starts with moisture control, and it's what separates a lasting after from a fast failure.
2. Legal Basement Apartment with Separate Egress (Accessory or Rental Unit)
A Bronx two-family home had a dark lower level used for storage and a boiler, and the owner wanted rental income from it. Existing condition wasn't the main obstacle. Zoning, occupancy classification, fire separation, and a legal exit were. If the certificate of occupancy doesn't permit a dwelling unit down there, no amount of finish work makes the apartment legal.
Scope. The conversion added a one-bedroom unit with its own kitchen, bathroom, and separate entrance after zoning and egress requirements were confirmed in writing. Cost drivers were the exit work, fire-rated assemblies, interconnected smoke alarms, plumbing for a full kitchen and bath, and sound separation from the unit above. Cabinetry and tile were minor line items by comparison.
Where These Projects Fail on Paper
Ceiling height ends more apartment plans than design does. Ducts, beams, and a low slab can leave you short of habitable clear height once a finished ceiling and floor go in, so measure before anyone draws a layout. Co-op and condo owners face a second gatekeeper, since alteration agreements can restrict wet areas, work hours, and even whether a unit conversion is allowed at all.
- Verify zoning first: Confirm the certificate of occupancy permits a dwelling unit before design begins.
- Confirm ceiling height early: Measure clear height under beams and ducts, not just slab to joist.
- Draw fire separation in the permit set: Retrofitting rated assemblies after inspection costs far more.
- Check board rules: Review alteration agreements before ordering any materials.
A Westchester in-law suite took a softer version of the same path, with a bedroom, bath, kitchenette, and bulkhead-style exterior exit for a parent. Realized outcome in both cases was multigenerational or rental space that could be insured, listed, and sold without apology. An unpermitted unit may photograph identically, but it creates insurance and resale problems the day a buyer's attorney reads the file. Legal status is the true before and after here.
3. Basement Bedroom with Code-Compliant Egress Window Retrofit
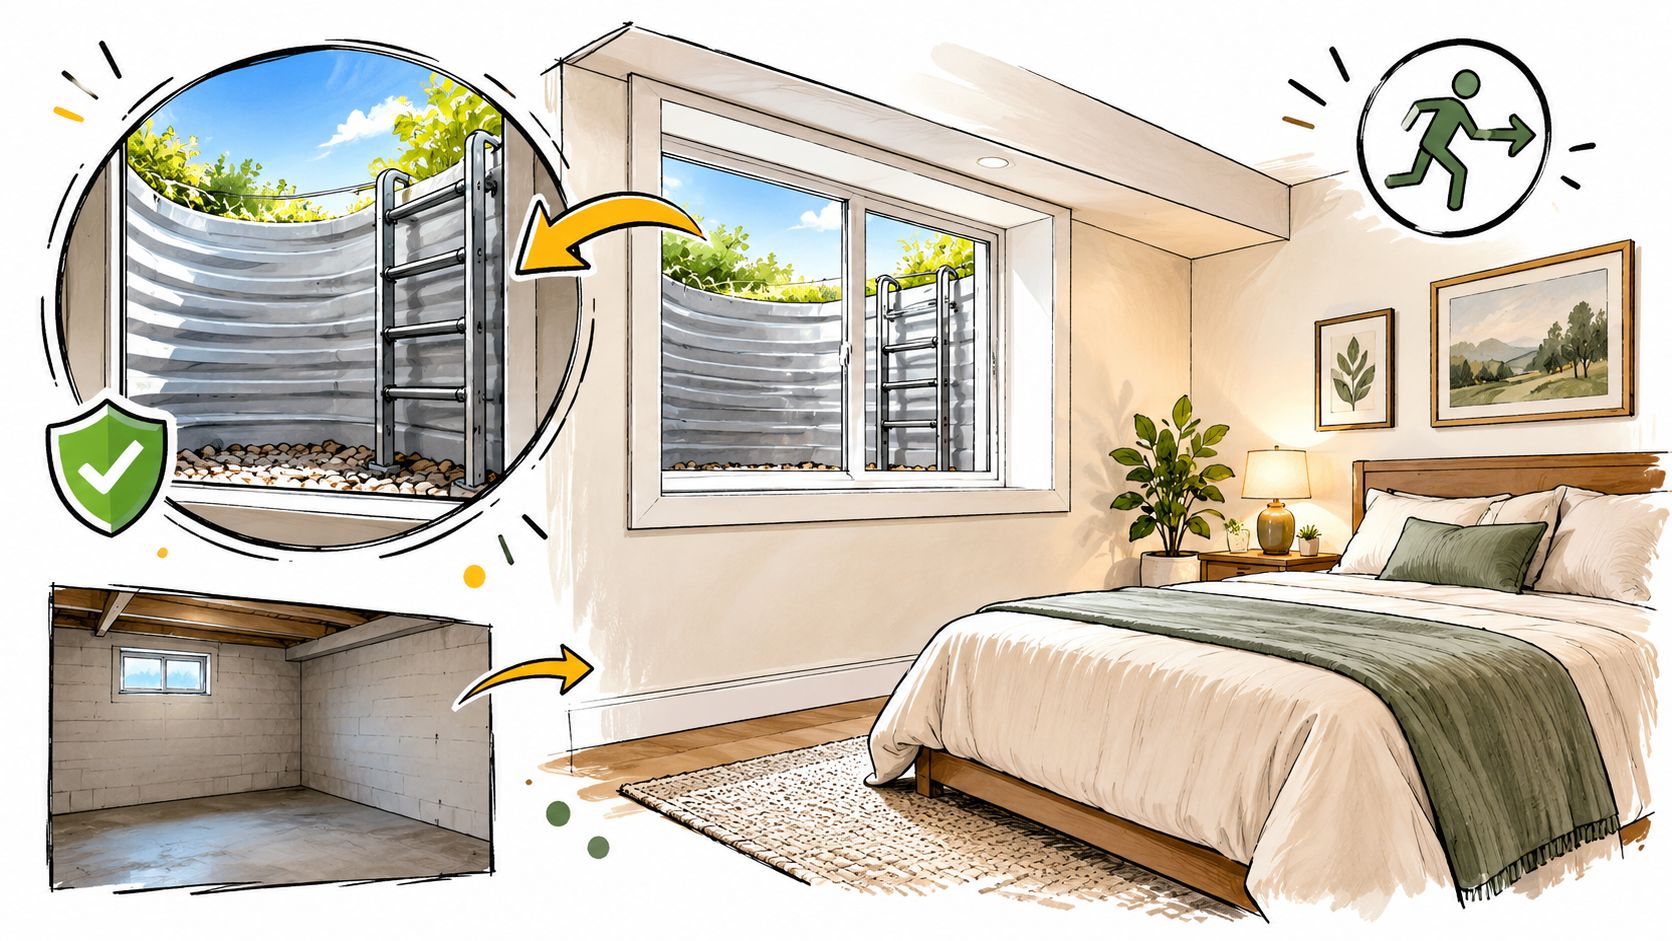
Existing condition. A Westchester basement had a windowless storage room the family wanted as a teen bedroom. It had heat, a door, and enough area, but a sleeping room without a compliant emergency escape opening isn't a bedroom in any legal or safety sense. Calling it one on a listing doesn't change that.
Tactical response. The crew cut the foundation wall for an enlarged egress window, excavated a window well outside, connected the well drain to the perimeter drainage system, and fitted a prefabricated well with a secure ladder. Historical code records show why precision matters, since by 1976 the maximum sill height had decreased to 44 inches while the minimum opening increased to 5.7 square feet, with minimum dimensions of 24 inches high and 20 inches wide, according to the Washoe County egress history summarizing those code milestones.
The Measurements That Decide Pass or Fail
Measure net clear opening, not the rough opening, because the frame and sash reduce usable area. That's the mistake that fails inspections. Window wells deeper than the sill threshold may also require permanently affixed ladders or stairs, and an undrained well turns into a fish tank against your new window during the first storm.
Cost drivers were excavation, concrete cutting, lintel work, and the window itself. Custom egress sizes can carry long lead times, so order early and don't frame the interior wall until the unit is on site and verified. A Bronx row house took a lighter route by enlarging an existing rear window to meet egress requirements, which avoided new excavation on a tight lot.
A basement room becomes a bedroom at the window opening, not at the bed.
Realized outcome. Both rooms gained legal sleeping use, daylight, and ventilation they never had as storage. One modern code nuance is worth knowing. Under specified conditions, basement sleeping rooms in a dwelling protected by an automatic sprinkler system may not need the usual emergency escape and rescue opening, provided other compliant means of egress are present. Confirm whether that exception applies locally before relying on it.
4. Basement Bathroom Addition Using a Macerating Toilet or Ejector Pump
Every basement bath I've priced starts with one measurement: where the main drain leaves the house relative to the slab. A Bronx family room forced everyone upstairs to find a toilet, which kept the finished space from getting used. Its drain exited above slab level, so gravity plumbing was off the table without lifting waste. That single elevation fact shaped the entire design.
The crew added a compact three-piece bath beside the laundry on a macerating toilet, which avoided breaking the slab for a below-grade pit. A Westchester walkout went the other direction: a full shower, vanity, and ejector pump in a sealed basin, because multiple fixtures serving a home gym and guest space justified the excavation and roof venting.
Where the Two Systems Diverge
| Decision point | Macerating toilet | Ejector pump |
|---|---|---|
| Concrete work | Minimal, no pit required | Pit excavation and sealed basin |
| Fixture load | Toilet and small basin | Full bath, multiple fixtures |
| In use | Audible when cycling | Quieter, below floor |
| Service access | Rear of unit must stay reachable | Check valve and basin lid need clearance |
Confirm the existing sewer elevation before choosing either system. A drain that's only slightly high sometimes allows a simpler layout than expected. Cost drivers ran in a consistent order across both projects: the pump system first, then vent routing, waterproofing, and tile.
The constraints that matter never show in the photos. Include a backflow or check valve at an accessible point, flood-test the shower pan before any tile is set, and route the exhaust duct during framing because adding it later means opening finished work. The worst mistake is burying a pump behind cabinetry that has to be demolished for routine service.
The outcome was a basement functioning as independent living space for guests and movie nights. The waterproofing and ventilation discipline behind a bathroom renovation built for below-grade conditions applies here with less forgiveness, since everything sits on a slab and a slow leak has nowhere to go.
5. Home Office or Studio Conversion with Acoustic and Lighting Upgrades
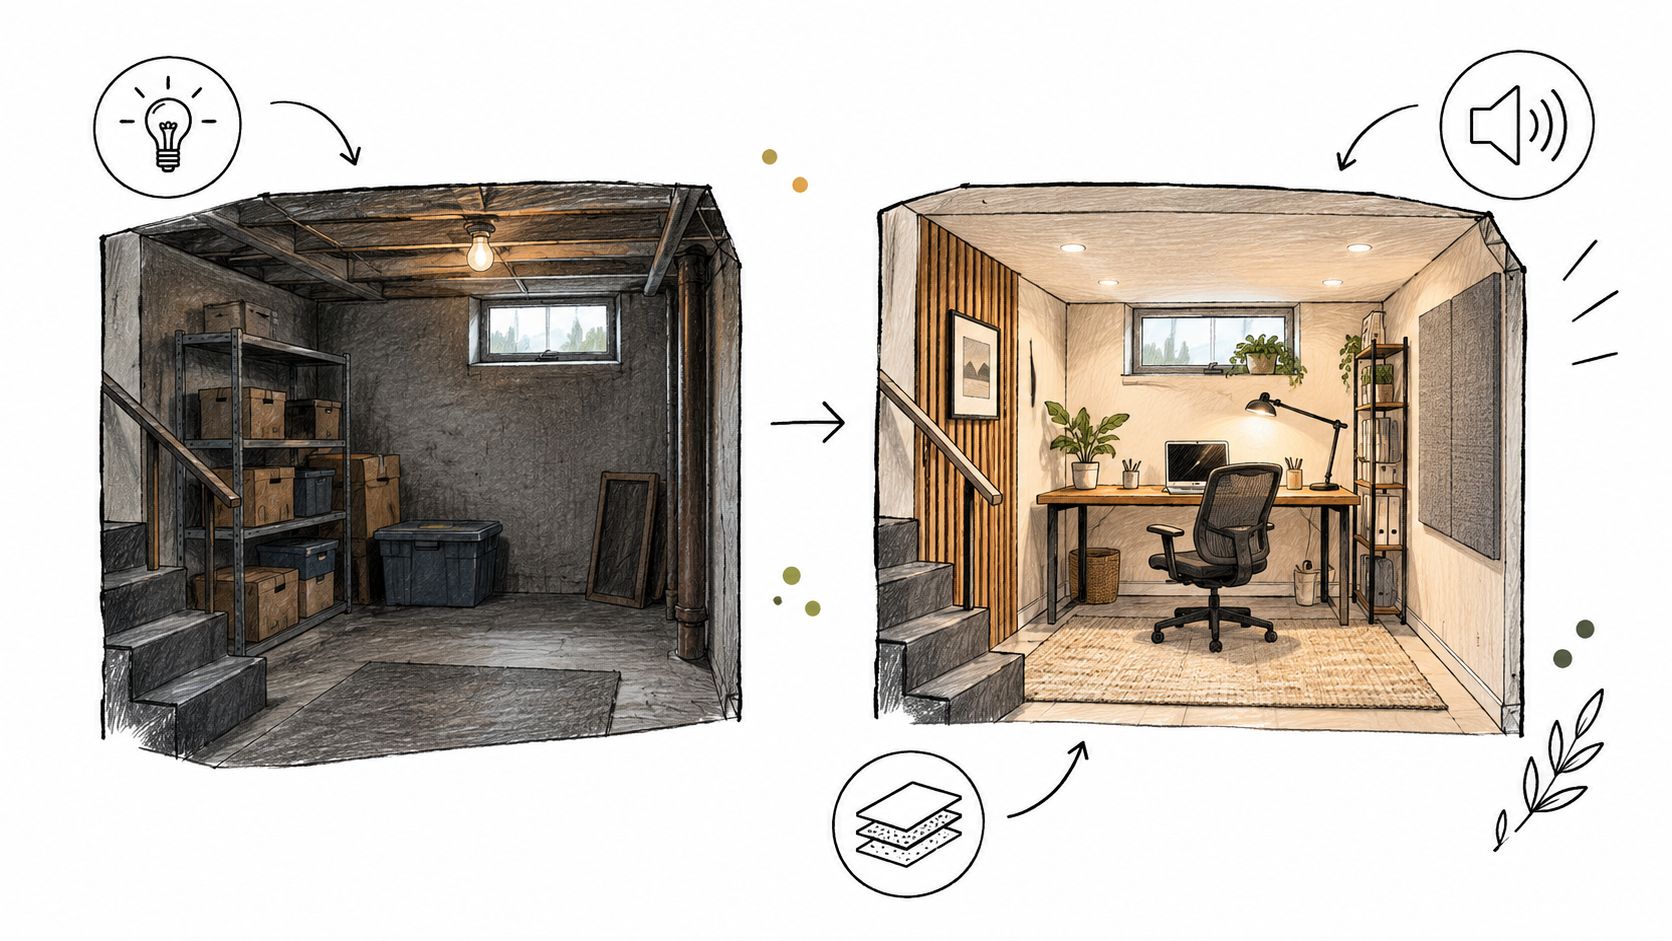
Existing condition. A Bronx storage room had one bare bulb, a low ceiling with exposed joists, and footfall noise from the kitchen directly overhead. The owner worked remotely full time and recorded calls daily. A desk in the corner wouldn't fix any of that, so the scope targeted sound, light, and climate as one system.
Tactical response. The Westchester version of this project used resilient-channel ceiling assembly, insulated walls, and a solid-core door to create a quiet recording and work studio. The Bronx conversion paired a ductless mini-split with layered lighting, since tapping the existing duct system would have left the room cold in winter and carried household noise straight through the vents. A dedicated mini-split also avoids overloading a shared system that's already sized for the floors above.
Details That Make It Usable All Day
Basements punish bad lighting, so plan ambient, task, and background layers rather than a grid of identical ceiling lights. Color temperatures around 3000K to 4000K keep a workspace balanced without the clinical feel that makes below-grade rooms tiring by midafternoon. Add blocking during framing for wall-mounted monitors, shelving, and desks, and place network and power outlets at desk height instead of only at baseboard level.
Cost drivers were the mini-split, acoustic assembly, and electrical work for dedicated circuits and data. Paint and flooring were the cheapest part of the transformation. Constraints included the low ceiling, which ruled out deep dropped ceilings, and a lally column that became a built-in shelving pier rather than an obstacle.
Field note: Sound isolation fails at the door and the duct, not at the insulated wall you paid extra for.
Realized outcome. Both owners got a door that closes on household noise and a room that holds a steady temperature through a full workday. That's the honest measure of this basement finishing before and after, not the accent wall. If you can't take a client call while someone makes lunch upstairs, the office isn't finished yet.
6. Basement Recreation Room, Wet Bar, and Media Lounge
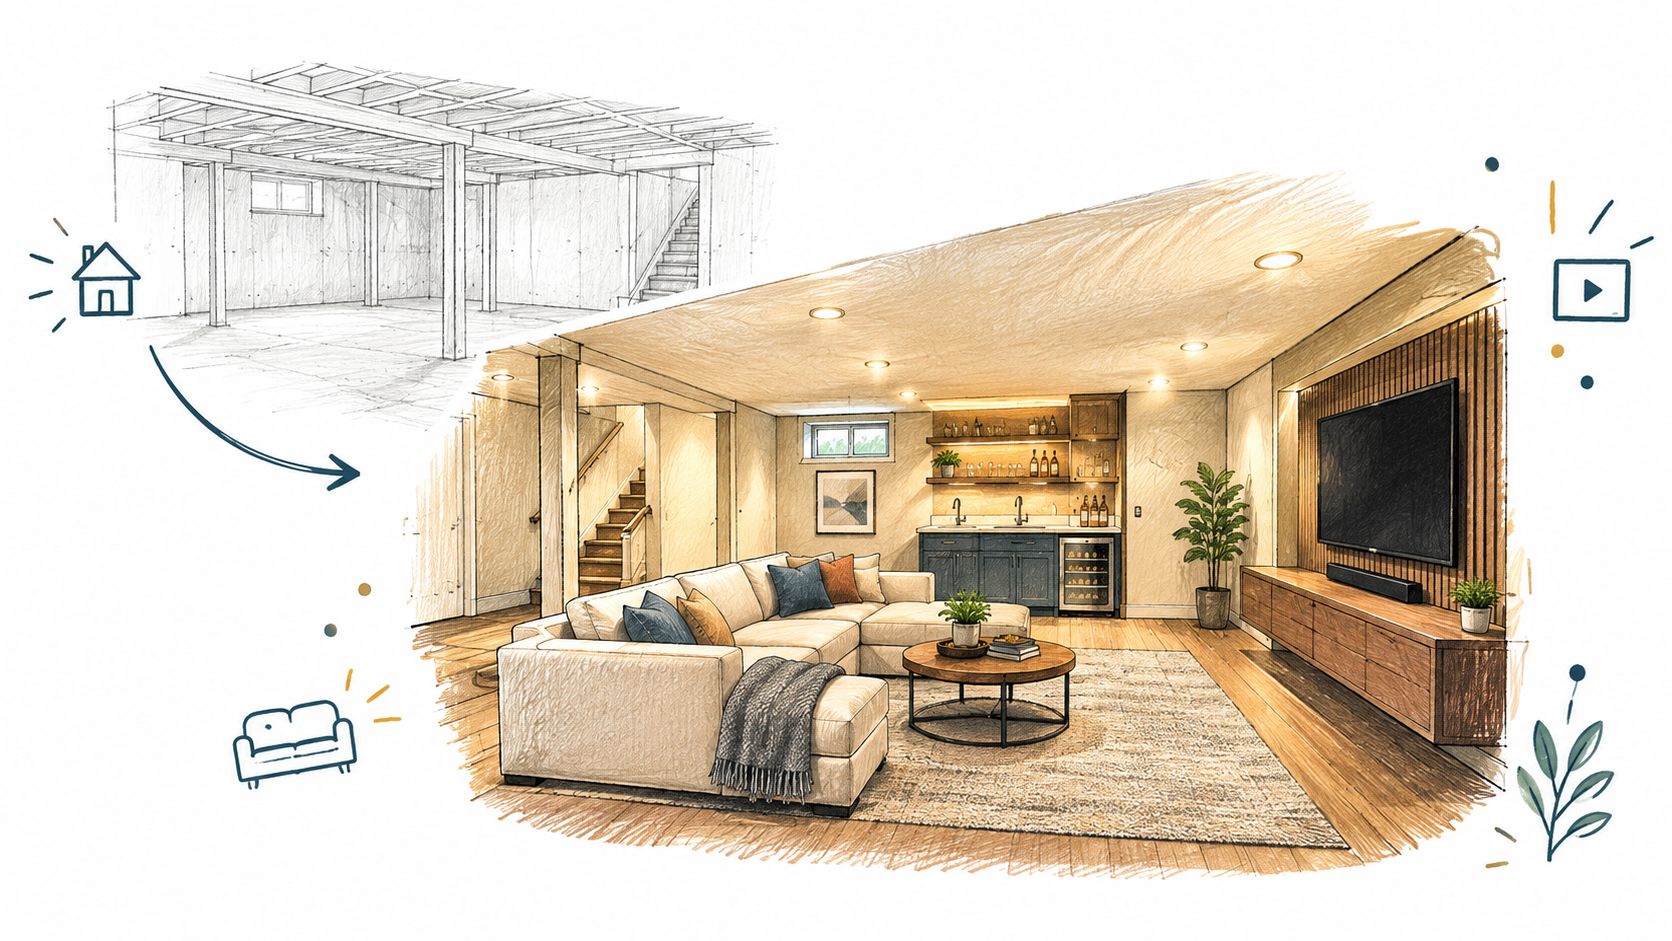
A wet bar belongs near the drain stack, even when that move changes the room homeowners imagined. In this cold Westchester basement, holiday decorations, a workbench, and one center row of ceiling lights left no clue about the first decision: the stack sat opposite the proposed bar wall. Pulling the sink across the room would have meant a pump, longer plumbing runs, and more noise under every party.
The layout flipped around that constraint. The bar went to the drain side, with a stone-topped wet bar, electric fireplace, and recessed media wall arranged for a crowd. Raking sconce light made the media wall unforgiving, so the crew finished it to Level 5 drywall and left conduit behind it for AV swaps that should never require opening rock again.
Details Decided Before the First Sofa Arrived
Cabinet and appliance clearances were measured before framing, and the beverage fridge and dishwasher went on the permit drawings early enough to shape power and water. The AV rack got ventilation and a dedicated circuit, because heat and shared loads are what turn a clean rack wall into service calls. Carpet over slab needed moisture-resistant underlayment, ceiling insulation and resilient assembly keep bass out of bedrooms above, and under-stair plus column bays became storage for games, blankets, and equipment.
A Bronx family basement used the same logic at smaller scale. One open plan zoned a sectional area, game table, and a kitchenette with a sink and beverage fridge, keeping plumbing on a single wall instead of scattering fixtures.
Cost came from bar plumbing, stone, electrical, and the higher drywall finish level. The finished outcome is a room that runs a crowd without extension cords, echo, or a sink pump clearing its throat mid-film. The reveal reads easy because the stack, conduit, clearances, and ceiling assembly were settled before finishes.
7. Basement Home Gym with Impact Flooring and Sound Control
A basement gym can feel finished and still fail as a workout space if the floor transmits every dropped weight or the air stays damp. In a Westchester home, the equipment sat on bare concrete beside the furnace. Cold floors, mechanical-room odors, and impact noise shaped the renovation more than the choice of mirrors or paint.
The crew first checked the slab and framing for the planned rack and weight storage. Ceiling height narrowed the options: a duct crossed the best position for overhead lifts, so the rack went in the clear bay. Interlocking rubber flooring tiles made damaged sections replaceable, while blocking behind the walls gave heavy mounts a secure connection to structure. An exhaust fan ducted outdoors cleared workout heat and moisture. Keeping the furnace area accessible also limited how much of the room could become gym space.
Sound control required a separate decision. A Bronx multi-family building added impact mats and a sound-isolated ceiling in its shared fitness room to reduce noise in the apartment above. That assembly costs more and can lower the ceiling, but it addresses vibration better than adding soft wall finishes alone.
Plan for Air, Impact, and Clearance
Exercise adds moisture to a below-grade room. Size ventilation for the room and expected use, and check where humid air will exhaust. A small hopper window is a poor substitute during cold weather; stale, damp air can condense on cool surfaces behind equipment and contribute to rust.
Cost centered on rubber flooring, ventilation, ceiling sound control, and electrical work for equipment and a wall-mounted screen. The finished gym sees daily use, while the equipment layout preserves access to the furnace and leaves enough overhead clearance for planned lifts. In a multi-unit building, reducing transmitted impact noise also helps limit complaints from residents above.
8. Laundry and Utility Room Reconfiguration in a Finished Basement
Existing condition. A Bronx basement laundry corner had open studs, a slop sink, exposed shutoff valves, and a dryer vent that wandered across the ceiling in flexible duct. The rest of the basement was getting finished, and this corner would have made the whole level feel unfinished. It also held the boiler, the electrical panel, and every valve that matters in an emergency.
Scope and tactical response. The crew framed a laundry alcove with cabinetry, a folding counter, and a utility sink, then enclosed the boiler behind a removable access panel with required clearances maintained. A Westchester project grouped the water heater and furnace into a closet with code-compliant access, which freed the main room while keeping service space honest. Screening equipment only works if a technician can still reach it without a saw.
Access Rules That Outrank Aesthetics
Keep dryer-vent runs short and straight using rigid metal duct, because long flexible runs collect lint and strain the dryer. Maintain clear access to the electrical panel and shutoff valves at all times, and plan combustion-air and clearance requirements before finalizing cabinetry dimensions. A floor drain or leak pan under the washer is cheap insurance in a finished space where one burst hose can ruin flooring in the next room.
Service test: If you can't pull the washer, reach the cleanout, and open the panel door fully, the pretty cabinetry is a future demolition cost.
Cost drivers were cabinetry, plumbing relocation for the sink, vent rerouting, and the panel or closet enclosures. Constraints included the existing stack location and a low beam that limited upper cabinet height, solved with open shelving on that wall. Realized outcome was a utility zone that looks intentional from the family room and still functions like a mechanical space when something breaks. Of all the basement finishing before and after transformations here, this one improves daily life the most per dollar, because laundry happens every week and movie nights don't.
8 Basement Finishing Before-and-After Transformations Compared
| Basement Transformation | Implementation Complexity & Resources | Expected Outcome | Ideal Use Case | Key Advantages |
|---|---|---|---|---|
| Moisture-first cellar conversion | High; requires moisture diagnosis, drainage or sump work, vapor control, and finishing after drying | Dry, comfortable living space with reduced risk of mold and finish failure | Damp or musty basements, especially in older homes | Protects health and finishes; adds usable space |
| Legal apartment with separate egress | Very high; requires zoning review, permits, fire separation, egress, and plumbing and electrical work | Code-compliant self-contained dwelling | Rental income or multigenerational housing | Adds flexible living space and potential income |
| Bedroom with egress window | High; requires foundation cutting, structural support, a drained window well, and alarm upgrades | Safer bedroom with natural light and an emergency exit | Basement rooms intended for sleeping | Adds bedroom space and improves safety |
| Bathroom with macerating toilet or ejector pump | High; requires below-grade waste handling, venting, waterproofing, and electrical work | Functional basement bathroom | Guest suites, recreation rooms, or basement apartments | Improves convenience; macerators may avoid slab demolition |
| Home office or studio | Medium; requires layered lighting, sound control, reliable HVAC, and dedicated power or data | Quiet, comfortable workspace | Remote work, recording, or home-based business | Creates focused work space separate from household activity |
| Recreation room, wet bar, and media lounge | Medium to high; requires layout planning, AV wiring, finishes, and possible plumbing and ventilation | Entertainment and gathering space | Family use and hosting guests | Adds versatile living space and integrated entertainment |
| Home gym with impact flooring | Medium; requires load verification, durable flooring, ventilation, and vibration control | Private workout space with protected floors | Home fitness or shared building gym | Convenient exercise area; impact flooring helps protect surfaces |
| Laundry and utility room reconfiguration | Medium; requires appliance circuits, dryer venting, plumbing, access, and code clearances | Organized laundry and mechanical area | Basements with cluttered utilities or laundry | Improves daily convenience while keeping equipment accessible |
Build the Invisible Infrastructure Before Chasing the Reveal
The strongest basement transformations share a sequence you can verify before any finish work begins. Diagnose water and structural conditions first, then confirm zoning and permit requirements, then coordinate mechanical systems, and only then select decorative finishes. When that order flips, you get the failures hidden inside attractive photos, including mold behind drywall, bedrooms that can't legally be called bedrooms, and pumps buried behind cabinetry.
Start with what's hidden, not with finishes. EPA guidance says homeowners should correct leaks and other moisture problems before converting a basement into living space because damp basements support biological growth, including mold, and it also recommends testing for radon on the lowest lived-in level, since mitigation is generally easier and less expensive before finishing work begins. You can read those pre-finish priorities in the EPA guidance on remodeling and indoor air quality, and they should be line items in your diagnostic phase, not afterthoughts.
Document the before condition with the same care you'll photograph the after. That means moisture readings at multiple wall heights, photos of concealed drainage and insulation layers, radon test results, and records of footing drains and sump operation. A monitored basement-wall retrofit found a noticeable reduction in masonry moisture after approximately one year following exterior insulation and natural ventilation, with no further significant reduction by the second year, as documented in the monitored basement-wall retrofit presented at NSB 2023. Drying takes time, and your handoff records prove whether it's happening.
Be honest about payback. Available 2025 reporting places average cost recovery near 70 to 71%, meaning a project can improve utility and equity without returning its full construction cost at resale, according to Opendoor reporting on basement finishing and home value. That's a national average, not a guarantee for a Bronx, Westchester, condo, or co-op property. Outcomes vary with legal status, ceiling height, natural light, bathroom installation, bedroom egress, workmanship, and buyer demand, so separate three results in your own planning: legal living area, marketable bonus space, and attractive but nonconforming finished space. Only the first two reliably help a sale.
The highest-return basement isn't necessarily the most expensive one. Functional, code-compliant space, including a real bedroom with egress, a full bath, or a dry family room, tends to serve owners and buyers better than a highly customized theater or bar. Unpermitted or moisture-prone improvements can undermine resale confidence despite attractive photography, because inspectors and appraisers look behind the reveal.
When you interview contractors, request a line-item proposal, documented assumptions, realistic timelines, and a dedicated project manager who'll be your single point of contact. Ask how moisture, radon, egress, and lead-safe practices for older buildings are handled, and get the answers in writing. For New York area work, Excellent Home Improvement provides in-house design and construction support, fixed-price proposals, permit coordination, and a seven-year written workmanship warranty, which matches the documentation standard these case studies demand.
Judge your own basement finishing before and after by completed square footage, room function, code-compliant systems, and test records you can hand to the next owner. If those four things improve, the photographs will take care of themselves.
Excellent Home Improvement handles basement finishing across the Bronx, Westchester, and the five boroughs, including moisture control, egress planning, framing, insulation, and finished interiors coordinated by a dedicated project manager. If you're planning a transformation like the ones above and want a fixed-price, line-item proposal grounded in a site walkthrough, visit Excellent Home Improvement to start the conversation.