Running Bond Brickwork Explained for Homeowners
Learn what running bond brickwork is, where it works best, and what homeowners should know about layout, ties, and movement joints before planning a project.
By Excellent Home Improvement & Remodeling
You're standing outside your home, looking at a brick wall while a contractor discusses a repair or renovation. The vertical joints don't line up from row to row, and you're wondering whether that's just a style choice or part of how the wall works. It's a reasonable question: a familiar pattern can look simple while concealing decisions about support, openings, and movement.
Running bond brickwork is the pattern most homeowners recognize, but the visible layout is only one part of the job. The same stagger that gives a wall its orderly appearance doesn't, by itself, tell you whether the wall is structural or veneer, how it's attached, or where it needs room to move.
Before you approve a finish, it helps to know what the bond does, where it's commonly used, and where a repeating layout has to be interrupted. Those details matter especially on NYC brownstones and additions, where existing windows, doors, and changes in wall geometry can make a standard-looking pattern a more involved design problem.
Table of Contents
- Why Homeowners Notice This Pattern First
- What Running Bond Means
- Where Running Bond Is Used and Where It Falls Short
- Laying Out Courses That Stay Straight and Square
- How the Pattern Connects to Ties, Flashing and Movement Joints
- Running Bond Against Other Common Patterns
- What a Homeowner Should Decide Before Construction Starts
Why Homeowners Notice This Pattern First
A homeowner may first notice running bond while comparing brick samples or standing beside a wall that needs repair. The bricks look familiar, but the joints form a staggered rhythm: each vertical joint seems to land near the middle of the brick above it. You might ask whether that's the intended pattern, whether a replacement area can match it, or whether the uneven-looking cuts near a window are a sign that something went wrong.
A mason reads more than appearance in that wall. The pattern can help identify how the bricks were laid, while the wall's thickness, corners, openings, and connections offer clues about how the assembly is supported. The bond is a visible detail, not a complete description of the wall's structure.
The small detail that raises bigger questions
Suppose you're planning an addition and want its brick face to blend with an existing façade. Matching the stagger is only one decision. The new work may meet an old wall, pass around a window, or sit over an opening. Those transitions need to be considered along with the appearance of the brickwork.
A similar issue comes up in façade repairs. A section can look tidy from the sidewalk while still having problems behind the brick, such as inadequate ties or poorly coordinated flashing. Conversely, an awkward cut doesn't automatically mean the wall is unsafe, but it can show that the layout wasn't planned carefully.
On-site question: “Is this structural brickwork, or is it veneer attached to a backing wall?” The answer affects what the visible bond can tell you.
That's why the right conversation starts before the first brick is laid. Ask what the wall is intended to do, how the pattern will meet openings and corners, and who will decide where movement joints belong. A pattern that looks straightforward can still involve design choices that go beyond a mason's layout.
What Running Bond Means
Running bond is a brick pattern made entirely of stretcher bricks, laid lengthwise with their long faces visible. Each course shifts horizontally from the one below. In the conventional layout, each brick overlaps the one beneath by about half its length. Technical guidance describes half running bond as a basic arrangement for many wall and paving applications, while broader definitions allow an overlap of at least one-quarter unit. Guidance on traditional masonry patterns
The stagger works like offset seams in a row of floor tiles: vertical joints do not continue in straight columns. That arrangement can distribute loads more effectively than stacking bricks directly above one another, but the pattern alone does not determine how a wall performs.
Recognize the pattern by its joints
Look at the vertical joints, also called head joints. In running bond, they shift from course to course. A conventional modular brick is approximately 8 inches long, making a half-brick overlap about 4 inches. The exact layout depends on the chosen brick standard and mortar joints.
By comparison, stack bond places bricks directly above one another, creating aligned vertical joints and a crisp grid. Other patterns include headers, bricks set to show their short ends. These arrangements look different and can contribute to the interlock within a multi-wythe wall.
Running bond can be mistaken for a historic load-bearing bond because both have staggered joints. The visible pattern, however, is only one part of the wall. Thickness, brick and mortar properties, reinforcement, connections, and design requirements also affect its behavior.
The repeating layout also has to be adjusted where the wall meets openings, movement joints, or shelf angles. Those interruptions can change where joints fall and how bricks are cut or supported. A mason can lay out the face, but when these details affect structural support or coordination with the building, the design may need an architect's input before construction.
Where Running Bond Is Used and Where It Falls Short
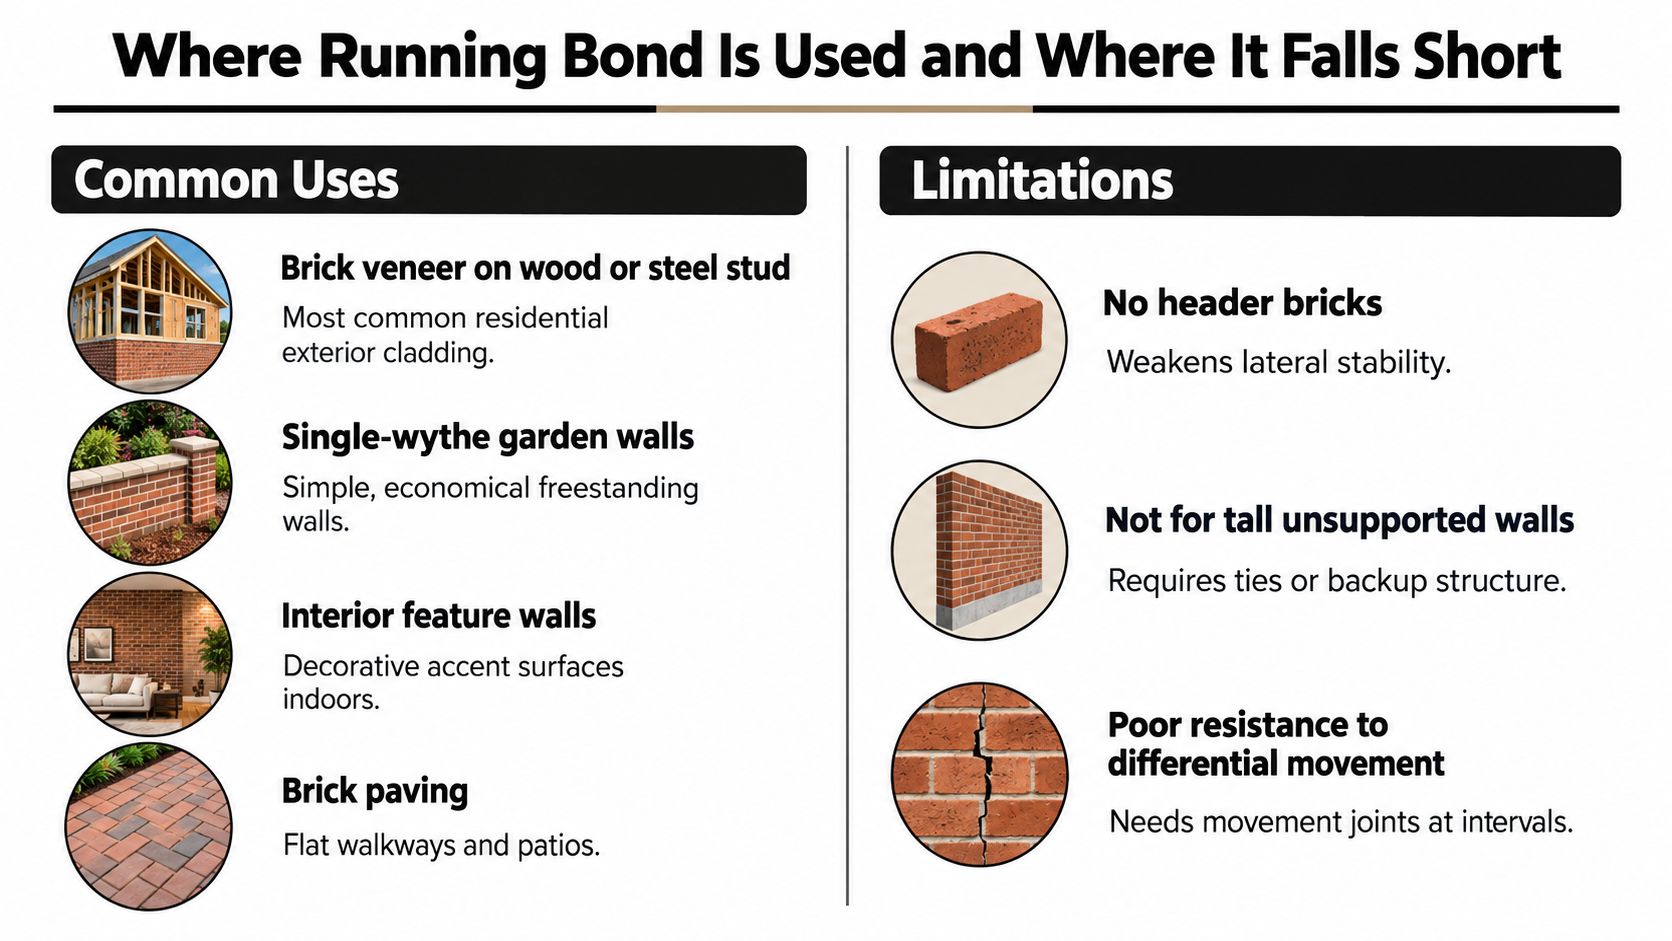
Running bond appears in a range of familiar settings. It's widely used for brick veneer, where a brick exterior sits in front of a separate backing wall; for simple walls made from a single thickness of brick; for interior feature surfaces; and for brick paving. Its repeating layout is straightforward to plan and produces a continuous, orderly face.
The pattern suits mass-produced modular units because the standard stagger can be repeated without designing a new arrangement for each course. It's also easy to read visually: the long faces form horizontal lines, while the offset joints keep the wall from looking like a grid. That combination makes running bond a common choice when homeowners want a traditional brick appearance.
The bond isn't the wall support system
The limitation becomes important when people assume that a running-bond face automatically locks the whole wall together. Because the pattern contains no headers crossing between wall leaves, it generally doesn't provide enough inherent transverse interlock for a freestanding multi-wythe structural wall. Veneers and cavity walls need metal ties or anchors to connect the brick to the backing construction.
A masonry specification guide gives a commonly specified benchmark of one metal tie per 3 square feet (0.28 square metres), with vertical spacing no greater than 16 inches (406 mm). The governing code and engineered design may call for different requirements. Ties need to be embedded as the wall is built, with at least 15 mm (5/8 inch) of mortar cover at exterior faces. Brick masonry specification guidance on ties and embedment
Those details aren't visible once the work is complete, but poor tie placement or inadequate embedment can contribute to veneer bowing, cracking, or separation under wind or differential movement. Corners, intersections, openings, and transitions also need deliberate detailing. A repeated stretcher layout doesn't automatically connect those areas.
For a homeowner, the practical distinction is simple: running bond describes the visible brick arrangement. It doesn't prove that a tall or freestanding wall is adequately supported. If you can't tell what's behind the brick, ask the contractor to explain the assembly and its connection to the structure.
Laying Out Courses That Stay Straight and Square
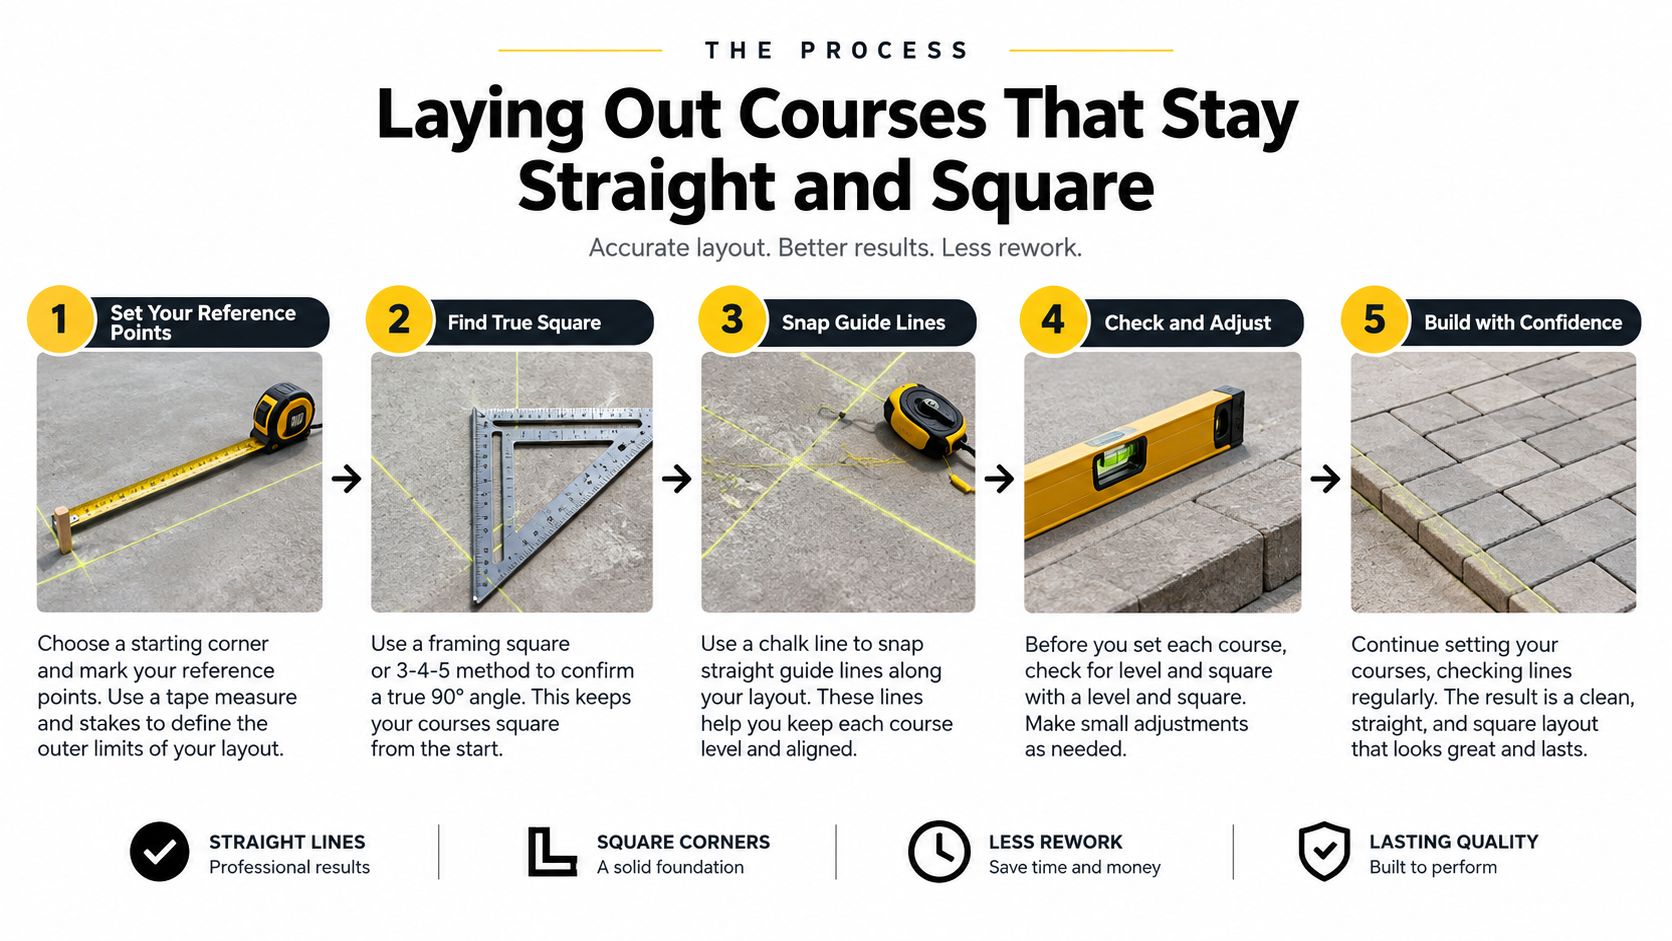
A window opening can expose a layout mistake before the wall is finished. If the brick module does not fit the wall's length and height, small measuring errors accumulate, leaving awkward cuts at corners and jambs. Start with the dimensions, then mix the mortar.
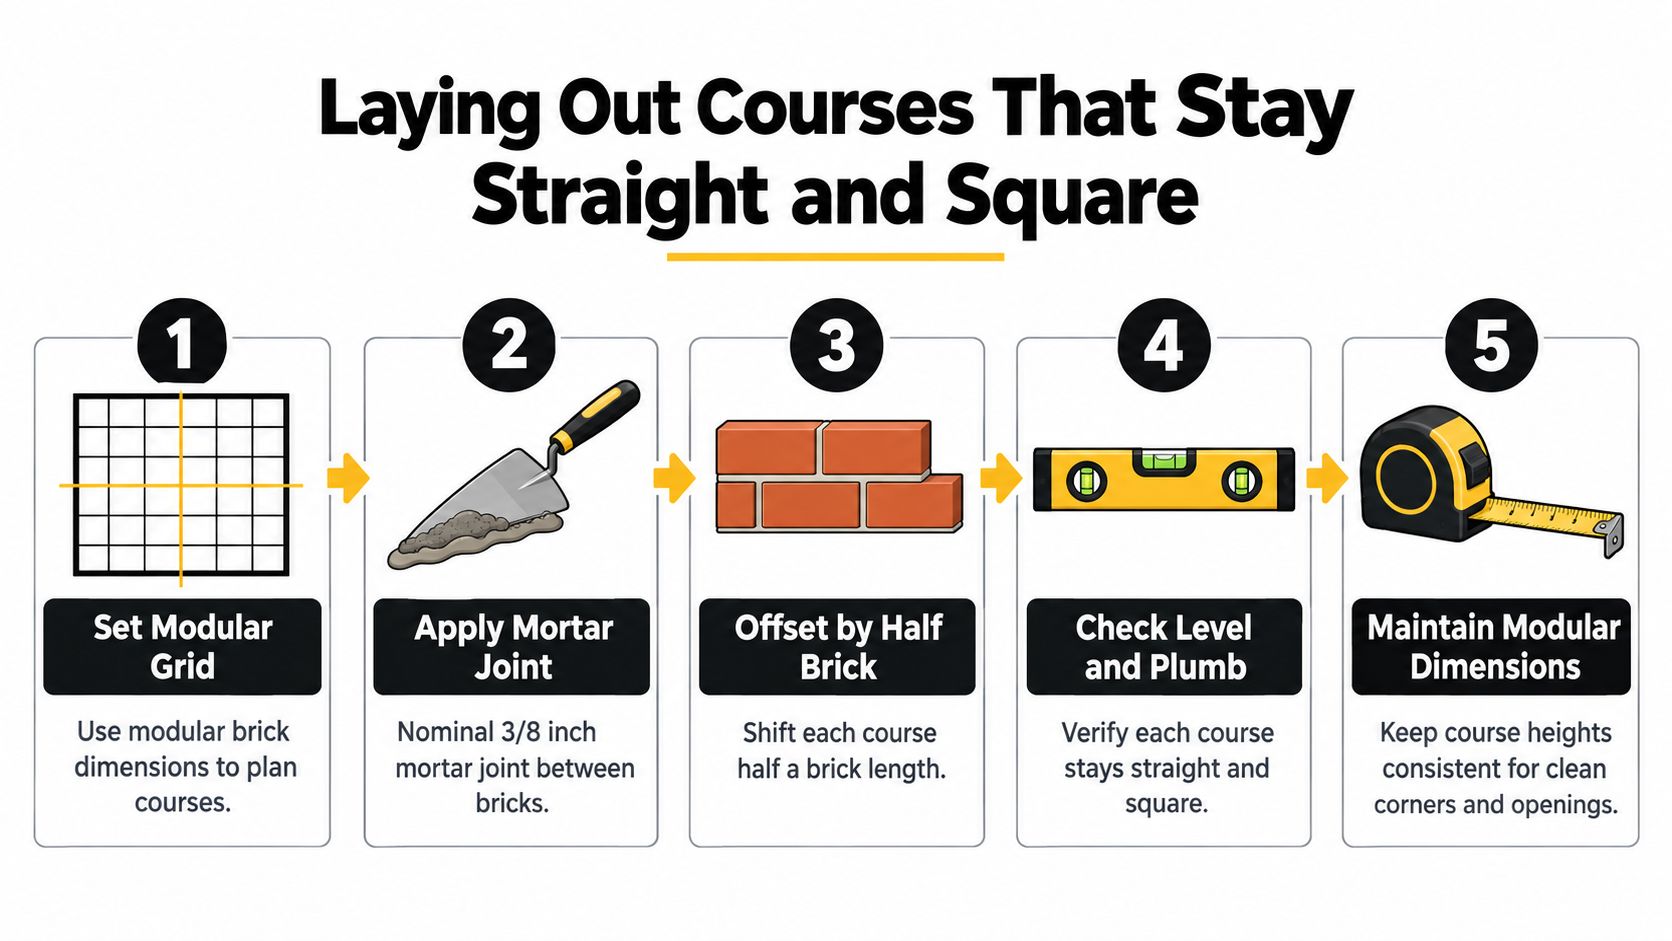
A nominal mortar joint is commonly 3/8 inch, about 9.5 mm. For modular brickwork, the brick and its joint together must suit the intended course and bay dimensions. Masonry unit and joint layout specifications
Plan the repeat before laying the first course
In conventional half running bond, each course shifts by half a brick's length. The shift should match the selected brick and joint dimensions, rather than relying on a mason's eye alone. Like marks on a ruler, consistent modules help each course meet its intended endpoint.
Brick proportions affect the repeat. Half-running bond fits bricks whose width is half their length; one-third running bond suits units whose width is one-third of their length. The goal is a steady relationship among brick, joint, and offset.
Before laying the full wall, dry-lay bricks around windows, doors, and corners. This mockup shows whether measurements drift and where joints will sit beside a jamb or return. Adjustments are easier while the bricks are still loose.
Practical rule: Check corners and openings before mixing mortar. Shifting a planned joint is easier than hiding a narrow sliver after construction.
Bed joints, the horizontal mortar beneath the bricks, and head joints between units should be fully filled. Dry joints, butt joints, or mortar only at brick corners leave gaps that can weaken weather resistance. Exterior veneer needs its specified lap, and pieces smaller than half a brick should be avoided at corners, jambs, and breaks. Brick masonry guidance on mortar joints and layout
Openings, movement joints, and shelf angles can interrupt the repeating pattern. A window or door changes where the bond must end, while a shelf angle may support brick above an opening or at a transition. These details need coordinated design; a mason should not continue the pattern through them. If the layout affects a structural transition or unusual exterior detail, ask the contractor whether an architect or engineer should review it. A Bronx general contractor can help coordinate renovation work.
How the Pattern Connects to Ties, Flashing and Movement Joints
The face of a running-bond wall is only the visible layer of a larger assembly. In a veneer, ties connect the brick to its backing. Flashing directs water away at vulnerable points, while weep holes allow drainage. Movement joints give the masonry planned locations to accommodate expansion instead of forcing the wall to relieve stress through an unplanned crack.
Clay masonry can expand by about 1 inch per 100 linear feet. Guidance commonly recommends movement joints no more than 25 feet apart in plain walls and no more than 20 feet apart where multiple openings create weaker sections. Masonry veneer checklist on movement joints
Openings and shelf angles interrupt the repeat
Windows and doors change the wall's geometry. The bond has to be planned around their edges, while flashing above openings helps manage water. A shelf angle, which supports brick at a transition or over an opening, also needs coordinated detailing rather than a pattern that continues as if the support weren't there.
Movement joints shouldn't be added like cosmetic seams after cracking appears. Their positions need to work with the wall's layout, flashing, and drainage details. The same is true at penetrations and where an addition meets existing masonry: a neat-looking joint pattern can't compensate for a poorly designed transition.
In NYC brownstones, repairs and additions often meet existing openings, corners, and changes in wall plane. Those conditions can make a generic repeating layout inadequate. If the proposed work alters structural support, crosses a complex opening, or connects different wall sections, ask whether an architect or engineer should review the details before construction begins.
A good-looking façade is the result of coordinated decisions behind the face, not just evenly staggered joints.

Running Bond Against Other Common Patterns
Running bond is often chosen because its repeating layout is efficient and visually familiar. Other patterns can create a different character, but they may require more planning, different units, or a more involved installation. The right choice depends on the wall's role as well as the look you want.
| Pattern | Layout | Best for | Watch-out |
|---|---|---|---|
| Running bond | Stretcher bricks with offset head joints | Veneer, paving, and straightforward brick faces | Needs appropriate ties or support when used as veneer |
| Stack bond | Vertical joints align from course to course | A crisp, highly ordered appearance | Less horizontal overlap, so reinforcement and design need careful attention |
| English bond | Courses alternate between stretchers and headers | Traditional work where the header pattern is part of the design | Requires deliberate layout and detailing |
| Flemish bond | Each course alternates headers and stretchers | Decorative façades with a more intricate rhythm | More involved to lay out than a simple stretcher pattern |
| Common or American bond | Predominantly stretcher courses with periodic header courses | Walls where the header courses are part of the intended masonry bond | The header arrangement needs to suit the wall construction |
Choose for the wall, not just the sample
Running bond is a practical default for many veneer and paving applications, but “default” doesn't mean right for every project. Stack bond can suit a modern grid-like appearance, yet the aligned joints make sound support and reinforcement particularly important. English and Flemish bonds add visible headers and a more traditional character, but they call for more careful layout.
Don't assume that headers on the face alone make a wall structurally adequate. The intended construction, connections, and design requirements still matter. Ask the project team to identify the wall type and explain how the chosen pattern fits it before settling on a sample.
For interior finishes, pattern choice also affects how a surface reads beside cabinetry, flooring, or natural stone. If you're coordinating materials for a renovation, reviewing tile and stone options alongside the brick can help keep the overall palette intentional.
What a Homeowner Should Decide Before Construction Starts
Before work begins, get the essential decisions in writing. Confirm whether the brick is structural masonry or anchored veneer, and ask for a dry layout at windows, doors, and corners. Have the contractor identify the tie requirements and movement-joint locations, and clarify who is responsible for reviewing complex transitions.
For a NYC renovation or addition, ask whether the scope requires permits or an engineer's review. Don't rely on a clean-looking exterior to prove that the unseen connections and drainage details are complete. If you're comparing contractors, use this guide to hiring a licensed NYC contractor to help frame your questions.
A clear plan should cover the brick selection, bond, cuts, openings, support, drainage, and movement details. Ask for explanations you can understand, and pause the work if the built layout differs from the approved plan.
Excellent Home Improvement provides full-service design, sourcing, and construction for NYC renovations, including brownstone projects, additions, and home remodels. If you're planning brickwork as part of a larger renovation, visit Excellent Home Improvement to discuss your project with a team that coordinates design, permits, and construction.