8 Basement Finishing Ideas on a Budget
Explore 8 basement finishing ideas on a budget, from moisture control and affordable floors to flexible layouts, lighting, storage, and ROI priorities.
By Excellent Home Improvement
The cheapest-looking basement finish is often the most expensive one to redo. A painted floor won't solve water entering through a wall, inexpensive wall panels won't make an illegal bedroom safe, and attractive lighting can't compensate for damp insulation. For NYC-area homeowners, moisture testing, code planning, and a flexible layout should come before cosmetic upgrades.
The best basement finishing ideas on a budget protect the usable space first, then improve how it looks. That means deciding whether the basement will serve as a recreation room, storage area, home office, workout space, or a combination of uses. From there, you can phase the work instead of paying for every upgrade at once. A dry shell, durable surfaces, practical lighting, modular storage, and movable zones can create a finished-feeling room without committing to a premium entertainment build-out.
This guide organizes eight ideas in that order. Some work well as DIY projects, while insulation, electrical work, egress, permits, and moisture remediation deserve qualified help. Excellent Home Improvement is a relevant option for NYC homeowners who need permit coordination, egress planning, moisture control, material sourcing, and construction managed as one project.
Table of Contents
- 1. Painted Concrete Floors with Epoxy Coating
- 2. Unfinished Drywall with Strategic Paint and Lighting
- 3. DIY-Friendly Insulation and Moisture Control Strategy
- 4. Open Shelving and Modular Storage Systems
- 5. Suspended Drop Ceiling Alternative with Open Joist Finish
- 6. Budget-Friendly Flooring with Luxury Vinyl Plank and Underlayment
- 7. DIY Framing and Partition Walls for Multi-Purpose Spaces
- 8. Recessed and Track Lighting for Professional Ambiance on a Budget
- 8-Point Comparison of Budget Basement Finishes
- Build the Budget in the Right Order
1. Painted Concrete Floors with Epoxy Coating
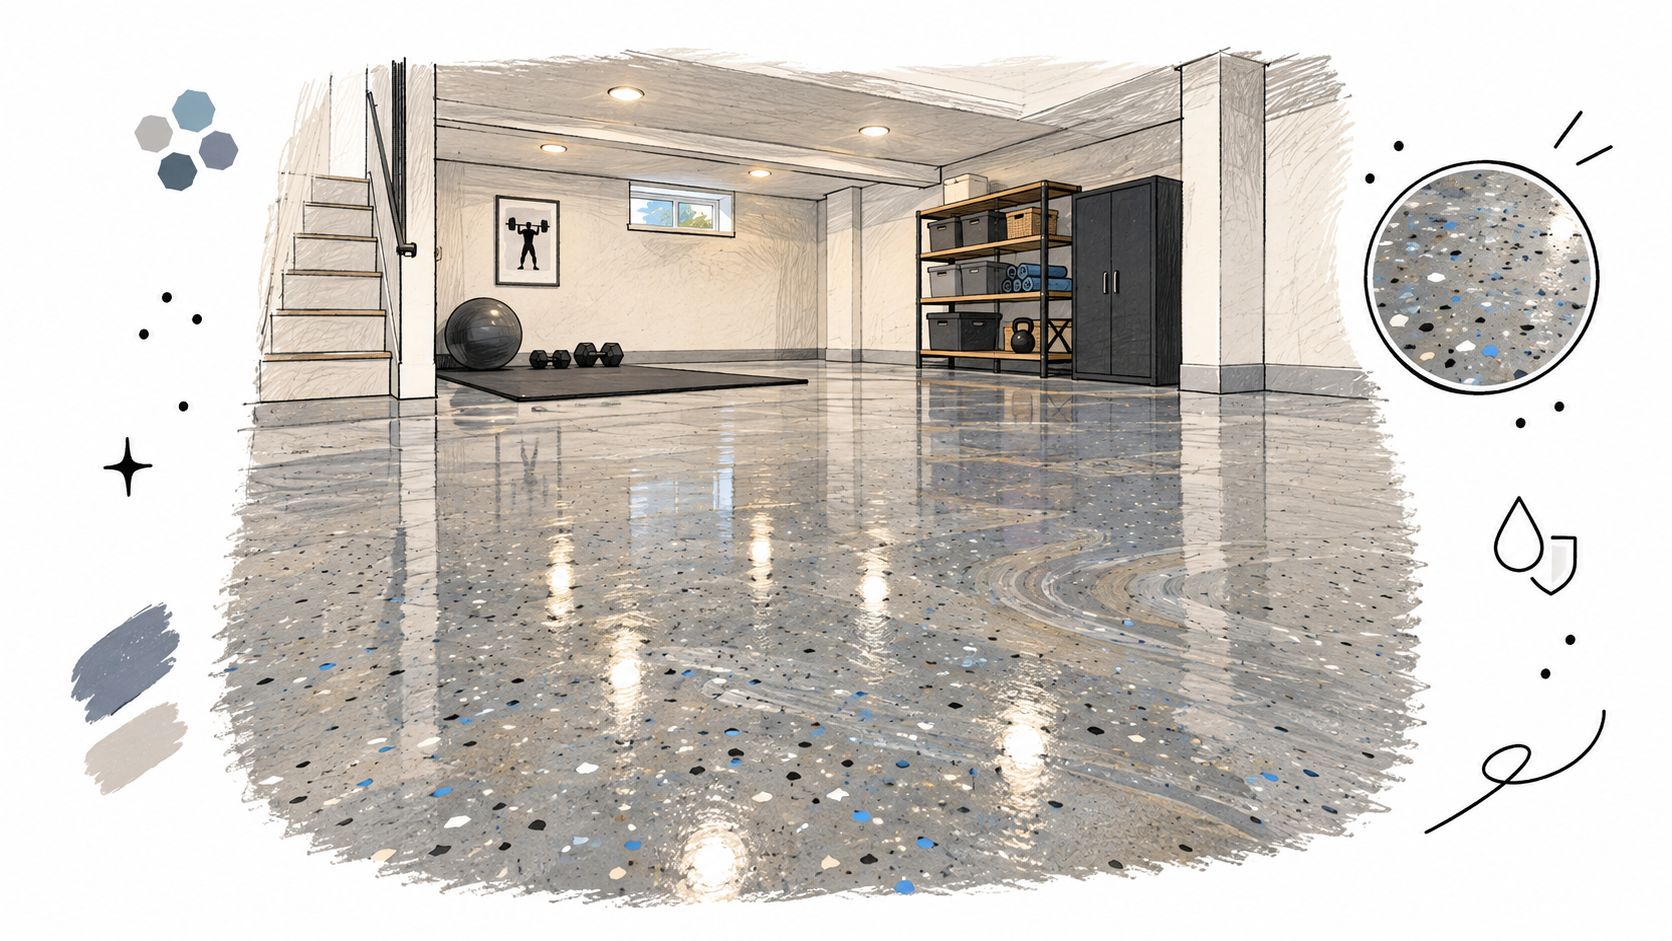
A raw concrete slab can become a durable finished floor without the expense of tile, engineered wood, or a complex raised-floor assembly. Epoxy works particularly well when the basement's main purpose is a home gym, workshop, storage area, or recreation room where easy cleaning matters more than a residential wood-floor appearance.
The savings come from using the existing slab. The work still requires careful preparation, including cleaning, repairing cracks, checking for moisture, and applying the coating system according to the manufacturer's instructions. If moisture vapor pushes upward through the slab, epoxy can blister, peel, or trap a problem beneath the finish. That makes moisture testing a prerequisite, not an optional upgrade. Basement cost guidance from HomeAdvisor shows why controlling hidden conditions matters, since basement projects can vary widely depending on whether the work is cosmetic or includes framing, insulation, flooring, lighting, and moisture treatment.
Make the coating safe and serviceable
A glossy surface can look sharp in a Bronx workout room, but it may become slippery when wet. Add a non-slip aggregate in traffic paths and choose a matte or semi-gloss finish for a more forgiving residential surface. Ventilation during application is important, and the room should remain unused until the coating has fully cured according to the product instructions.
DIY savings are realistic if the slab is sound, dry, accessible, and free of active water intrusion. Professional help is the safer value when the concrete has persistent dampness, major cracking, drainage issues, or uncertain previous coatings.
Practical rule: Never use epoxy to hide a moisture problem. Fix the water path first, then finish the slab.
For painting support, surface preparation, and coordinated basement work, homeowners can review Excellent Home Improvement's painting services. A finished epoxy floor can serve as the durable base while later phases add storage, partitions, or furniture.
2. Unfinished Drywall with Strategic Paint and Lighting
Drywall doesn't always need to look like a formal living-room wall. In a basement media room, gaming area, or creative workspace, a deliberately simple finish can support an industrial style while avoiding the labor associated with a highly polished wall surface. The important distinction is between intentional simplicity and unfinished work that leaves seams, fasteners, or vulnerable edges exposed.
Use sound drywall installation, then limit decorative effort to the walls that matter most. An accent wall behind a television, desk, or exercise area can establish the room's character, while the remaining surfaces receive a durable primer and paint. A matte finish helps reduce glare and can make dust easier to manage. Darker colors may give a media room atmosphere, while lighter colors can help an enclosed basement feel more open.
Spend on preparation, not unnecessary perfection
A Bronx artist studio might use a restrained wall palette as a backdrop for shelving and artwork. A Westchester recreation room might pair plain painted walls with polished concrete, simple furniture, and visible utility lines. Both approaches work because the design looks deliberate.
The budget fails when homeowners skip basic preparation. Poorly fastened panels, unsealed penetrations, and unprotected areas near plumbing or utility equipment can create maintenance problems later. Install lighting and plan outlets before closing walls, even if you postpone decorative fixtures.
A low-cost wall finish should look selected, not abandoned.
DIY installation can make sense for a straightforward nonstructural partition or utility wall when local requirements are understood. Taping, finishing, moisture-resistant panel selection, and coordination around electrical or plumbing work are better handled by an experienced crew when the basement is part of a permitted renovation. Excellent Home Improvement's drywall installation service for New York homes is relevant when the scope includes framing through finishing rather than a simple cosmetic paint job.
3. DIY-Friendly Insulation and Moisture Control Strategy
Insulation is one of the least visible basement upgrades and one of the easiest places to create expensive trouble. A homeowner may save on materials by choosing a basic system, but the assembly still needs to manage condensation, vapor movement, air leakage, and seasonal humidity. Finishing a damp wall with ordinary materials can conceal deterioration until the wall must be opened again.
For a dry basement, Canadian government guidance recommends insulation and vapor-control measures suited to the wall assembly, along with moisture protection at the floor and wall interface. Natural Resources Canada's basement-insulation guidance discusses vapor barriers, moisture barriers, sealed floors, and insulation levels that vary by assembly and climate. Local NYC requirements still control the project, so use general guidance as background, not as a substitute for a site-specific code review.
Separate the DIY tasks from the riskier work
Closed-cell foam board can be practical for straightforward wall areas when installers seal joints and penetrations with compatible materials. A dehumidifier can support a dry environment, but it won't replace drainage, foundation repair, or exterior waterproofing. Interior perimeter drainage may be considered when exterior excavation isn't feasible, but the design needs to account for discharge, pumps, access, and local requirements.
A homeowner can often handle cleaning, monitoring, and limited sealing after receiving professional direction. A contractor should evaluate active leaks, radon concerns, mold, foundation movement, insulation around mechanical systems, and any plan to create a sealed habitable room.
The right sequence is simple: inspect the shell, identify water sources, control bulk moisture, select the wall assembly, then close the walls. Spending on moisture control before flooring and paint protects every later dollar.
4. Open Shelving and Modular Storage Systems
Custom cabinetry can consume a basement budget without improving the room's core function. Open shelving, wall organizers, and stackable bins usually provide more flexibility, especially when the basement must serve as storage today and a recreation or work area later.
Metal shelving suits a brownstone workshop or utility-heavy basement because it tolerates frequent handling and leaves the floor visible for cleaning. Wood shelving can soften a media or family room. In either case, keep the storage system modular. Freestanding units can be rearranged as furniture, equipment, or household needs change, while wall-mounted components can use vertical space without narrowing walking paths.
Protect belongings from basement conditions
Use sealed or weather-resistant containers for paper goods, clothing, seasonal decorations, and electronics. Open shelves are useful for items you reach often, but enclosed bins keep dust and humidity fluctuations away from vulnerable contents. Labeling turns a storage wall into a usable inventory rather than another place to lose things.
A simple layout might put sports equipment near the stairs, a workbench along one wall, and closed bins beneath a media console. A Bronx home gym can store weights on low shelving and reserve upper shelves for infrequently used items. A Westchester family room can combine neutral shelving with baskets, books, and a movable console.
- Anchor shelves securely: Fasten tall units to wall studs or use an approved anchoring method so they can't tip.
- Respect clearances: Keep access to electrical panels, shutoff valves, furnaces, pumps, and other serviceable equipment unobstructed.
- Check load limits: Match shelf capacity to the actual weight of tools, equipment, books, or stored materials.
- Use a consistent palette: Black metal, white shelving, and natural wood can look coordinated without custom millwork.
DIY installation is usually reasonable when the wall is accessible and the shelving is properly anchored. Hire help when anchoring involves uncertain masonry, finished walls, heavy loads, or a layout that must satisfy egress and access requirements.
5. Suspended Drop Ceiling Alternative with Open Joist Finish
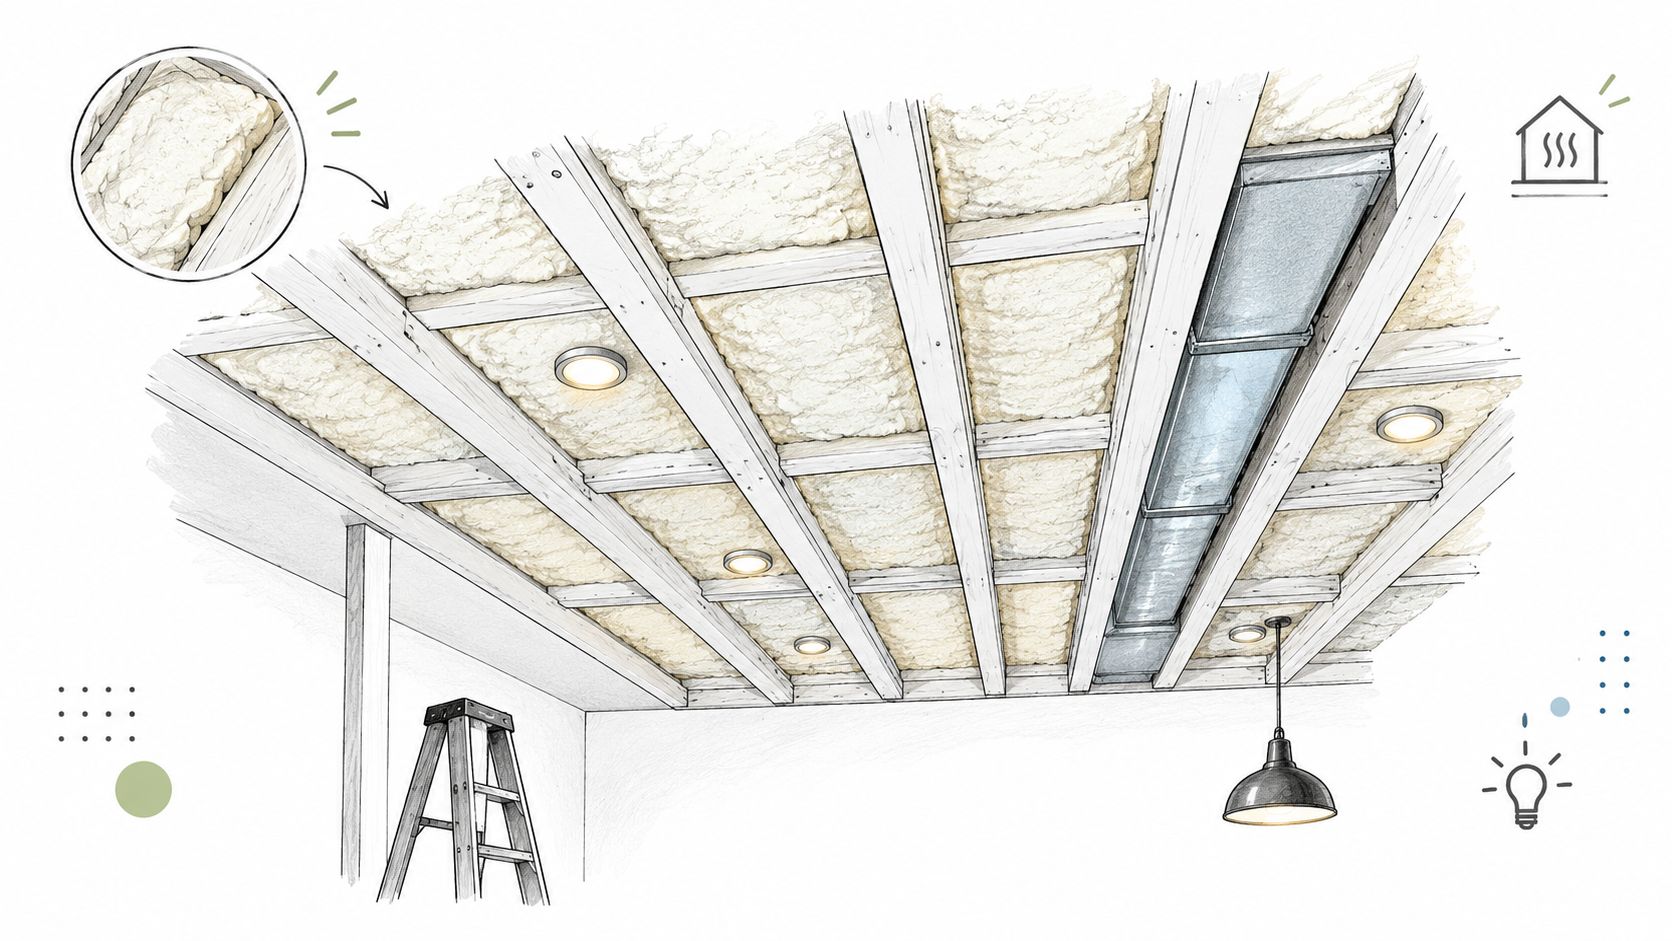
A suspended ceiling makes utilities accessible, but it also consumes headroom and adds a grid, panels, and installation labor. Leaving joists exposed or semi-exposed can produce a cleaner modern look while preserving ceiling height. It works especially well in a loft-inspired basement, a workshop, or a rec room where visible structure and mechanical runs fit the design.
The appearance depends on discipline. Paint the joists, pipes, ducts, and wiring in a consistent neutral color, or highlight selected timber while keeping service equipment visually organized. Plan electrical, HVAC, lighting, and access before applying insulation. Later changes become harder and more disruptive when the joist cavities are sealed or coated.
Treat spray foam as a professional system
Spray-in insulation can improve thermal performance, but it isn't a casual weekend material. Application requires product-specific preparation, ventilation, protective equipment, and attention to fire and code requirements. A qualified contractor should determine whether the chosen foam, coating, and exposed assembly are permitted for the intended use.
An exposed ceiling can reduce material and labor compared with a fully enclosed ceiling, but it may transmit more sound. In a home theater or office, acoustic treatment may matter more than visual minimalism. Add rugs, fabric panels, or other appropriate acoustic elements rather than assuming insulation alone will create a quiet room.
DIY work is limited to planning, painting where safe, and coordinating access. Professional installation is the better value for spray foam, electrical changes, fire protection, and any ceiling assembly that affects code compliance.
6. Budget-Friendly Flooring with Luxury Vinyl Plank and Underlayment
Luxury vinyl plank can create the warm appearance of wood or the clean appearance of stone without using a moisture-sensitive natural material. Its click-lock installation also makes it appealing for homeowners who want to complete a straightforward floor in phases. The product only performs well when the slab beneath it is flat, clean, and appropriately dry.
Start with the concrete, not the plank. Remove contaminants, address uneven areas, and confirm that the selected underlayment suits both the product and the basement conditions. A moisture-rated underlayment can add protection, but it can't correct active water intrusion or a slab that remains excessively damp.
Where LVP saves money
A wood-look floor can warm up a Bronx family room, while a stone-look pattern can suit a media room or multipurpose space. Use spacers at the perimeter, follow the manufacturer's expansion requirements, and install transition strips where the floor meets stairs, bathrooms, or other materials. Plan the direction of the planks so the room feels coherent rather than treating each zone as a separate patch.
Acclimate the material as directed before installation. Maintain stable indoor conditions, because repeated humidity changes can contribute to movement, gaps, or other installation problems.
Spend carefully: The cheapest plank is a poor bargain if its locking system fails, its wear layer is inadequate for the room, or the slab preparation was skipped.
DIY installation is realistic for an open, rectangular room with a sound subfloor and few obstructions. Professional installation becomes more valuable around stairs, floor drains, doors, columns, irregular foundations, and rooms that need leveling or moisture remediation. LVP should follow the moisture-control phase, never replace it.
7. DIY Framing and Partition Walls for Multi-Purpose Spaces
A finished basement does not need permanent rooms for every activity. A carefully placed partition can define a work area, storage zone, exercise space, or quiet corner while keeping the floor adaptable. The savings come from zoning the room without immediately adding a bathroom, bedroom, or built-in entertainment suite.
Lay out the plan with furniture and tape before buying lumber. Mark circulation paths, door swings, windows, columns, stairs, utility access, and any equipment that must remain reachable. A half wall or short divider can separate a gym from a family room while preserving sightlines and borrowed light. A full-height partition provides more privacy, but it reduces openness and may add code, electrical, ventilation, or fire-separation requirements.
Don't create an illegal bedroom by accident
A partition can create a code problem if the enclosed area is presented as a bedroom or other habitable room. Egress, ceiling conditions, ventilation, electrical work, fire separation, and permits may all affect the layout. NYC homeowners should confirm applicable Department of Buildings requirements before framing a space intended for sleeping or independent occupancy.
DIY framing makes sense when the wall is nonstructural, its location is confirmed, and electrical and mechanical routes are already coordinated. Plan outlets before closing the wall, and add sound-control insulation where privacy matters. Keep shutoffs, panels, cleanouts, drains, and service points accessible. Never conceal uncertain foundation conditions behind permanent finishes.
A professional assessment is safer for permit-sensitive layouts, bedroom conversions, structural changes, complex wiring, plumbing, or walls near foundation problems. Excellent Home Improvement handles basement framing, insulation, moisture control, egress, and electrical work for NYC homeowners, but local approvals and licensed trade work still govern the project.
The best budget partition is one that can change with the household. Use removable or shallow construction where possible, and spend on proper layout, access, and code compliance before adding decorative finishes. A low-cost wall that requires demolition later is not a saving.
8. Recessed and Track Lighting for Professional Ambiance on a Budget
Lighting changes how a basement functions and how large it feels. A single bright fixture in the center of the room creates glare and leaves corners dark. A modest layered plan can serve a desk, exercise area, television wall, storage run, and circulation path without requiring an expensive decorative package.
Plan the lighting before framing and before closing ceilings. Mark each zone, then decide where general light, task light, and accent light belong. Recessed fixtures can provide even illumination in a work area, while track heads can highlight artwork, shelving, or a feature wall. Wall sconces and lamps can add softness where recessed fixtures would feel too clinical.
Coordinate fixtures with the ceiling and wiring
Choose bulb color by use. A warmer white can support a family or media room, while a cooler light may suit detailed work or exercise. Dimmers are valuable because one room may need bright task lighting during the day and lower ambient light at night. Use fixtures rated for the ceiling assembly and follow electrical requirements for insulated areas, damp locations, switching, and circuit capacity.
A Westchester workout space benefits from even, glare-controlled light. A Bronx media room needs dimming and reduced reflections. A storage area may need straightforward visibility rather than decorative fixtures. The right plan follows the activity, not a generic fixture count.
DIY replacement of an existing fixture may be manageable for someone qualified to do it safely, but new circuits, recessed wiring, junction boxes, switches, and NYC code compliance belong with a licensed electrician. Excellent Home Improvement's lighting fixtures and fittings can support material selection when the lighting plan is coordinated with the broader renovation.
Design the wiring once. Moving a fixture after drywall, insulation, and paint are complete costs more than planning the zones at the beginning.
8-Point Comparison of Budget Basement Finishes
| Option | Implementation complexity | Resource requirements | Expected outcomes | Ideal use cases | Key advantages |
|---|---|---|---|---|---|
| Painted Concrete Floors with Epoxy Coating | Moderate, thorough concrete prep; professional recommended for best results | Primer, epoxy resin, grinders/profile tools, ventilation, optional non-slip aggregate | Seamless, moisture- and stain-resistant finish; durable 10+ years with care | Basements, garages, home gyms, storage in moisture-prone areas | Cost-effective, quick install, customizable appearance, low maintenance |
| Unfinished Drywall with Strategic Paint and Lighting | Low–Moderate, skip Level 5 finishing; focus on paint and lighting layout | Basic drywall, primer/paint, lighting fixtures, trim tools | Intentional industrial/minimal aesthetic with visible seams | Media rooms, studios, man caves, casual rec spaces | Lower labor cost, trendy look, easy access to services, simple refresh |
| DIY-Friendly Insulation and Moisture Control Strategy | Moderate, careful planning and correct vapor placement required | Rigid foam board, vapor barrier/tape, dehumidifier, basic tools, moisture tests | Improved thermal performance and moisture control; mold risk reduced | Any below-grade finishing in humid climates; prep step before finishing | Cost-effective moisture control, energy savings, DIY-capable, code-aligned |
| Open Shelving and Modular Storage Systems | Low, assembly and anchoring; minimal modification to structure | Modular shelves, anchors/brackets, storage bins, basic tools | Flexible, visible storage; fast installation and reconfiguration | Workshops, storage-focused basements, multipurpose rooms | Much cheaper than custom cabinetry, reconfigurable, widely available |
| Open Joist Finish with Spray-In Insulation (Drop-ceiling alternative) | Moderate–High, spray foam needs pros and pre-planning for services | Spray foam contractor, paint/stain for joists, recessed lighting planning | Maintained ceiling height, superior insulation and moisture barrier | Basements wanting higher ceilings, energy-efficient modern designs | Saves vs drop ceilings, better thermal performance, easy future access |
| Luxury Vinyl Plank (LVP) with Underlayment | Low–Moderate, click-lock install; subfloor/ moisture prep critical | LVP planks, moisture-resistant underlayment, basic installation tools | Realistic wood/tile look, waterproof surface, 10–20 year lifespan | Basements with moisture risk, DIY installs, living and rec spaces | Affordable, waterproof, warm underfoot, low maintenance |
| DIY Framing and Partition Walls for Multi-Purpose Spaces | Moderate, carpentry skills and code/egress knowledge required | Lumber (2x4/2x6), drywall, insulation, fasteners, wiring coordination, permits | Clearly defined zones/rooms, improved privacy and sound separation | Creating bedrooms, offices, storage divisions in basements | Flexible layout, inexpensive materials, DIY-friendly, removable |
| Recessed and Track Lighting for Professional Ambiance on a Budget | Moderate, electrical work typically requires licensed electrician | LED recessed/track fixtures, wiring, dimmers, electrician labor | Layered, controllable lighting; energy-efficient and improved ambiance | Media rooms, home theaters, workspaces, galleries | Dramatically improves aesthetics, flexible zones, lower operating cost |
Build the Budget in the Right Order
A basement budget works best when it follows risk rather than visibility. HomeAdvisor's consumer cost guidance places typical basement projects around $32,000, with a broad common range of $15,000 to $75,000, while some unfinished basements fall around $30 to $100 per square foot and partially finished spaces around $7 to $23 per square foot. HomeAdvisor's basement cost overview explains why the same footprint can produce very different totals. Cosmetic work on an already usable shell is quite different from framing, insulating, adding utilities, and correcting moisture conditions.
Resale value also argues for restraint. The 2022 Remodeling Impact Report estimated that basement conversion recovered 86% of project cost at sale, while more recent 2025 Cost vs. Value coverage places national recovery closer to 71%, with a mid-range remodel costing roughly $66,000 to $75,000 and returning about $47,000. HGTV's overview of finished basements and home value describes the broader trade-off. A finished basement can add useful living area, but premium finishes don't guarantee dollar-for-dollar recovery.
Use this priority sequence:
- Resolve moisture first: Investigate leaks, seepage, condensation, drainage, sump systems, foundation cracks, and ventilation before installing finishes.
- Confirm code and egress: Decide whether the space is storage, recreation, work, or a habitable room. Check permits, exits, ceiling conditions, smoke protection, and required approvals before framing.
- Plan utilities: Map electrical circuits, lighting, HVAC, plumbing, equipment access, and future changes before closing walls or joists.
- Choose durable surfaces: Select epoxy, properly prepared concrete, LVP, or another suitable floor only after the slab and moisture conditions are understood.
- Treat the ceiling strategically: Use an open-joist finish when access and height matter, or choose an accessible ceiling system when future serviceability is more important.
- Add lighting and storage: Layer fixtures by activity and use modular shelving instead of committing to custom cabinetry too early.
- Finish in phases: Create a dry, functional core first, then add partitions, furniture, accent walls, or specialty features when the room has proved useful.
User satisfaction matters alongside resale. The 2019 Remodeling Impact Report found that 58% of homeowners felt happy when they saw their completed projects, while 38% reported satisfaction. NARI's report summary supports a practical conclusion: homeowners often gain the most from usable space, not from expensive finishes that don't improve daily life.
For NYC homeowners, the lowest total cost may come from hiring professionals for the parts that can invalidate or damage the entire project, including permits, egress, electrical work, insulation, drainage, structural coordination, and hazardous-material controls. An itemized proposal should separate shell repairs, code work, labor, materials, allowances, and optional phases. That makes it easier to compare a modest rec room with a more complex basement conversion without confusing decorative upgrades with required construction.
Excellent Home Improvement offers basement finishing, design coordination, sourcing, and construction for NYC-area homeowners. Compare the scope line by line, keep the first phase focused on a dry and compliant foundation, and postpone features that don't improve the room's core use.
Excellent Home Improvement provides basement finishing, framing, insulation, moisture control, egress planning, electrical coordination, design, sourcing, and construction management for homeowners in New York City, the Bronx, Westchester, and the five boroughs. If you're planning a budget-conscious basement renovation, visit Excellent Home Improvement to discuss the existing conditions and request a clearly defined proposal.