Bathroom Renovation Plumbing: A Complete How-To Guide
Plan bathroom renovation plumbing the right way with our step-by-step guide on rough-ins, venting, code, waterproofing, and permits for NYC homes.
By Excellent Home Improvement
You've picked the tile, ordered the vanity, and probably spent more time comparing finishes than looking at the pipes behind the wall. Then demolition begins, the old bathroom opens up, and the true scale of the project appears: undersized supply lines, an unclear vent connection, a drain that can't reach the new layout, or a shutoff valve buried where nobody can service it.
That's why bathroom renovation plumbing should be planned before the finish schedule. Tile, stone, cabinetry, lighting, and paint are visible, but the concealed work determines whether those finishes can be installed without reopening the room. In a New York City apartment, the plumbing scope also affects permits, inspections, building approvals, waterproofing, ventilation, and coordination with every other trade.
Table of Contents
- Why Plumbing Drives Your Bathroom Renovation
- The Rough-In Sequence That Protects Your Project
- Choosing Fixtures That Work With Your Plumbing
- Permits, Codes, and NYC Approval Realities
- Venting, Waterproofing, and Moisture Performance
- Coordinating Plumbers With Tile, Electrical, and Carpentry
- Final Checks and Your Project Closeout Checklist
Why Plumbing Drives Your Bathroom Renovation
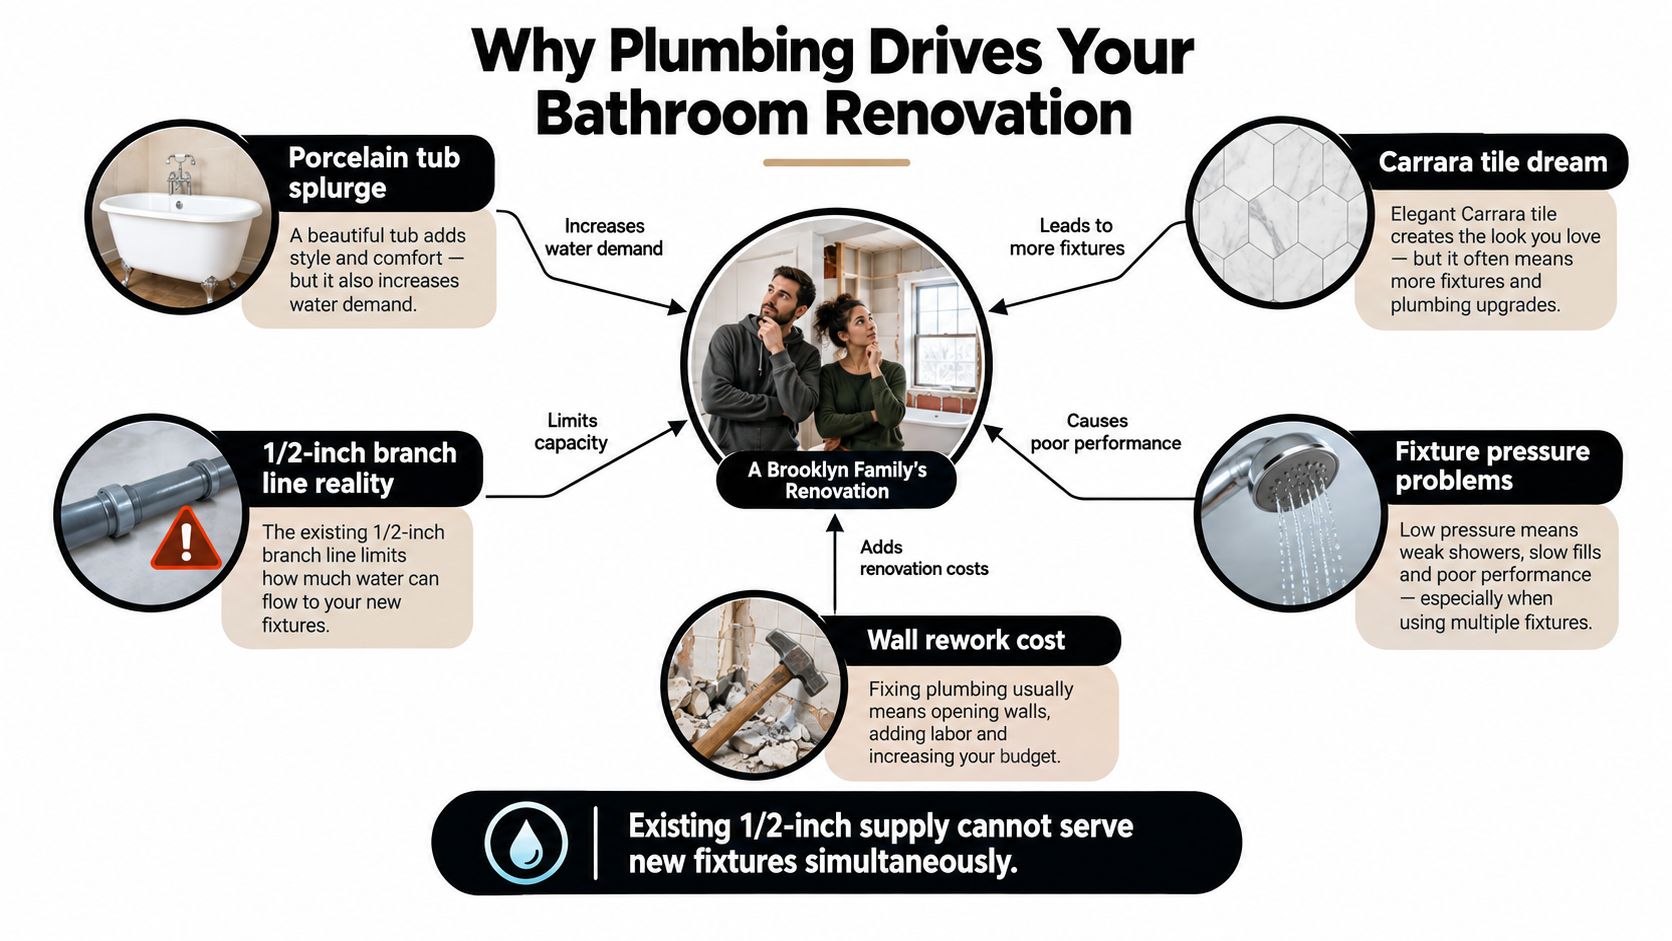
A Brooklyn family can spend heavily on a porcelain tub and carefully selected stone tile, only to discover during demolition that the existing branch line can't support the new fixture arrangement properly. The problem isn't the tub or the tile. It's that supply capacity, drain routing, vent placement, and access were treated as details instead of design constraints.
The walls are designed around the rough-in
A bathroom's plumbing rough-in decides where the wall cavities, ceiling drops, floor buildup, niches, access panels, and service openings can go. Move a toilet and you may affect the branch drain, vent connection, flange position, and finished-floor height. Move a shower valve and you may need to open a different wall, alter blocking, reroute supply lines, and revise waterproofing transitions.
The designer can develop a beautiful layout, but the plumber has to verify that the layout works with the existing stack, branch piping, drainage path, water pressure, and adopted code. Fixture locations should be measured against the actual product documents, not a generic showroom assumption. A valve body, concealed diverter, freestanding tub filler, or wall-hung toilet carrier can each demand different framing and rough-in conditions.
Practical rule: Treat every concealed pipe as part of the architectural layout. If it can't be serviced, tested, or inspected before the wall closes, it hasn't been properly planned.
Water use makes fixture selection a plumbing decision
Bathrooms account for more than half of all indoor household water use, according to the U.S. Environmental Protection Agency's WaterSense overview. The same EPA reference identifies toilets, showers, and faucets as substantial components of indoor demand, which means a renovation changes more than appearance when it replaces or relocates those fixtures.
A renovation also creates an opportunity to choose fixtures with measurable operating differences. WaterSense targets include toilets using no more than 1.28 gallons per flush, bathroom faucets flowing at no more than 1.5 gallons per minute, and showerheads using no more than 2.0 gallons per minute. EPA estimates that replacing old inefficient toilets in an average family's home with WaterSense models can save approximately 13,000 gallons of water and $130 annually, while WaterSense showerheads can save more than 2,700 gallons per year. Those figures apply to the cited product and household assumptions, not automatically to every bathroom.
Budget the concealed work first
The plumbing scope should be established before final tile quantities and finish commitments. Ask for a documented survey of the existing drain, waste, vent, and water lines. Then ask which pipes will remain, which will be replaced, where shutoffs will be located, and how the work will be tested before the walls close.
This approach exposes the expensive decisions early. A finish can usually be changed during procurement. A drain connection hidden behind waterproofing is much harder to change without demolition. The practical mindset is simple: the bathroom is a plumbing project first and a finish project second.
The Rough-In Sequence That Protects Your Project
A gut renovation shouldn't be managed as a fixture swap. The correct sequence starts with verification and ends with a record of what was concealed. Each stage protects the next trade from inheriting an unknown condition.
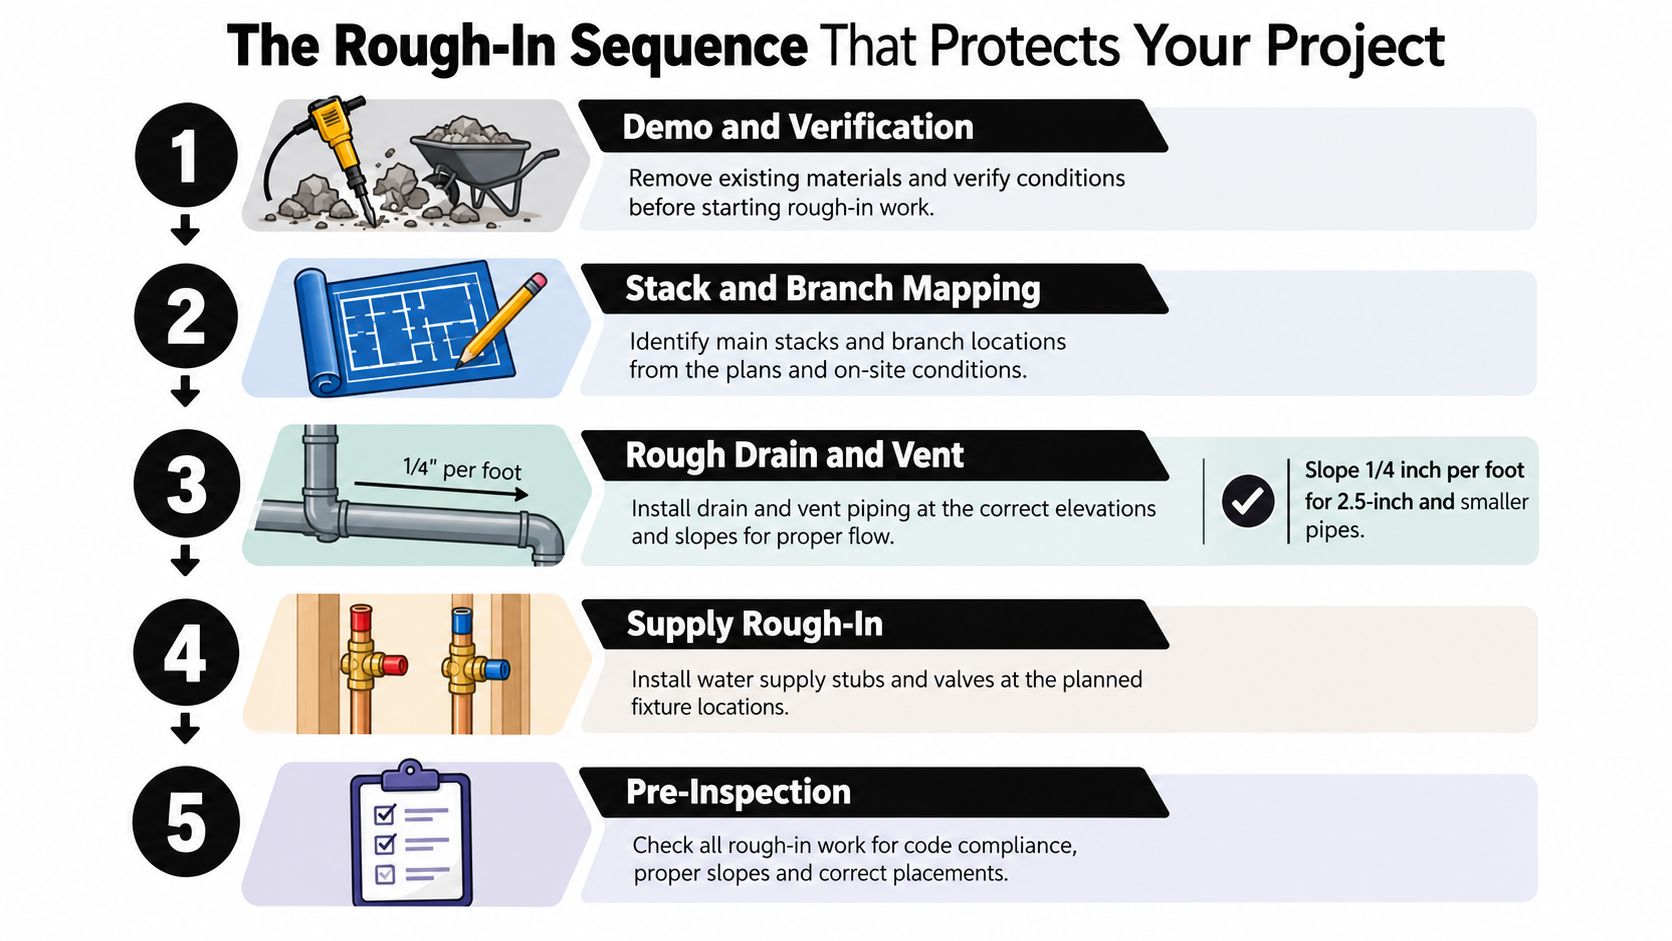
Begin with demolition and verification
Before cutting into walls or floors, shut down and identify the relevant water supplies. Photograph the existing fixture connections, valves, cleanouts, vent paths, and exposed pipe materials. Once the room is open, inspect the drain and vent arrangement rather than assuming the old installation is compliant because it functioned for the previous layout.
Map the stack and branches next. The plumber should identify which lines serve the bathroom, where the branch connects to the stack, whether a shared wall or riser is affected, and whether the new fixture arrangement changes developed pipe lengths or venting. In an occupied apartment, this is also the point to confirm which shutoffs belong to the unit and which require building coordination.
Install and test the rough plumbing
Rough drains, traps, and vents should be installed with the required geometry and gravity drainage in mind. A commonly adopted International Plumbing Code provision limits the slope of a horizontal vent section to 1 unit vertically in 12 units horizontally, or 8.3%, and cautions against excessive fixture-drain fall that can compromise trap protection. Review the applicable local requirements through the International Plumbing Code venting provisions, because New York City requirements and amendments must be checked separately.
Supply lines should be sized for the selected fixtures and arranged with accessible shutoffs. Flush the lines before finish fixtures are connected. Test static and operating pressure at the remote fixture, then test fixtures individually and under simultaneous use. A high-flow shower arrangement may behave very differently from a lavatory faucet, even when both appear to be served by the same branch.
Record measurements against purchased fixtures
Generic rough-in dimensions are only starting points. The toilet, valve, faucet, shower base, sink, and trim should be physically identified before the final rough-in is approved. Record the manufacturer's rough-in dimensions, connection sizes, required pressure, outlet positions, and service clearances in the project file.
The plumber should also verify trap-seal requirements, vent connections, drain grades, flange position, and access to concealed service components. A measurement that looks correct on a general plan can be wrong for the purchased model. This is especially common with concealed valves, wall-mounted fixtures, compact vanities, and shower drains.
Test before waterproofing and closing walls
Test the water piping and the drainage, waste, and vent system before backer board, waterproofing, drywall, or tile conceals the work. Fill the tub or shower pan where applicable, discharge fixtures simultaneously, inspect every exposed connection, and confirm positive drainage. Make sure no vent connection sits below the trap weir, and verify that cleanouts remain accessible where required.
The plumber should photograph the concealed work from several angles, with enough context to locate each pipe later. Include fixture centerlines, valve depths, shutoff locations, drain routes, blocking, and penetrations. Before the waterproofing assembly is covered, the plumber should also verify that the pan flood test has passed and that the tile installer has the actual drain and valve elevations.
Choosing Fixtures That Work With Your Plumbing
Fixture selection should happen alongside plumbing design, not after the rough-in. Flow rate affects supply sizing, pressure at the point of use, user experience, drainage demand, and long-term water consumption.
EPA WaterSense provides useful performance benchmarks. WaterSense toilets have a maximum effective flush volume of 1.28 gallons per flush, bathroom faucets flow at no more than 1.5 gallons per minute, and showerheads use no more than 2.0 gallons per minute, as described in the EPA bathroom faucet guidance. The same guidance explains that WaterSense bathroom faucets use at least 30% less water than the conventional 2.2 gallons-per-minute standard while meeting performance requirements.
Build a fixture schedule before rough-in
Create a schedule that lists the manufacturer, model, flow rate, connection size, rough-in dimensions, trim compatibility, and required pressure for every fixture. The schedule should identify the valve body separately from the trim, because a trim kit that looks compatible may not fit the concealed valve already installed.
Then verify the plumbing against the actual schedule. Check whether the selected shower system runs one outlet at a time or combines a rainhead, handheld, and body sprays. Confirm the toilet's rough-in and outlet configuration. Make sure the vanity cabinet leaves room for the trap, shutoffs, supply connections, and future service.
| Fixture | Pre-1994 Rate | WaterSense Max | Annual Savings, Family of 4 |
|---|---|---|---|
| Toilet | Older inefficient models varied by product | 1.28 gallons per flush | Varies by household and replacement scope |
| Bathroom faucet | Conventional standard is 2.2 gallons per minute | 1.5 gallons per minute | About 700 gallons for an average household when inefficient faucets and aerators are replaced |
| Showerhead | Older products varied by product | 2.0 gallons per minute | More than 2,700 gallons when inefficient showerheads are replaced |
The faucet and showerhead savings figures in the table come from EPA WaterSense bathroom fixture guidance. They're planning benchmarks, not a promise for every household, because usage patterns and existing fixtures differ.
Think about pressure, noise, and serviceability
A pressure-assist toilet can produce a different noise profile and flushing behavior from a gravity-flush model. Neither choice should be made from appearance alone. Review the stack connection, drain configuration, user expectations, available pressure, and building restrictions with the plumber.
Low-flow fixtures also need proper line sizing and pressure verification. A shower system with multiple outlets may need a different supply arrangement than a single showerhead. Don't assume a smaller flow rating solves every problem, and don't specify a high-flow system without testing the available pressure at the most remote fixture.
Use the fixtures and fittings selection service as one possible way to organize product choices, but keep the plumbing schedule independent of the showroom order. The plumber needs a stable, documented list before pipes are closed.
Permits, Codes, and NYC Approval Realities
“Do I need a permit?” isn't a reliable yes-or-no question for a New York City bathroom renovation. Direct replacement of an existing faucet, toilet, or sink may fall into a different category from work that changes shutoff valves, traps, piping, fixture locations, or concealed connections. The compliance path depends on what the plumber changes, where the work occurs, and which building systems are affected.
Start with the work scope
Before demolition, write down whether the project changes any of the following:
- Fixture locations: Relocating a toilet, shower, sink, or tub can change drainage, venting, and inspection requirements.
- Concealed piping: New branch lines, altered traps, riser work, or changed connections may require licensed-plumber involvement and filings.
- Shared building systems: A stack, riser, wet column, or common shutoff can bring co-op, condo, and building-management rules into the project.
- Gas or heating equipment: Any tie-in to gas-fired equipment requires a separate review of the applicable requirements and licensed trades.
- Electrical and ventilation: New circuits, exhaust routing, and equipment can create related filing and inspection obligations.
NYC guidance includes narrow exceptions for certain ordinary plumbing work, including limited fixture relocation within the same room, but those exceptions still have conditions and reporting requirements. Don't treat “the toilet isn't moving” as proof that the project needs no plumbing review.
Request the paperwork before opening walls
For apartment work, ask who will file the plumbing work, who will schedule inspections, and what documents the building requires. A co-op or condo may also request an alteration agreement, insurance documentation, approved-trade information, work-hour limits, elevator reservations, and shutdown procedures.
Before demolition, request a fixture plan, the fixture schedule with model numbers and flow rates, a filing determination, and confirmation of vent terminations and riser shutoff access. Where a stack relocation or substantial change is proposed, request signed and sealed plumbing drawings when required by the filing path.
The NYC Department of Buildings plumbing permits and applications guidance should be checked with the licensed professional handling the work. For help evaluating the contractor and documentation process, review this guide to hiring a licensed contractor in NYC.
Separate building approval from code approval
A building board's approval doesn't replace a DOB filing, and a DOB filing doesn't automatically satisfy a co-op's alteration rules. Brownstones and one-to-three-family homes may follow a different owner-permit or contractor pathway from apartments, while gas work and shared systems can still require licensed professionals and additional review.
Keep the permit pathway tied to the closeout documents. The final record should show which work was filed, which inspections occurred, what was approved, and whether related electrical or building work remains open.
Venting, Waterproofing, and Moisture Performance
A bathroom can have correctly connected fixtures and still fail as a room if moisture has nowhere reliable to go. Ventilation, waterproofing, duct routing, surface temperature, penetrations, and occupant behavior work together. Treating them as finish details leaves the homeowner responsible for failures that started behind the tile.
Research on residential bathrooms has found that relative humidity reached 100% during bathing in the studied rooms regardless of ventilation settings, while better airflow removed more moisture. The findings are described in the 2025 Houzz bathroom trends research, which also discusses ventilation, heating, and plumbing upgrades. The practical conclusion is not that a fan is useless. It's that fan capacity alone doesn't prove the room is drying properly.
Make the wet zone continuous
The shower walls, niche, curb or curbless entry, floor, corners, penetrations, and drain should be treated as one waterproofing assembly. The installer needs a compatible system, properly prepared seams, sealed fasteners where required, and transitions that connect rather than stop at the edge of a tile field.
Waterproofing should be inspected before tile conceals it. Confirm that the shower pan, drain connection, wall treatment, niche, bench, and penetrations follow the selected system's instructions. The bathroom waterproofing guide can help homeowners understand the components, but the project team still has to follow the approved assembly and local requirements.
Commission the fan and the pan
Ask the team to confirm that the exhaust fan discharges outdoors through an appropriate duct route, not into a soffit, wall cavity, attic, or shared area. Check that the grille is positioned to capture shower moisture, that the fan operates without excessive noise, and that the duct path doesn't contain avoidable restrictions.
Use commissioning checks that produce evidence:
| System | Test | Pass Criterion |
|---|---|---|
| Shower pan | Flood test before tile | No leakage or moisture migration to the floor below |
| Exhaust fan | Airflow and discharge inspection | Air moves through the grille and vents to the approved exterior path |
| Supply piping | Pressure and leak test | No pressure loss or visible leakage during the specified test |
| Wet-zone penetrations | Visual inspection | Valves, niches, benches, fasteners, and drain transitions are sealed within the system |
| Finished bathroom | Humidity observation after bathing | Moisture declines without persistent condensation or wet surfaces |
A higher-capacity fan won't correct a disconnected duct, cold uninsulated surface, or weak waterproofing transition. After installation, test the room under normal use and document the result rather than relying on the fan's label.
Coordinating Plumbers With Tile, Electrical, and Carpentry
Trade sequencing is where many bathroom renovations lose time. The plumber, tile setter, electrician, carpenter, and project manager need one shared plan, because each trade's work changes the surfaces and clearances used by the next.
Hold one coordination meeting at the exposed-rough stage
Demolition should expose the existing conditions before the team finalizes the new sequence. Once the walls and floor are open, hold a coordination meeting with the general contractor, plumber, tile lead, electrician, and carpenter. Review the purchased fixture documents, not just the design drawings.
The plumber sets drain, supply, valve, and fixture elevations. The tile setter confirms the finished surface buildup, drain grate position, niche dimensions, and waterproofing transitions. The carpenter adds blocking for grab bars, accessories, shower glass, cabinets, and future service needs before the walls are covered.
Use a short look-ahead
A weekly site walk keeps small conflicts from becoming rework. The team should review what will be opened, tested, inspected, waterproofed, closed, and finished next. Keep the plan visible on site and update it when a fixture, tile thickness, valve, or building restriction changes.
A practical coordination checklist includes:
- Before rough-in: Confirm the actual shower valve, tray or pan, drain, toilet, sink, vanity, and faucet are on site or fully documented.
- After plumbing rough-in: Verify slopes, trap and vent geometry, supply outlets, shutoffs, service access, and pressure-test records.
- Before waterproofing: Confirm wall planes, framing, blocking, drain height, penetrations, and pan test requirements.
- Before electrical close-in: Confirm that plumbing tests have passed and that wiring avoids wet-zone conflicts and service areas.
- Before tile: Match the tile setter's finished elevations to the installed drain, valve, niche, curb, and threshold.
- Before drywall or backer board: Photograph every concealed section and upload the record to the shared project folder.
The plumber must coordinate the rough elevations with the tile setter before tiling begins. A small mismatch between the purchased drain or valve and the installed rough-in can force the team to reopen work that looked complete.
Final Checks and Your Project Closeout Checklist
Turnover day is not the time to discover that the tub drains slowly, the toilet rocks, or the exhaust fan discharges into a ceiling cavity. The final inspection should connect the physical bathroom to the documents opened at the beginning of the project.
Run the room as a system
Test each fixture independently, then test realistic combinations. Run the sink while the shower operates. Fill and discharge the tub where applicable. Flush the toilet while checking nearby connections. Look below the vanity, around the toilet base, at exposed shutoffs, and at every accessible drain connection.
Use a written checklist:
- Supply piping: Confirm the plumber's pressure-test record and inspect all accessible joints for leakage.
- Drainage: Check that fixtures empty promptly without gurgling, backup, or standing water.
- Traps and vents: Confirm that traps retain their seal and that no vent terminal discharges into an attic, soffit, or concealed cavity.
- Toilet installation: Check that the bowl is stable, the flange and finished-floor relationship are correct, and the connection doesn't leak during repeated flushing.
- Shower pan: Verify that the required flood test was completed before tile and that the floor below shows no moisture evidence.
- Electrical protection: Test the required GFCI devices serving bathroom outlets and equipment with the electrician present.
- Ventilation: Confirm exterior discharge, quiet operation, airflow at the grille, and reasonable moisture decline after bathing.
- Access: Open every service panel and confirm that shutoffs, valves, cleanouts, and equipment can be reached without removing finished tile.
A sluggish drain on a second fill, a rocking toilet, an inaccessible shutoff, or moisture below the shower should hold the punch list open. Cosmetic completion doesn't override a failed concealed system.
Collect the closeout record
Request the licensed plumber's sign-off and inspection documentation, fixture model and serial information where available, valve warranty cards, product manuals, and as-built photographs. The photo set should show valve rough-in depth, drain routes, cleanouts, blocking, waterproofing transitions, and service access.
Tie these records to the permit pathway. The project isn't fully closed until the required plumbing, electrical, building, and related inspections are complete and the owner has documentation showing what was installed. A clean closeout protects future maintenance, resale questions, warranty claims, and the next renovation.
Bathroom renovation plumbing works best when the team treats testing and documentation as part of construction, not as paperwork added at the end. The tile can look perfect while a concealed defect waits behind it. The final standard should be a bathroom that performs under use, passes the required inspections, and can still be serviced without unnecessary demolition.
Excellent Home Improvement provides NYC bathroom renovations with coordinated plumbing and electrical rough-ins, waterproofing, fixture sourcing, and project management for apartments, brownstones, and homes across the Bronx, Westchester, and the five boroughs. If you're planning a bathroom renovation plumbing scope, visit Excellent Home Improvement to discuss the existing conditions, permit pathway, fixture schedule, and construction sequence before demolition begins.