Bathroom Renovation Small Spaces That Work Big
Practical bathroom renovation small space guide covering layouts, fixtures, waterproofing, ventilation, permits, and budget tips for NYC homeowners.
By Excellent Home Improvement & Remodeling

You open the bathroom door, turn sideways past the vanity, and notice the same cracked joint beside the shower. You'd like more storage and a room that doesn't stay damp after bathing, but you're also wondering what's behind the tile and whether your building will approve the work. In a small NYC bathroom, those questions belong at the start, before you order anything.
Table of Contents
- Why a Small Bathroom Feels Like a Big Project
- Setting a Realistic Budget Before You Pick a Tile
- Layouts That Reclaim Every Inch
- The Waterproofing Sequence Behind the Tile
- Ventilation That Moves Moisture
- Accessibility That Does Not Look Like a Hospital
- Permits, Approvals, and Your Project Timeline
Why a Small Bathroom Feels Like a Big Project
A compact bathroom isn't a large bathroom with fewer tiles. The plumber, electrician, tile setter, and carpenter still need to complete their work, often through the same narrow doorway. Their installation sequence matters because each trade can cover up work another trade needs to inspect.
Consider a typical planning dilemma, not a completed project: the homeowner wants a deeper vanity, a larger shower, and a door that no longer hits the toilet. Each request sounds reasonable on its own. Together, they may leave too little usable circulation or require changes to walls that contain plumbing.
The useful starting point is a measured existing-conditions plan, not a fixture shopping list. Record finished wall positions, door movement, pipe locations, ceiling obstructions, and the available service access. Then distinguish what's confirmed from what remains concealed.
Separate preferences from constraints
In an older Bronx apartment, a pipe enclosure might look like wasted space until someone establishes what it contains. In a Westchester house, an uneven bathroom floor may require investigation before anyone promises a flush shower entry. Neither condition should be resolved with a rendering alone.
Ask the project team to classify decisions:
- Must remain functional: Toilet access, bathing access, drainage, lighting, and a workable ventilation route.
- Needs verification: Wall construction, floor assembly, concealed piping, and building restrictions.
- Can change later: Mirror style, paint color, accessories, and other selections that don't determine rough-in work.
Practical rule: Don't approve a layout because every fixture fits on paper. Approve it because people can use those fixtures and trades can install and service them.
For a bathroom renovation, small spaces demand deliberate coordination rather than miniature versions of showroom layouts. The strongest plan protects essential systems while making daily routines easier.
That distinction also helps define success. A room that photographs beautifully but lacks towel storage, dries poorly, or requires awkward movement hasn't solved the homeowner's problem. A successful renovation makes those ordinary tasks less frustrating without hiding unresolved construction issues behind new finishes.
Setting a Realistic Budget Before You Pick a Tile
Budget by scope, not floor area alone. A smaller footprint can reduce material quantities without removing the need for demolition, plumbing, electrical work, waterproofing, ventilation, and finish installation. That's why estimating from tile coverage alone gives homeowners an incomplete picture.
National renovation benchmarks can provide context, but they aren't NYC bids. Your contractor still needs to inspect the room, establish building access requirements, and determine what stays versus what gets rebuilt. A decorative refresh and a shower reconstruction shouldn't share the same assumptions.
Identify the work that changes the price
Plumbing becomes a major decision when you relocate fixtures rather than replace them in place. Electrical work needs a defined scope rather than an allowance labeled “new lighting.” Waterproofing requires preparation and detailing that aren't visible in the finished tile surface.
Ask for separate descriptions of:
- Demolition and protection: What comes out, what remains, and how adjoining finishes and common areas will be protected.
- Rough construction: Pipe adjustments, electrical changes, substrate repairs, and ventilation work.
- Finish installation: Tile preparation, tile setting, cabinetry, fixtures, glass, and painting.
- Project administration: Building submissions, applicable filings, inspections, disposal, and closeout documentation.
A fixed-price proposal is useful only when its boundaries are clear. Check whether fixture purchasing, delivery, building protection, testing, and restoration outside the bathroom are included. An inexpensive bid with broad exclusions may leave you carrying more uncertainty than a higher, better-defined proposal.
Reserve money against identified risks, not against an arbitrary feeling that every renovation needs the same cushion.
Make the contingency specific
Have the contractor identify plausible concealed conditions and explain how each would be priced if discovered. For example, distinguish repairing a localized damaged substrate from replacing a deteriorated section of piping. Require written authorization before additional work proceeds.
Keep that reserve separate from elective upgrades. Otherwise, a more expensive faucet can consume money intended for necessary repairs.
Use the renovation cost calculator to organize an initial scope, then reconcile the result with a site-based proposal. The useful comparison isn't contractor total against contractor total. It's the same work, the same exclusions, and the same responsibility for unresolved conditions.
Layouts That Reclaim Every Inch
Start with the existing waste connections and the route through the room. Keeping fixtures near their current locations is worth testing before committing to a rearrangement. A dramatic layout change isn't automatically a functional improvement.
A wall-aligned wet zone can keep the bathing area organized along an existing plumbing wall. It works best when the remaining floor supports comfortable access to the basin and toilet. Its limitation is depth: an enclosure or vanity that projects too far can narrow the entire route.
A corner or neo-angle shower may release space near the entrance, but examine the usable interior, not just the enclosure's outer dimensions. Check entry movement, control access, and where someone will stand while opening the door.
Matching Small-Bathroom Layouts to Real-World Constraints
| Layout Option | Best When | Main Trade-Off |
|---|---|---|
| Wall-aligned wet zone | Existing plumbing already follows a practical wall | Fixture projections can still restrict circulation |
| Corner or neo-angle shower | The entrance needs more open floor | A compact outline may conceal an awkward bathing area |
| Pocket door | The adjacent wall can accommodate a clear pocket | Wall services and framing need investigation |
| Surface-sliding door | Clear wall space exists outside the opening | Privacy and sound control need careful consideration |
| Wall-hung vanity | Open floor is more valuable than maximum cabinetry | Storage and support requirements need checking |
| Wet-room arrangement | Broader splash exposure can be designed into the room | Drainage and waterproofing become more extensive |
Test the layout in use
Mark proposed fixture edges and door swings at full scale before ordering. Stand where you'd dry off, reach for a towel, open a drawer, and help someone use the shower. These movements reveal conflicts that a plan viewed from above can miss.
Pocket doors aren't a universal answer. Don't specify one until the wall has been checked for services and structural constraints. A barn-style surface slider avoids a concealed pocket, but it still needs unobstructed wall space and an acceptable privacy detail.
Wet rooms deserve similar scrutiny. Removing a shower enclosure may improve movement, but it also changes where water can reach. Assess the toilet, cabinetry, doorway, drainage strategy, and cleaning routine as a connected arrangement.
In older NYC buildings, ask the designer to verify cast-iron stack locations, floor construction, and restrictions on fixture relocation before finalizing the plan. Don't assume a slab can be recessed or penetrated. Where ceilings contain beams, ducts, or piping, check finished headroom before proposing a dropped ceiling or overhead shower fitting.
Select the layout that works with the building, not the one that requires the most exceptions to become buildable.
The Waterproofing Sequence Behind the Tile
Tile is the visible finish, not the complete water-management system. Before installation begins, the contractor should identify the substrate, membrane, drain connection, and transition details as one compatible assembly.
The sequence below is a useful overview, but the project's approved system instructions must govern the work.

Establish a sound assembly before covering it
Begin by inspecting supply and waste lines and repairing leaks. Check exposed substrates for deterioration and suitability before preparing the shower surfaces. In prewar NYC buildings this often means working over an old mortar-bed floor or a lead pan, and neither should be buried under new material until the cause of past moisture is understood. Fresh board over a live problem buys you a nicer-looking failure.
Specify a continuous, tile-compatible waterproofing membrane directly beneath the tile-bonding mortar, and require the installer to name the exact system in writing. Ask which membrane standard the product has been tested to, and confirm the membrane and mortar manufacturers list the full assembly as compatible rather than mixing components from different systems. That written confirmation matters if a leak surfaces later and the warranty question comes up.
The highest-risk work happens where the surface changes direction or gets interrupted. Corners, valve openings, curbs, and drain connections all need the specified treatment. Confirm the drain and curb arrangement early enough that the membrane can connect correctly, rather than improvising around installed components.
- Before concealment: Photograph membrane connections, corners, penetrations, and transitions while they remain visible.
- Before tile installation: Obtain a documented flood test where local requirements and system instructions call for one. In a co-op or condo, check the alteration agreement first, since some buildings require advance notice or a management witness for water tests.
- During verification: Inspect accessible adjoining walls, ceilings, and service areas rather than relying only on the appearance of the shower floor.
- At completion: Retain product information, test records, and installation photographs with your project file.
Don't confuse finishing with waterproofing
Grout and caulk aren't substitutes for the membrane. Even if a finish product is described as water-resistant or waterproof, that description doesn't establish a continuous waterproof assembly behind the tile. The infographic's final finishing stage should be read with that distinction in mind.
A fresh bead of sealant can improve a finish joint, but it doesn't establish that concealed corners or drain connections were built correctly. Ask to see the relevant detail before it disappears beneath tile.
The bathroom waterproofing guide can help you prepare questions for the installer. Your role isn't to supervise trowel technique. It's to insist that the system, testing, and documentation are agreed upon before the work is covered.
Ventilation That Moves Moisture
A loud fan proves nothing. The installed system has to pull air out of the room and discharge it through a proper route, and a higher rating on the box won't fix a blocked duct or a bad termination.
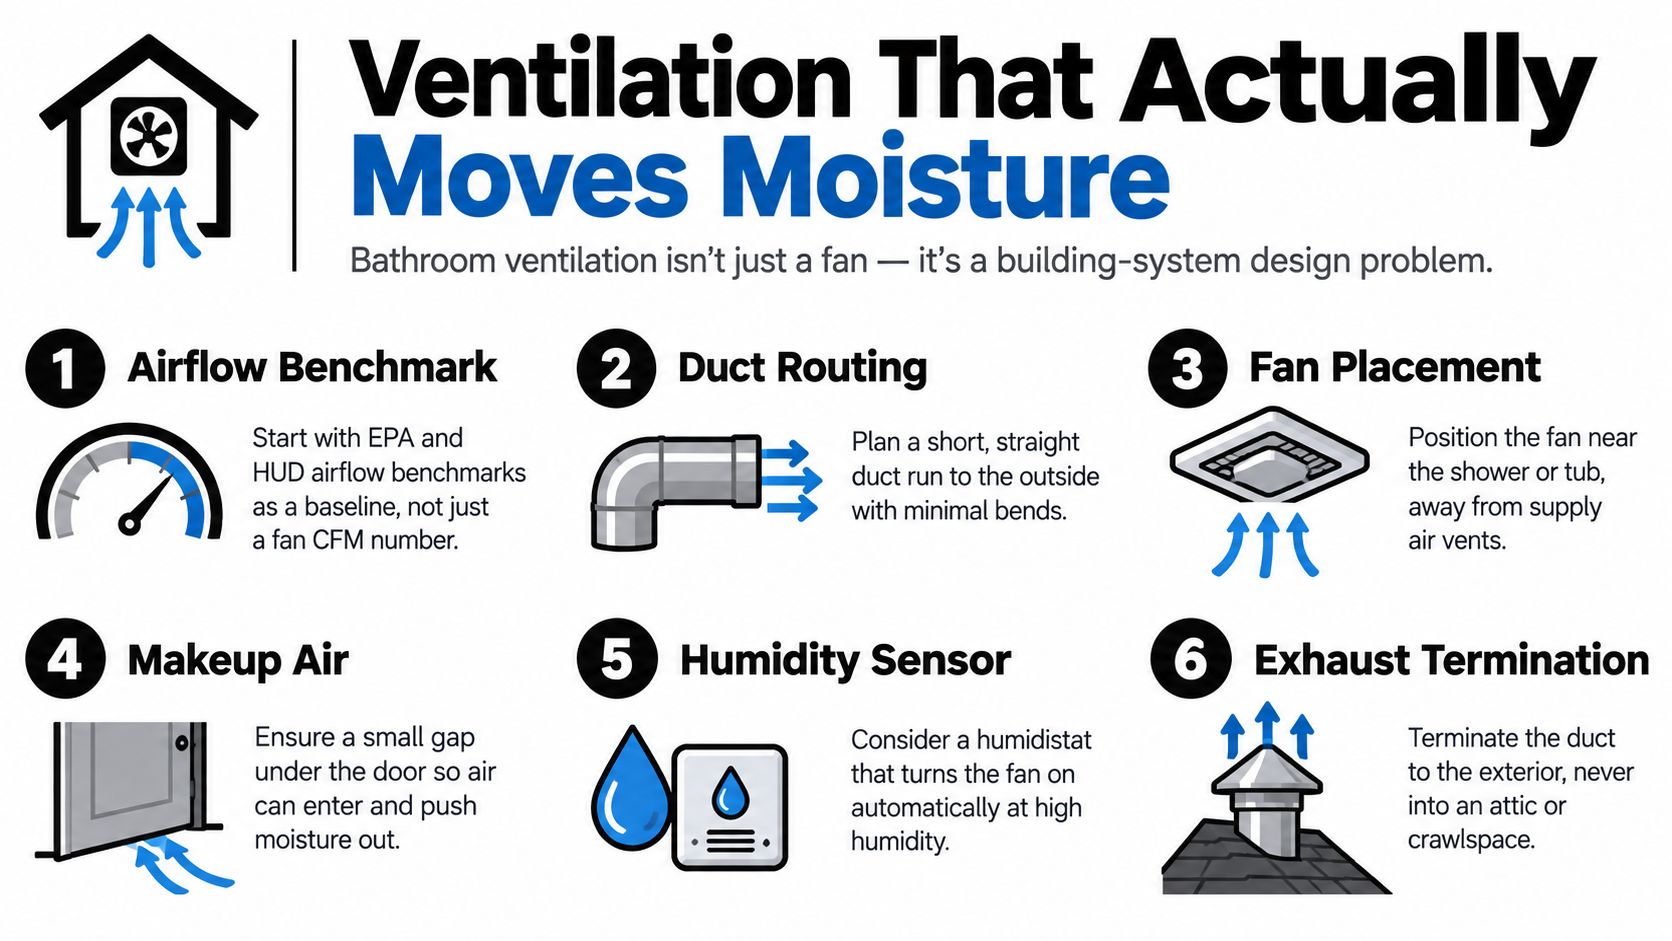
Size the fan for at least 50 cfm intermittent or 25 cfm continuous, then verify measured airflow after installation. A rating printed on the box does not confirm performance in your building.
Resolve the route before selecting the fan
Ask where the existing exhaust goes. A grille, a running motor, or an unexplained opening into a shaft is not verification. In a co-op or condo, have the building's representative confirm the permitted connection and whether the proposal affects a shared system.
A shared shaft needs investigation before anyone assumes it is suitable or defective. Hold off on a booster or a new connection until you know how the building system operates.
The design review should cover duct restrictions, bends, exterior discharge, replacement air entering the room, and condensation protection where ducts pass through cold areas. The door-gap suggestion in the infographic is a prompt to check replacement airflow. It is not permission to alter a rated door assembly.
A bathroom fan should be accepted on measured performance after installation, not on the sound of its motor.
Controls matter because occupants need a practical way to keep extraction running after bathing. A timer or humidity-sensing control handles this well, but verify the settings during commissioning. Factory configurations rarely match the room.
Require a ventilation closeout record
Ask the contractor to leave documentation that another technician could use:
- Equipment: Fan model and accessible service information.
- Performance: Measured airflow under the intended operating conditions.
- Duct route: Recorded path, relevant restrictions, and accessible connections.
- Discharge: Verified termination or approved building-system connection.
- Controls: Control type, operating settings, and homeowner instructions.
Moisture control also depends on the surrounding construction. A moisture-resistant finish can't compensate for weak drying, and a strong fan can't correct a defective shower assembly. Sign off on the bathroom only after both systems have been checked independently.
Accessibility That Does Not Look Like a Hospital
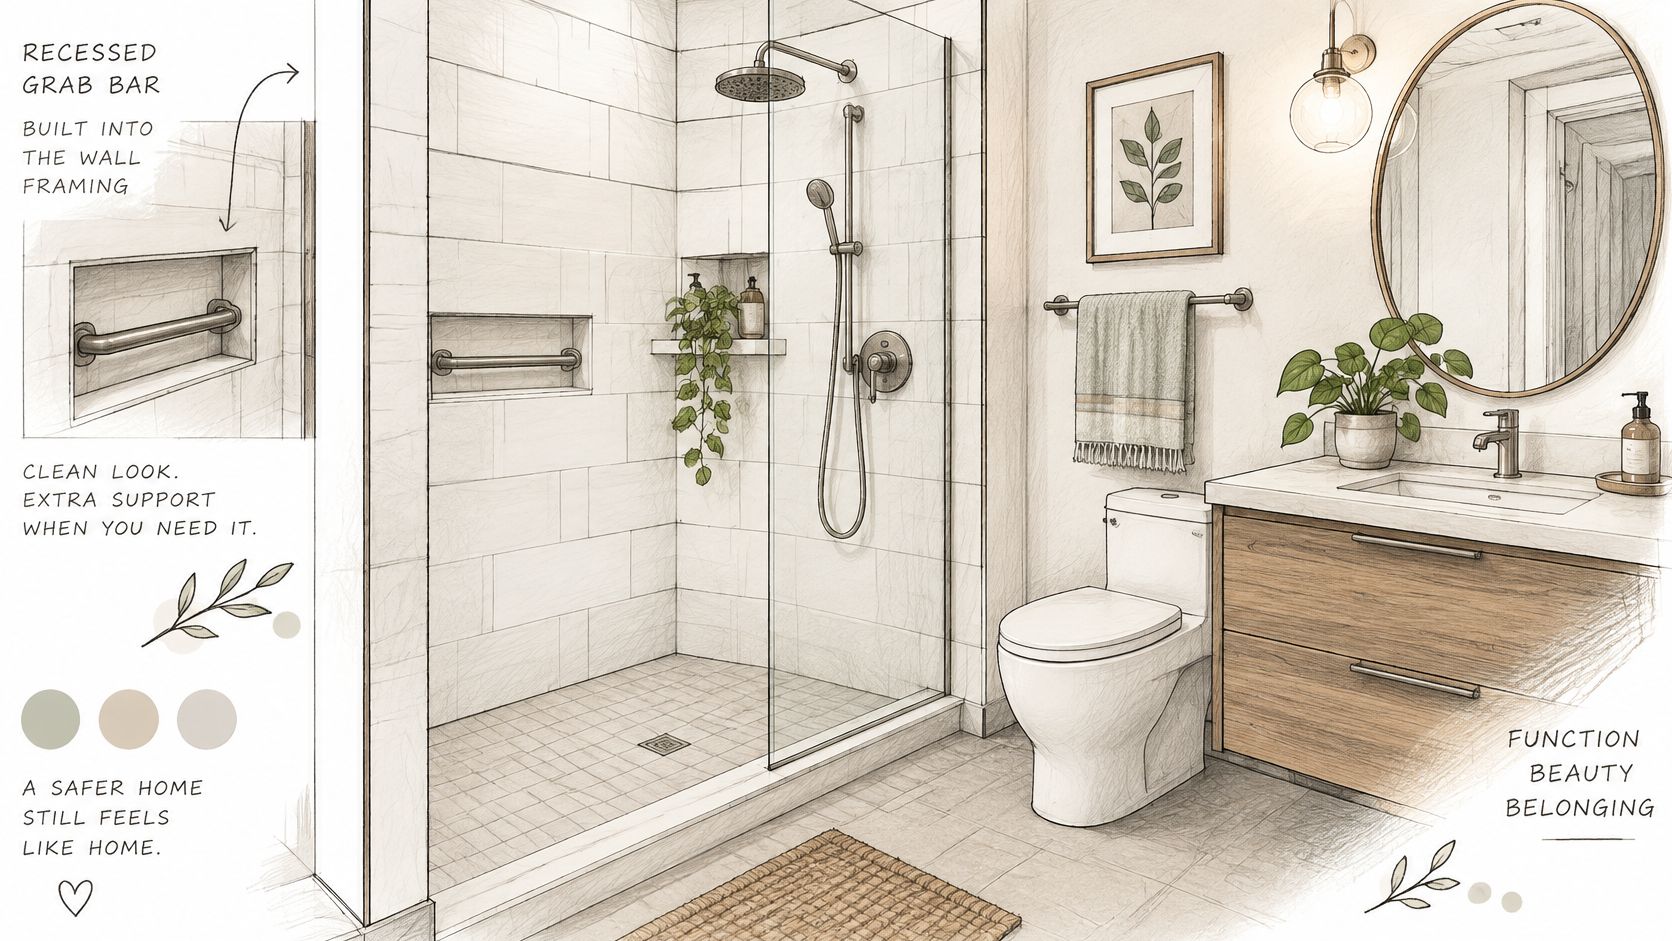
The least visually intrusive accessibility decisions happen before the walls close. Blocking for future grab bars, reachable controls, and a usable entry can all be built into the framing and rough-in, and none of it shows in the finished room.
In most small-bathroom renovations we plan in older co-ops and walk-ups, owners ask for grab-bar backing, nonslip flooring, and a low-curb or curbless shower entry, even when nobody in the household currently needs assistance. What they rarely think to ask about is the part that matters later: where that backing sits once tile goes up. Record the blocking locations with measurements and photos before finishes conceal them. A future grab bar installed into tile without blocking behind it is a wall repair waiting to happen.
Choose usability over appearance alone
A curbless shower works well when the floor structure allows it. Many prewar buildings have joist layouts and floor depths that make a true recess impractical without structural work, so a low-curb entry may be the honest answer. Check the floor assembly with your contractor and designer before committing to either one.
Plan support and reach around the person using the bathroom:
- Reinforcement: Record proposed grab-bar locations and backing before finishes conceal them.
- Seating: Check a fold-down seat in both positions, including the remaining standing and entry space.
- Shower controls: Coordinate handheld-shower placement and valve access from the intended seated or standing position.
- Hardware: Test whether handles and controls are comfortable to operate.
A floating vanity opens up the floor visually but removes storage a small room often needs. A wall-hung toilet helps circulation, though its carrier, wall depth, and service access need deliberate planning in a prewar shaft. Pick these fixtures for how they function, not for visual lightness.
Voluntary universal-design choices and formal accessibility compliance are different things. Ask the design professional which requirements apply to your property and scope, then check the proposed layout against them. Have the building review any floor or wall changes before those choices become purchase commitments.
For owners planning to stay long-term, daily comfort carries more weight than any label. Check where towels, toiletries, and cleaning supplies will live, and whether a second person could assist comfortably if needs change.
Permits, Approvals, and Your Project Timeline
Don't choose a demolition date before establishing who must approve the work. A contractor's availability, building permission, and authorization to perform regulated work are separate matters. Your schedule needs to account for each.
For NYC work, ask the contractor and design professional to identify the applicable DOB filings, trade permits, inspections, and sign-offs. Have them explain how proposed plumbing, electrical, ventilation, or structural changes affect that scope. Don't accept a blanket assurance that a small bathroom doesn't need permits.
Build the schedule around decision gates
Require a written approval and responsibility list before construction:
- Contractor credentials: Verify the applicable NYC DCWP Home Improvement Contractor license and the licensed trades responsible for regulated work.
- Building authorization: Obtain the alteration agreement, submission requirements, work-hour rules, protection requirements, and access arrangements.
- Existing-material review: Establish whether suspect materials require testing and what lead-safe containment practices apply before disturbance.
- Procurement readiness: Confirm that critical rough-in components and approved selections are available.
- Inspection planning: Identify required checks before work is concealed and the documents needed for closeout.
For an apartment project, use the NYC co-op renovation approval guide to prepare for the building's review. In Westchester, confirm the relevant local approval process rather than assuming NYC procedures apply.
A credible schedule runs from site investigation through design, approvals, procurement, demolition, rough work, testing, finishes, and punch-list completion. Ask which activities depend on outside review or concealed conditions. Avoid treating every delay as something the construction crew can recover by working faster.
Translate package names into actual scope
Labels such as Refresh, Full Remodel, and Gut Renovation don't establish a small-bathroom price by themselves. Ask what each category includes for your room, what remains untouched, and which unresolved conditions could change the contract.
Bring direct questions to the consultation: Who obtains approvals? What must arrive before demolition? How are change orders authorized? What tests and sign-offs will I receive? If this is your only bathroom, establish the household's temporary arrangements before work begins.
Excellent Home Improvement offers bathroom design, material sourcing, and construction coordinated by a dedicated project manager. Visit Excellent Home Improvement to request a site walkthrough and discuss a written scope covering your small bathroom's layout, waterproofing, ventilation, and applicable building approvals.