Cost to Add a Shower to Half Bath Pricing Guide
Learn the cost to add a shower to half bath, from plumbing and waterproofing to NYC permits. Get real price ranges and what drives your total.
By Excellent Home Improvement

About $8,044 on average is a realistic starting point for the cost to add a shower to a half bath, with a broad project range of roughly $3,000 to $12,500. Labor alone may account for about $2,778, but the final price depends less on the shower fixture than on the plumbing, drain slope, venting, waterproofing, permits, and condition of the room.
You may be standing in a small powder room right now, looking at the toilet and sink and wondering whether a shower can fit beside them. The catalog price of a shower kit can make the job look straightforward. In a New York City apartment, brownstone, or older house, however, the visible fixture is only the last layer of the work.
Whether the room can support a shower as a complete system is the question. Water must reach the valve, wastewater must leave through a properly configured drain, the drain must connect to suitable venting, and the walls and floor must be sealed against constant moisture. A tight NYC footprint can make each of those tasks more involved.
Table of Contents
- Introduction: What Adding a Shower Really Costs
- Understanding the Half Bath to Shower Conversion
- Key Cost Factors That Drive Your Total Price
- Prefab Versus Custom Tiled Shower Options Compared
- NYC Permits Inspections and Building Approvals Explained
- Real World Examples and How to Keep Costs Under Control
- Planning Your Shower Addition With Confidence
Introduction: What Adding a Shower Really Costs
You are standing in a compact NYC powder room, measuring the space beside the toilet and sink. A shower kit may look like the main purchase, but it is only the visible finish. The project begins behind the walls and below the floor.
A half bath already has a toilet, sink, supply lines, and drainage. A shower still changes the plumbing system. It uses more water, needs a larger drain arrangement than a sink, requires a waterproof enclosure, and may force access through finished walls or flooring.
The clearest starting point is the about $8,044 average, including approximately $2,778 in labor, cited in this half-bath shower conversion estimate. That source also places potential resale return at up to 35%, so the work may support both daily convenience and added value.
Those figures describe a planning reference, not a fixed NYC price. A lower-cost conversion might use a prefabricated enclosure, leave the toilet and sink where they are, connect to accessible plumbing, and need limited finish work. A higher-cost job may require drain relocation, vent changes, floor access, extensive waterproofing, custom tile, glass, and building approvals.
Practical rule: Price the infrastructure before choosing finishes. A premium shower trim kit cannot correct a drain that cannot reach the waste line with the required slope.
The number behind the number
Independent estimates place the total project roughly between $3,000 and $12,500. A broader guide gives a range of $4,000 to $15,000, with many projects around $7,000 to $12,000. These figures come from a detailed shower addition cost guide. The spread reflects scope, location, materials, access, and the condition of existing construction.
For a NYC homeowner, treat the first estimate as a planning window. Before asking for a fixed proposal, identify usable wall space, floor access, the nearest waste stack, and the building's alteration requirements. Drain slope, venting, waterproofing, permits, and inspection access often control the budget more than the shower itself. Finish selections matter, but the hidden system determines whether the finished room works.
Understanding the Half Bath to Shower Conversion
A half bath normally contains a toilet and sink. Adding a shower turns it into a three-quarter bath, meaning it has a toilet, sink, and shower without a bathtub. In everyday use, that distinction matters less than whether the new room feels safe, drains correctly, stays dry outside the enclosure, and leaves enough space to use every fixture.
Think of the bathroom as a connected house system. The water supply is the delivery road, the drain is the exit road, the vent is the pressure-balancing route, and waterproofing is the protective shell. A shower addition touches all four. If one part is ignored, the finished tile can look perfect while the system underneath remains vulnerable.
Start with the room, not the fixture
Measure the room from finished wall to finished wall. Mark the door swing, toilet position, sink projection, windows, radiator locations, and any chase or boxed-in pipework. A corner enclosure may work where a rectangular unit doesn't, while a wall-mounted sink may preserve circulation in a narrow layout.
The shower needs usable interior space and clear access around the other fixtures. Exact requirements depend on the applicable code and building type, so a contractor should verify the layout rather than relying on a product drawing. In a co-op or condo, the building may also impose rules that are stricter than the basic municipal requirement.
Trace the plumbing path
The sink's nearby hot and cold lines may provide a convenient starting point, but the shower valve still needs correctly sized supply connections and accessible shutoffs. The drain is usually the larger challenge. The installer must establish a dependable path from the shower base to the building's drainage system, while preserving slope and connecting the trap and vent correctly.
The room may look shower-ready if the water lines are close. It isn't ready until the contractor confirms the drain route, vent access, floor depth, wall structure, and inspection requirements. For a broader overview of bathroom planning and construction coordination, homeowners can review this bathroom renovation resource.
Key Cost Factors That Drive Your Total Price
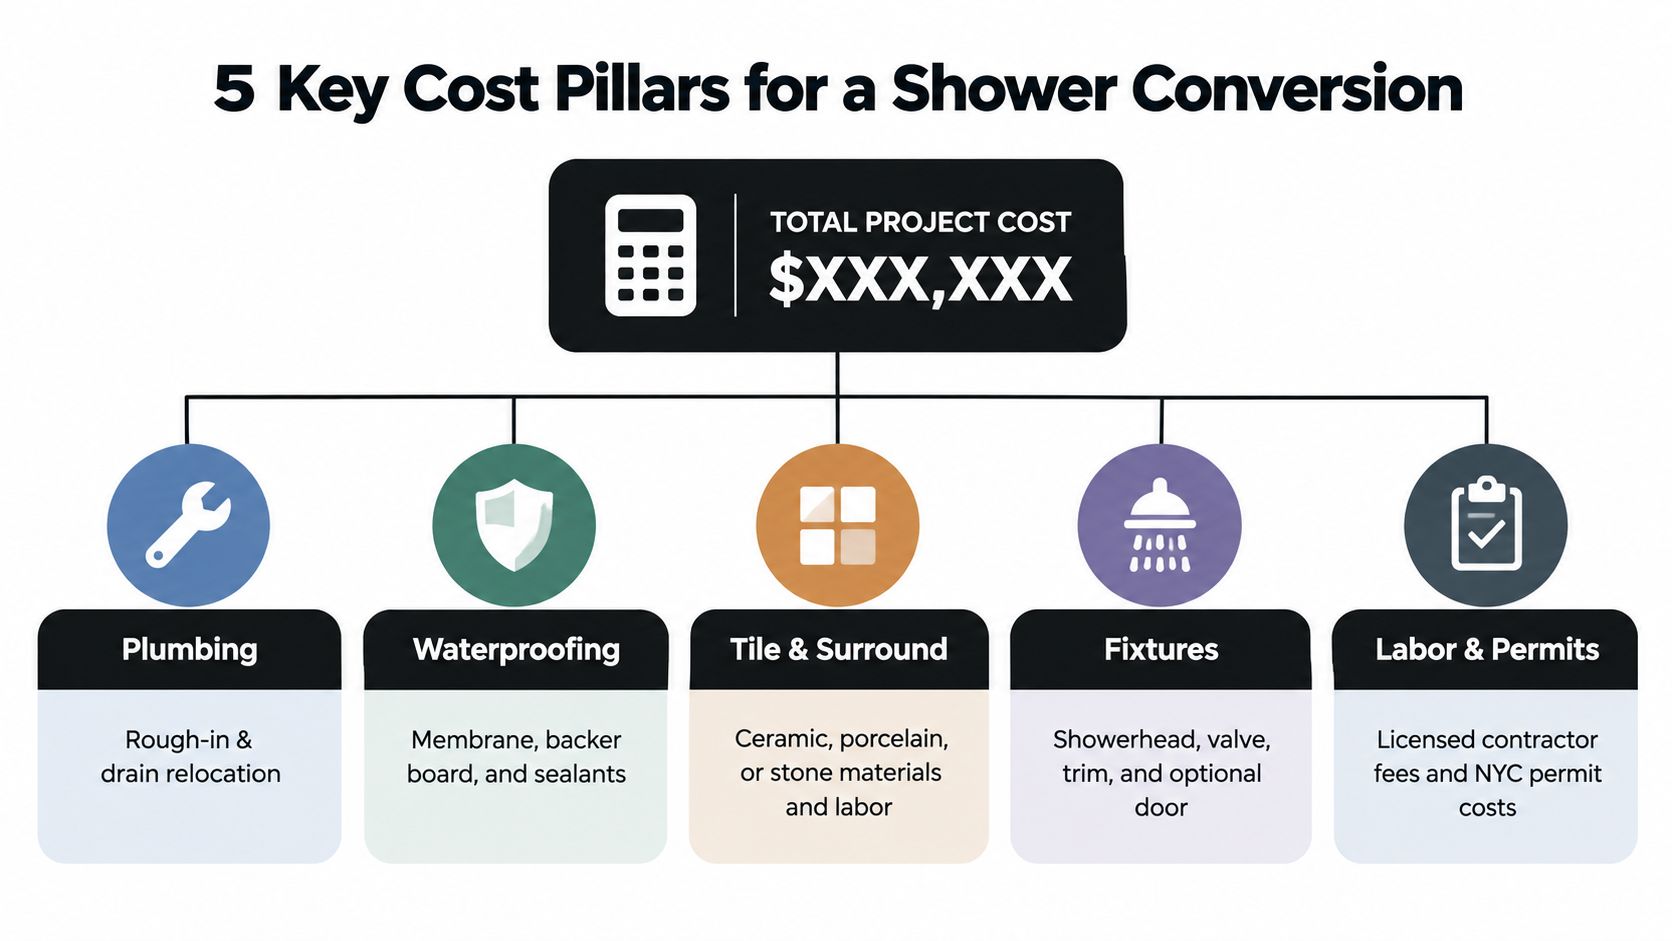
The final proposal usually reflects five budget pillars. They don't carry equal weight on every job, and they don't appear in the same order during construction. Hidden infrastructure comes first, while visible finishes often receive the most attention because homeowners can see them.

Plumbing and drain relocation
Plumbing creates the biggest swing when the existing lines don't cooperate with the new layout. Shower-only rough-in plumbing is commonly estimated at $1,000 to $2,200, according to rough-in cost guidance for shower plumbing. That work can include supply lines, the shower valve, the trap, the drain connection, and access through walls or floors.
A simple tie-in keeps the path short and accessible. A difficult one may require opening a slab, ceiling, chase, or finished wall. Vent stack work and main-stack connections can add substantial labor before anyone installs tile.
Waterproofing and the shower shell
Waterproofing isn't decorative preparation. It protects framing, subfloor, adjacent rooms, and the building below from the daily movement of water. A standard 40 to 60 square foot shower zone may carry waterproofing work estimated at $1,200 to $3,200, as described in bathroom waterproofing cost guidance.
The scope may include a shower pan or base, backer board, membrane, corner treatment, seam sealing, and careful transitions at the drain and threshold. Custom niches, benches, curbless transitions, and unusual wall conditions add detail and installation time.
Tile, surround, fixtures, and glass
A prefabricated surround reduces the number of site-built surfaces. Custom tile introduces more decisions, including tile format, pattern, trim, grout, waterproofing transitions, and layout around valves and niches. Stone can require more careful handling and support, while large-format materials demand a flat substrate.
Fixtures create a separate choice. A basic showerhead and trim package has a different material and installation scope from a system with a handheld wand, multiple controls, specialty valves, or a custom glass enclosure. The visible selections matter, but they shouldn't distract from the waterproofing assembly beneath them.
Labor, coordination, and access
Small bathrooms aren't automatically inexpensive. A tight room can slow every trade because workers can't stage materials, move tools, or work on multiple surfaces at once. In an occupied NYC building, elevator rules, hallway protection, limited work hours, and neighbor coordination can also affect the sequence.
The contractor is coordinating demolition, plumbing, electrical work, framing, waterproofing, tile, glass, painting, inspections, and cleanup. An itemized proposal should identify who handles each trade and which conditions are excluded or treated as allowances.
Permits and inspections
Permit work isn't just paperwork. It determines whether the proposed drain, venting, electrical changes, and layout can proceed lawfully. The building's approval process may add another layer, especially in a co-op or condo where the board, managing agent, architect, or engineer reviews the alteration.
Ask for permit and inspection responsibilities in writing. If the proposal says only “plumbing installation,” ask whether filing, rough-in inspection, wall closure, final inspection, and sign-off are included.
Prefab Versus Custom Tiled Shower Options Compared
The choice between a prefabricated shower and a custom tiled shower changes more than appearance. It affects how many pieces must be assembled on site, how the waterproofing is built, how precisely the enclosure must fit, and how much design flexibility you have in a room that may already be tight.
A prefab unit usually arrives as a coordinated base and wall system made from a manufactured material. A custom shower is built in place with a waterproofing assembly, tile, grout, and separately measured enclosure components. Neither approach is automatically right for every half bath.
| Feature | Prefab Shower Unit | Custom Tiled Shower |
|---|---|---|
| Cost logic | Often reduces site labor and finish complexity | Adds labor for waterproofing, tile layout, grout, and detailing |
| Layout | Works best when a standard shape fits | Can adapt more closely to unusual walls and tight corners |
| Waterproofing | Factory-formed surfaces simplify the enclosure | Requires careful field-built membrane and transition work |
| Appearance | Limited to available colors, profiles, and sizes | Broad choice of tile, trim, niches, benches, and glass |
| Maintenance | Fewer grout joints can simplify cleaning | Grout and surface details need regular care |
| Building access | Large panels may be difficult in narrow halls or stairs | Smaller components can enter challenging spaces |
| Repair considerations | Individual manufactured parts may be specific to the system | Tile and waterproofing repairs depend on the installation |
When prefab is the sensible choice
Prefab works well when the room can accept the available footprint and the homeowner wants a controlled, straightforward finish. It can reduce tile labor and simplify the number of field joints. That doesn't remove the need for proper drain connection, framing, valve installation, or code review.
Measure the route into the bathroom before ordering. A panel that fits the room may not fit through a stairwell, hallway, elevator, or apartment doorway. Confirm the drain location and valve height against the manufacturer's installation requirements.
When custom tile earns its place
Custom tile makes more sense when the room has an irregular footprint, when the shower must fit around existing openings, or when the design calls for a specific niche, bench, threshold, or glass arrangement. It also lets the enclosure visually continue the room's material palette.
The trade-off is execution. Tile is only the finished skin, so the contractor must build a properly sloped base and waterproof shell first. Homeowners planning that assembly can review this bathroom waterproofing guide before comparing tile samples.
NYC Permits Inspections and Building Approvals Explained
In New York City, adding a shower can affect plumbing systems that the building department and property owner need documented. The exact filing path depends on the work, the property type, and whether the project changes plumbing, electrical, walls, or other regulated elements. A licensed professional should confirm the requirements before demolition.
Follow the approval sequence
Start with a site assessment. The contractor or design professional reviews the existing conditions, sketches the proposed layout, traces plumbing routes, and identifies whether the work requires a Department of Buildings filing or other agency involvement.
Next, confirm who is authorized to file and perform the regulated work. The contract should identify the responsible licensed trades, insurance documentation, drawings, filing fees, inspection coordination, and closeout records. Don't assume a general statement such as “permits included” explains the entire process.
Prepare for inspection points
Inspectors may need to see rough plumbing before walls or ceilings are closed. The final inspection verifies that the completed installation matches the approved work and applicable requirements. If the contractor closes access too early, the team may need to reopen finished surfaces, creating avoidable cost and delay.
Co-op and condo owners face another checkpoint. The building may require an alteration agreement, insurance certificates, drawings, work-hour rules, protection plans, licensed-trade information, and board or managing-agent approval. This building-specific process should be mapped before materials are ordered. A useful reference for owners managing that layer is this NYC co-op renovation approval guide.
Document before demolition: Keep approved drawings, permit records, inspection results, invoices, and product information with the project file. Those records help answer questions during future repairs, refinancing, insurance review, or sale.
Unpermitted plumbing work can create problems when a buyer, insurer, lender, or building management requests documentation. Correcting concealed work after the fact can cost more than planning the filing and inspection sequence at the start.
Real World Examples and How to Keep Costs Under Control
Three half baths can look identical on a floor plan and produce very different proposals. The visible shower is only the finish layer. The larger cost question is what must happen behind it: drain slope, venting, waterproofing, access, and restoration.
Three planning scenarios
Scenario one, a contained prefab conversion. The room has enough wall space, the shower can stay near existing supply lines, the drain route is accessible, and the homeowner chooses a manufactured enclosure with standard trim. Savings come from limiting demolition, relocation, tile work, and wall repair.
Scenario two, a moderate custom conversion. The toilet and sink remain, but the new shower uses tile, a built-in niche, and a glass panel. Plumbing adjustments occur behind the wall, while the contractor builds a continuous waterproof shell. The finishes cost more, but the hidden work also requires closer coordination between trades.
Scenario three, a constrained NYC custom build. The powder room is narrow, the preferred shower location does not align with the waste path, and the building requires formal approvals. Floor or ceiling access may be needed for drain slope and vent connections. Custom glass, detailed tile work, protection, and restricted work hours can add coordination even when the shower footprint is small.
These models are for planning, not promised prices. As noted earlier, the project may fall within a broad $3,000 to $12,500 planning window, with broader guidance reaching $15,000, depending on scope and market conditions. The useful lesson is not the range alone. A vent relocation can require opening finished surfaces, while custom glass adds measuring, fabrication, and installation work after the walls are ready.
Control cost without cutting protection
- Keep the wet zone near existing plumbing: A shorter route usually means less opening, rerouting, and restoration.
- Confirm the drain path early: A shower needs proper slope and a workable connection, not only a nearby floor location.
- Measure access before choosing the enclosure: Confirm that the unit or glass can enter the building and fit the finished walls.
- Spend on waterproofing before decorative upgrades: Continuous membranes, drain transitions, corners, niches, valves, and thresholds protect the structure.
- Use a defined selection schedule: Finalize tile, trim, glass, valve, door swing, and accessories before installation.
- Request line-item pricing: Separate demolition, rough plumbing, vent work, waterproofing, tile, fixtures, glass, inspections, and patching.
- Bundle related repairs: If a wall or ceiling must open, address known plumbing or ventilation issues during the same access period.
A restrained fixture package over sound infrastructure can serve the home better than luxury trim over an uncertain drain. Control the hidden pathways first, then choose the finishes that fit the remaining budget and building limits.
Planning Your Shower Addition With Confidence
A credible estimate starts with a walkthrough, not a catalog. The contractor should measure the room, inspect the floor and walls, trace the supply and waste routes, evaluate vent access, identify the waterproofing assembly, and review the building's approval requirements.
Ask for a proposal that answers practical questions:
- Where will the shower drain connect?
- Does the plan require relocation or opening the floor, ceiling, or adjacent wall?
- How will the shower be waterproofed at the pan, corners, niches, valve, and threshold?
- Who files permits and schedules inspections?
- Which fixtures, tile, glass, protection, cleanup, and patching are included?
- What conditions could change the price, and how will written change orders work?
A fixed-price proposal is most useful when the scope is specific. It should identify allowances, finish selections, access assumptions, inspection responsibilities, and exclusions. In NYC, it should also account for building logistics rather than treating the bathroom as an isolated room.
Excellent Home Improvement provides design, material sourcing, project management, and construction for bathroom renovations, with permit support and licensed crews for applicable work. That type of single-team coordination can help homeowners evaluate the hidden infrastructure before committing to visible finishes.
Excellent Home Improvement can assess your half bath layout, plumbing access, waterproofing needs, and NYC approval path before you choose a shower system. Visit Excellent Home Improvement to request a project conversation and move toward a detailed, fixed-price renovation proposal.