Do You Have to Prime Before You Paint? Yes and No
Do you have to prime before you paint? Not on every wall. Match your surface to the right primer, or skip it when the old paint is sound.
By Excellent Home Improvement & Remodeling
Primer gets sold as a rule: always prime, every wall, every time. Walls disagree. You don't have to prime before every paint job, but porous, patched, stained, glossy, chalky, or dramatically recolored surfaces do need the right primer. A sound wall already painted a similar color usually needs only cleaning and spot priming.
Most advice fails in both directions. One camp says always prime; the other says a paint-and-primer-in-one handles everything. Both dodge the question that decides the job: what condition is this surface in right now? Clean, dull, intact, and close in color means paint goes straight on. Repairs, stains, slick gloss, or bare spots mean primer comes first.
Painting over a surface that needs priming is like wearing a raincoat for a swim. The garment looks right until it meets conditions it was never built for. Finish paint adds color and protection, and one more coat can't take over primer's job. When the underlying problem is dust, grease, gloss, or moisture, the fix has to match it, or the finish still peels, flashes, or bleeds.
Table of Contents
- When You Must Prime and When You Can Skip
- Lead Safety Before You Sand or Prime
- Why Primer Pays Off and When a Sound Wall Does Not Need It
- Rooms Where One Rule Does Not Fit
- How to Choose and Apply the Right Primer
- Confirm the Surfaces Before You Open a Can
When You Must Prime and When You Can Skip
A surface-by-surface decision beats a rule about primer. The bonding primer technical guidance draws the line at the coating itself: if the existing coating is sound, clean, dull, and similar in color and sheen, a quality paint-and-primer product may be sufficient; glossy or hard, slick surfaces should be dulled by sanding and coated with a bonding primer when they remain difficult to coat.
Read the table like triage. The top row asks for the least work, and each row below adds a specific reason to prime. The "Primer job" column names what the primer has to do, and the "If you skip it" column shows what goes wrong when that job is left undone.
Prime or Skip by Surface
| Surface | Prime? | Primer job | If you skip it |
|---|---|---|---|
| Sound previously painted wall, similar color and dull sheen | Spot prime nicks only | None if clean and compatible | Usually acceptable after cleaning |
| New drywall and joint compound | Yes, full prime | Seal uneven absorption | Flashing, uneven sheen, extra topcoats |
| Patched drywall or plaster repairs | Yes, at least spot prime | Equalize porosity | Repair flashes through the finish |
| Bare wood, including trim and doors | Yes | Seal grain and tannins | Blotchy sheen and bleed-through |
| Glossy or slick trim, laminate, or hard coatings | Yes, after deglossing | Bonding primer for adhesion | Peeling or poor stick |
| Water, smoke, grease, or marker stains | Yes | Stain-blocking primer | Stain bleeds into the finish |
| Dramatic color change, especially dark to light | Yes, often tinted | Hide and uniform base | Show-through and extra finish coats |
| Porous masonry, brick, stucco, or chalky exterior paint | Yes | Seal and bind the surface | High paint use and weak adhesion |
Start with the easiest row. A previously painted bedroom wall in good shape, going from a pale gray to a slightly warmer off-white, doesn't need a full prime. Wash it, let it dry, spot prime any nicked or sanded spots where you broke through to bare material, and paint. A spot prime here is the correct amount of work. A full coat would have nothing to fix.
New drywall sits at the opposite end. The paper face and the joint compound over seams and screws don't absorb at the same rate, so finish paint dries shinier in one place and flatter in another. Patches behave the same way on a smaller scale. A repair that looks invisible before painting can show up as a dull island afterward because the compound drank more of the finish than the surrounding paint did.
The skip in the top row is conditional on prep. Clean means no grease, dust, or wax film. Dull means no gloss. Compatible means the old coating is sound and not chalky or peeling. Miss one of those and the top row no longer applies. You are back to a primer job, even if the wall color is close.
A paint-and-primer-in-one has a place on that sound, compatible, previously painted wall. It does not replace a bonding primer on slick trim, a stain blocker over water marks, or a sealer on new drywall.
Lead Safety Before You Sand or Prime
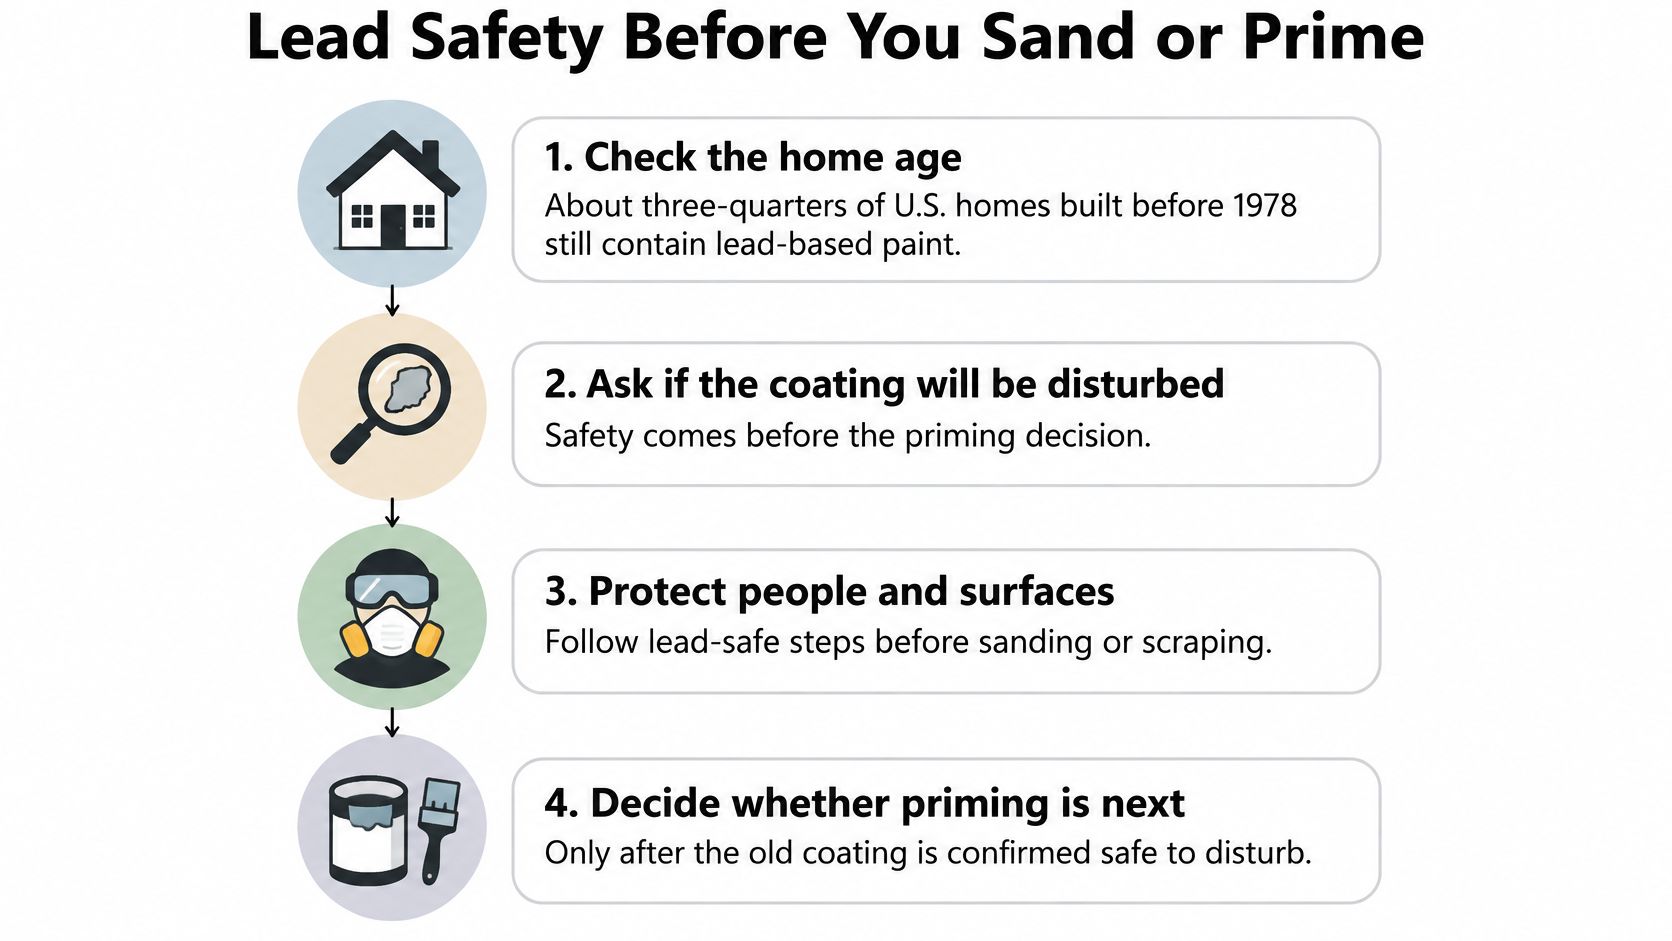
In an older home, whether to prime is not your first decision. Whether it is safe to disturb the old coating is. Prep is where the hazard lives, because sanding, scraping, cutting, and demolition are what turn old paint into dust.
The scale of that risk is easy to underestimate. The U.S. Environmental Protection Agency lead renovation program reports that approximately three-quarters of U.S. homes built before 1978 still contain some lead-based paint, including 87% of homes built before 1940 and 24% of homes built from 1960 through 1978, and its renovation standard treats a coating as lead-based at 1.0 milligrams per square centimeter or 0.5% by weight. The federal government banned the sale of lead-based paint for residential use in 1978, but that ban did nothing about coatings already on walls in older apartments, brownstones, and houses.
The Sequence That Keeps Primer in Its Place
Paid renovation, repair, or painting work that disturbs painted surfaces in a pre-1978 home generally falls under EPA's Renovation, Repair and Painting Rule. Affected components must be tested or presumed to contain lead unless testing establishes that the coatings fall below those federal thresholds. In practice, that flips the usual order of operations:
- Determine the building age: Treat a pre-1978 coating as suspect until you know otherwise.
- Test or presume: Do not guess based on how the top layer looks, since older layers sit underneath it.
- Contain and minimize dust: Use approved lead-safe preparation and cleanup, not open dry sanding.
- Let the surface dry, then prime: Primer comes after safe prep, as part of the new coating system.
- Apply finish coats: The topcoat is the last step, not a way to bury a prep problem.
Primer's three jobs are sticking, sealing, and blocking stains. Neutralizing a hazard is not on that list. Rolling a bonding primer over a chalking, peeling lead-era coating does not make the dust you already created safe, and it does not make an unstable film stable. A coat of primer over a lead problem works about as well as a bandage over a splinter: it covers the issue while leaving it in place.
Why a Small Job Still Counts
Many homeowners believe lead rules apply only once demolition starts. A small-looking scrape on a door casing or a sanded patch on a prewar wall can become regulated work the moment paint is disturbed. Aggressive dry sanding, abrasive blasting, or uncontrolled scraping can be unsafe or prohibited when lead paint is involved.
The people at highest risk in an occupied home are children and pregnant people, and lead dust does not stay politely inside the room where you made it. It settles on floors and sills and gets tracked through the rest of the home. That is why the responsible move in older New York housing is to have a lead-safe certified firm judge the scope before walls, trim, doors, or ceilings get sanded. In that context, primer is one late step in a risk-control process, not a cosmetic shortcut you reach for first.
Why Primer Pays Off and When a Sound Wall Does Not Need It
A dinner-plate patch of joint compound can look perfect under flat ceiling light, then turn into a dull circle at four in the afternoon when sun rakes across the wall. The paint did not fail. The patch absorbed more paint than the sealed coating around it, so it dried flatter and slightly darker. Spot priming that one repair lets it absorb at the same rate as the rest of the surface.
That is the payoff in one sentence. Primer makes mismatched areas accept finish paint the same way.
The EPA renovation guidance for older painted surfaces describes the order as clean and prepare, allow the surface to dry thoroughly, apply a high-grade primer, then apply one or two topcoats. Drywall compound, bare wood, masonry, and old paint pull paint in at different rates, so the primer coat evens out that absorption before color goes on.
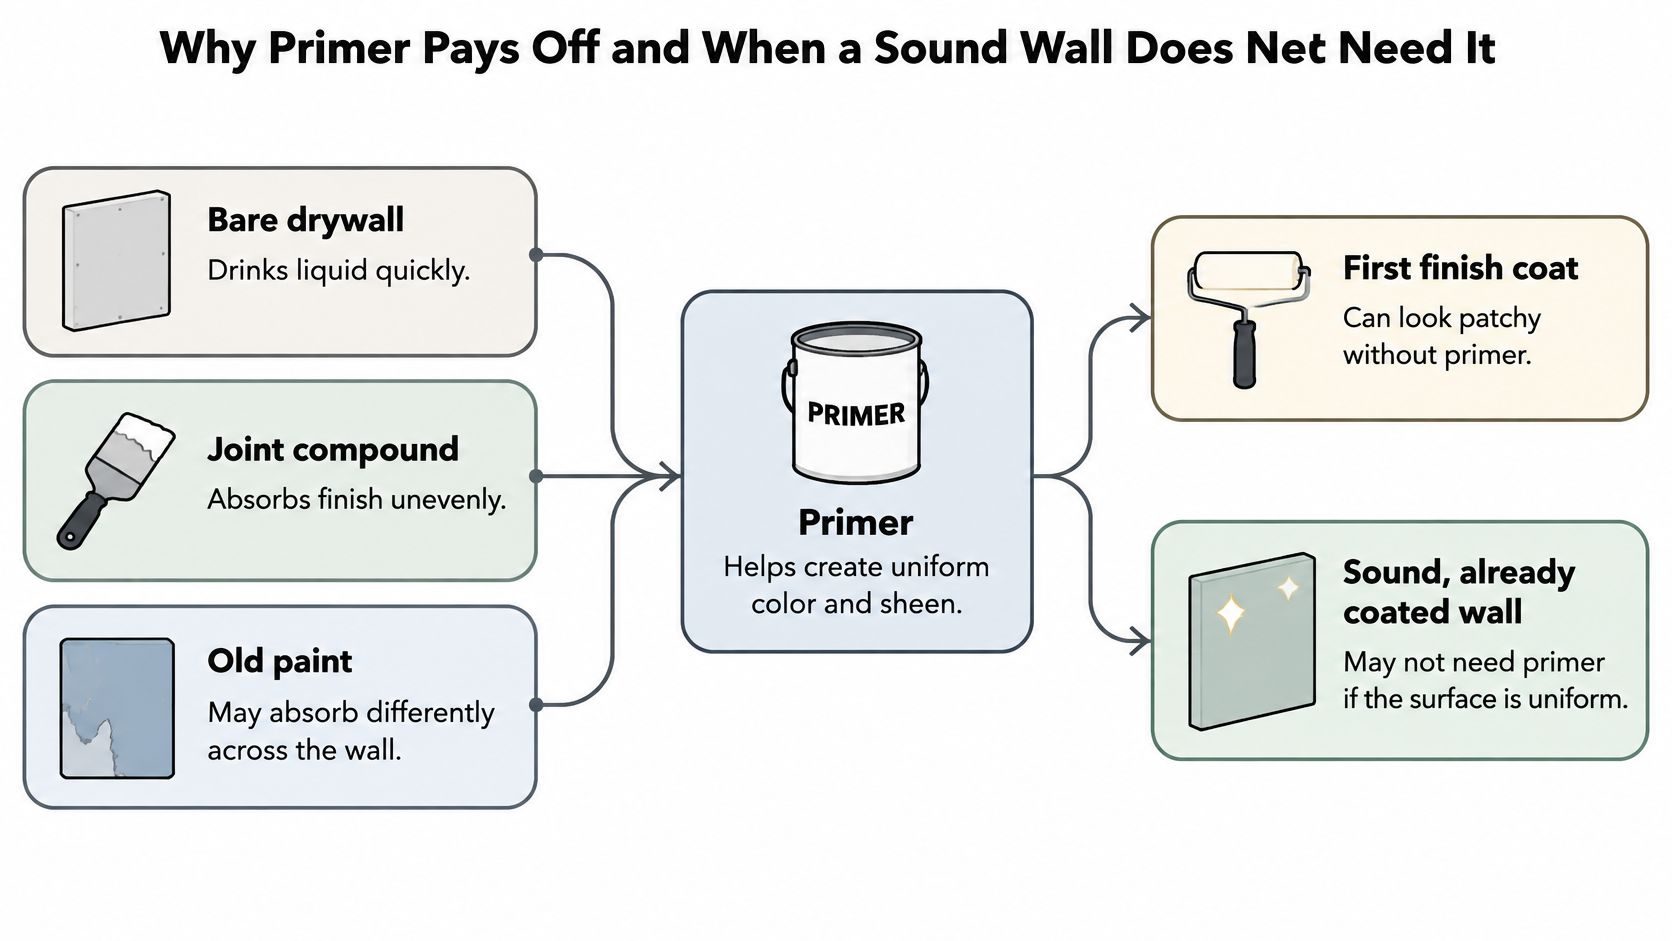
It helps to sort primers by the job they do. One type seals porous material so repairs do not flash through. A second type bonds to hard or chalky film where ordinary paint would sit on the surface without holding. A third type blocks water marks, smoke, and wood tannins from migrating into the color coat. Matching the product to the surface is what decides whether the coat holds for years.
The results show up in simple ways. Sheen stays even from corner to corner. A color change covers in two finish coats instead of dragging into a third and fourth. A repaired leak stays hidden instead of returning as a yellow halo. Finish paint is formulated for color and durability, not for soaking into raw gypsum, so letting primer do the sealing keeps the more expensive paint where it performs best.
Primer fixes a surface that is clean, dry, and sound but mismatched. It cannot fix an unstable coating.
The exception is real. A wall that is sound, clean, dull, and close in color and sheen to the new paint often needs only washing and spot priming of nicks and filled holes. There is no porosity gap, no slick film, and no stain to defeat, so a full prime adds little.
Use a one-line test before you open the can. Name the specific problem the primer solves on that surface. If you can name it, prime for it. If you cannot, paint.
Rooms Where One Rule Does Not Fit
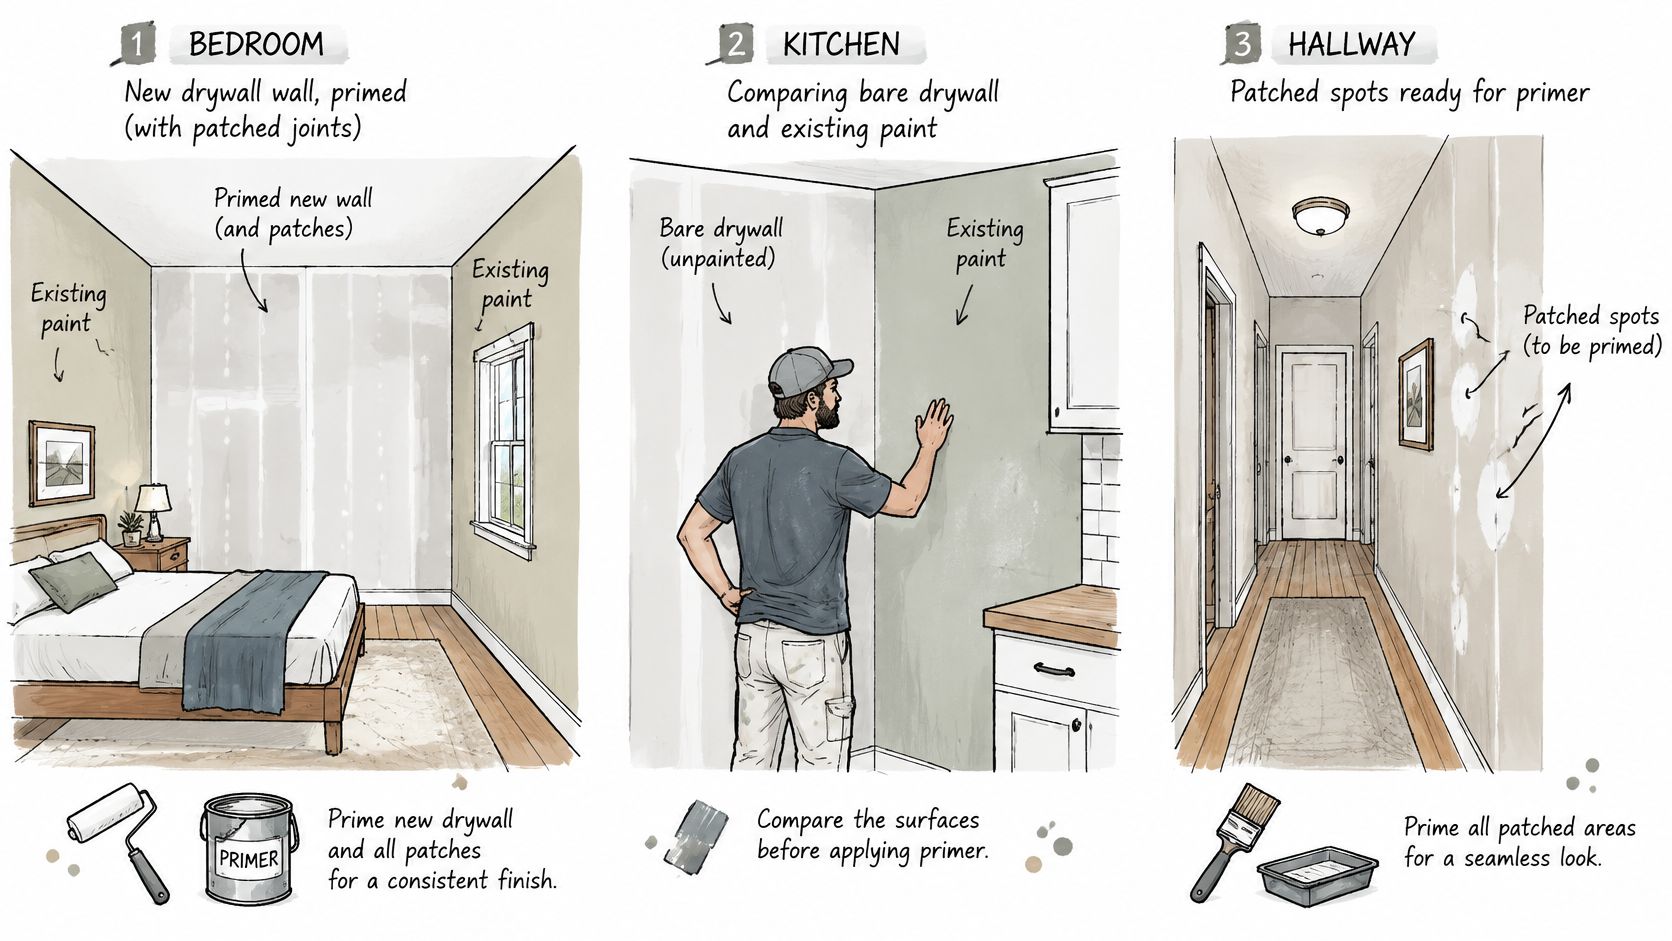
A single bedroom can hold four surfaces wearing one color: sound old paint, raw drywall, joint-compound patches, and enamel trim. Each one answers the primer question differently, which is why a blanket yes or no falls apart once the work starts.
A Bedroom With One New Wall
A closet relocation leaves one bedroom wall in fresh drywall while the other three carry sound old paint. The room doesn't get treated as a unit. The new wall and every joint-compound patch get a drywall primer after the sanding dust is wiped away, because dust under primer becomes a weak layer you're painting onto. The intact old paint gets washed, dried, and spot primed only where nail holes were filled.
Then the color decision changes the answer again. If the whole room is going from deep green to off-white, the old walls now need a tinted primer too, because the challenge there is hide rather than porosity. Same room, same walls, two different reasons to prime.
A Hallway With Glossy Trim and a Stained Ceiling
Hallways collect the mismatches. The trim might be old glossy oil enamel, hard as a countertop, while the ceiling carries a brown ring from a bathroom leak upstairs. Those are two unrelated failures sharing a ladder.
Degloss the trim with a scuff sand, wipe it clean, and use a bonding primer so the new enamel has something to hold. On the ceiling, fix the leak first, let the plaster dry fully, then use a stain-blocking primer on the ring. A drywall primer won't lock that stain. It'll seal the surface nicely while the brown migrates straight through your new white ceiling within weeks.
A Kitchen With Grease and Cabinets
Kitchens add contamination. The wall behind and above a stove carries a film of cooking grease you can feel more than see. Prime over it and the coating can crawl, fisheye, or peel in sheets later. Degrease with a suitable cleaner, rinse, and let it dry first, because the primer will bond to whatever it touches, and a film of grease is what it would be touching.
Cabinets are a separate system entirely, with their own degreasing, sanding, and sprayed lacquer or enamel schedule, so wall primer logic doesn't transfer to them. If you're weighing a cabinet refinish alongside the walls, look at how painted and stained cabinet finishes are built up as their own coating system rather than treating doors and boxes like more drywall.
The same sorting works everywhere else. A bare wood door needs sealing so grain and knots don't telegraph. Porous brick needs a masonry sealer so it stops drinking finish. Chalky exterior siding needs a binder so the new film has something solid to grip.
When a finish peels or flashes early, the paint usually takes the blame and the primer choice escapes it. A universal primer over untouched gloss peels. A paint-and-primer-in-one over a fresh patch flashes. In both cases the finish coat performed the way it was made to; the layer underneath was chosen for the wrong problem.
How to Choose and Apply the Right Primer
Start with the job the primer has to do. Primer is three tools in one aisle: adhesion for slick or hard coatings, sealing for thirsty or patched surfaces, and stain blocking for marks that bleed through color. A bathroom can need all three on different surfaces, while a sound hallway may need only spot priming.
Primer Type Matched to the Problem
| Primer family | Main job | Choose it when the signal is | Where it fits in the sequence |
|---|---|---|---|
| Drywall or PVA-style primer | Evens out absorption | New board, joint compound, wide patchwork | After the dust wipe-down, before finish coats |
| Bonding primer | Adds grip to a hard-to-coat film | Deglossed enamel, trim, factory-hard coatings | After cleaning and scuffing, before finish coats |
| Stain-blocking shellac or oil primer | Locks in bleed-through | Water rings, smoke residue, knot tannin | Spot first, then widen only if the area demands it |
| Masonry or alkali-resistant primer | Prepares porous mineral surfaces | Brick, stucco, concrete, chalky exterior | After drying and de-chalking, before exterior finish |
| Rust-inhibitive metal primer | Helps resist corrosion | Bare or prepared metal | After rust removal, before a compatible topcoat |
A drywall primer is a sealer: inexpensive, flat, and built to equalize absorption over gypsum and compound. A bonding primer is for grip on coatings that still resist paint after deglossing. A stain blocker, often shellac or oil based, is for water marks, smoke, and knots that would otherwise keep migrating. Masonry and metal primers solve chemistry problems, alkalinity in one case and rust in the other, so keep them off ordinary drywall.
If you want that sorting folded into prep, our interior and exterior painting services include patching, sanding, and priming before finish coats go on.
The Order That Makes Primer Work
Readiness comes before product. The surface has to be clean, dry, dull enough to grip, and free of joint-compound dust. Drying stages also mean different things: a primer can stop feeling tacky, become ready for the next coat, and still need more time to reach full hardness, so use the label or data sheet for that specific can rather than judging by touch alone.
- Fix the cause first: Stop the leak, let plaster dry, and remove grease before coating anything.
- Clean and dry thoroughly: Wash, rinse, and give the surface real drying time beyond a dry feel.
- Wipe new drywall: Use a damp cloth or tack cloth to pull joint-compound dust off seams and patches.
- Dull glossy coatings: Scuff sand with fine grit, wipe away the dust, and in a pre-1978 home degloss only in a lead-safe way.
- Prime the problem area: Go full wall on new drywall or a major color change, and spot prime small patches in sound paint.
- Respect recoat time: Cold rooms, humidity, poor ventilation, and thick film can slow the schedule, so do not rush the next coat.
- Apply one or two finish coats: Let the primer handle sealing and adhesion so the finish can handle color and durability.
That last timing point trips people up because the same product passes through stages. A coating can be dry enough to recoat while still too soft for doors, trim, and shelves that get handled, bumped, and cleaned.
Field check: Look down the wall in raking light for even sheen, confirm no stain halo is showing, and after cure make sure trim paint does not scrape off under a fingernail.
Keep paint-and-primer-in-one where it belongs. On a sound, compatible, previously painted wall, it is a reasonable one-can choice. On raw drywall, gloss, stains, or masonry, it is finish paint being asked to solve a problem it was not formulated for.
Confirm the Surfaces Before You Open a Can
You can make this decision standing in the room with a short list. Which surfaces here are new, patched, bare, glossy, stained, chalky, or changing color in a big way? Everything on that list gets a matched primer. Everything else gets washed, dried, and spot primed at the nicks.
If the coating is sound, clean, dull, and close in color, paint it yourself with confidence. That's a weekend job with no hidden traps. Wash the walls, fill and spot prime the small repairs, cut in carefully, and roll two finish coats.
Stop and get help when the surfaces stop being simple. If the building is pre-1978, if the plaster is cracked or damp, or if you're looking at layers of unknown coatings, don't start sanding and don't treat primer as the fix. Have a certified lead-safe contractor check the scope first. Fix any leak or moisture source before repair work too, and let plaster and drywall repairs finish and dry before paint, which is why our drywall installation and repair work covers prewar plaster cracks, water stains, nail pops, and skim coating before any paint is applied.
For a larger project, ask for a written scope that lists each surface and what it gets. Step 1 of our painting projects is a free on-site color and scope visit, where every surface is measured and checked for moisture, plaster damage, or lead-era coatings. That visit is where the prime or skip call gets made surface by surface instead of guessed at.
Bring your own list to that conversation. Note which walls are new, which are patched, which trim is glossy, where the stains are, and how far the color is moving. For timing expectations, a single room paint job usually takes one to two days, and a full three-bedroom interior takes five to ten working days including prep, two finish coats, and touch-ups. Most of that spread is prep and priming, which is exactly the part that decides whether the finish lasts.
If you're unsure which of your walls need sealing, bonding, or stain blocking, we can walk the rooms with you, check for moisture, plaster damage, and lead-era coatings, and put a surface by surface priming and painting scope in writing before any can is opened. Visit Excellent Home Improvement to request that free on-site color and scope visit and get a clear plan for your home.