How to Paint Interior Trim Like a Pro
Learn how to paint interior trim with expert prep, caulking, sanding, and brush techniques for crisp lines and a durable, flawless finish.
By Excellent Home Improvement
The baseboards are scuffed, the door casings have fingerprints, and the furniture has left a few dents at ankle height. Company is coming next weekend, so the temptation is obvious: buy a can of trim paint and knock it out on Saturday.
That approach works only when the existing finish is already sound. A durable, crisp result depends less on the final brush stroke than on what you decide before opening the paint. You need to identify the substrate, clean it properly, repair the damage, choose the right level of sanding and priming, then schedule coats around real drying and recoating times.
Table of Contents
- Why Trim Painting Rewards Patience
- Assessing and Prepping Your Trim Before Any Paint
- Filling, Sanding, and Caulking for a Smooth Surface
- Choosing the Right Primer and Paint Sheen
- Brush Techniques for Crisp Lines and a Durable Coat
- Finishing Touches, Cleanup, and Keeping Trim Looking New
Why Trim Painting Rewards Patience
Trim takes abuse that walls largely avoid. Shoes hit baseboards, vacuum cleaners catch corners, children grab door casings, pets rub against lower moldings, and furniture knocks the same exposed edges repeatedly. A wall may look acceptable after a quick refresh, while trim reveals every drip, brush mark, filled nail hole, and uneven joint.
A proper job includes cleaning, filling, sanding, caulking, priming, and finish coats. That doesn't mean every piece of trim needs the same amount of preparation. Sound painted trim with light wear may only need cleaning, abrasion, and targeted primer. Bare wood, glossy coatings, heavy repairs, stained surfaces, and peeling paint demand more.
Practical rule: The more damaged, glossy, porous, or uncertain the surface is, the less sense a quick cosmetic coat makes.
Drying time also controls the schedule. A trim paint specification can list 1 hour to touch, 4 hours to recoat, and 30 days to full cure at 77°F and 50% relative humidity. A primer specification may list 1 hour to touch and 2 hours to recoat under the same conditions, while deeper colors can require 4 to 6 hours to dry to touch and 6 to 8 hours before recoating. Check the product label because temperature, humidity, ventilation, color, and film thickness change the working window. PPG's product documentation illustrates why trim painting is scheduled work, not a race.
In occupied NYC apartments, I plan the work room by room. A contractor finishing guide allows 2 to 3 days for trim caulking, filling, and painting, while trim installation can take 5 to 8 days in a 2,000 to 2,500 square foot home. Those figures aren't a promise for every home, but they accurately reflect how preparation and access affect the calendar. The contractor guide also supports the practical sequence of completing trim after ceilings and walls.
Assessing and Prepping Your Trim Before Any Paint
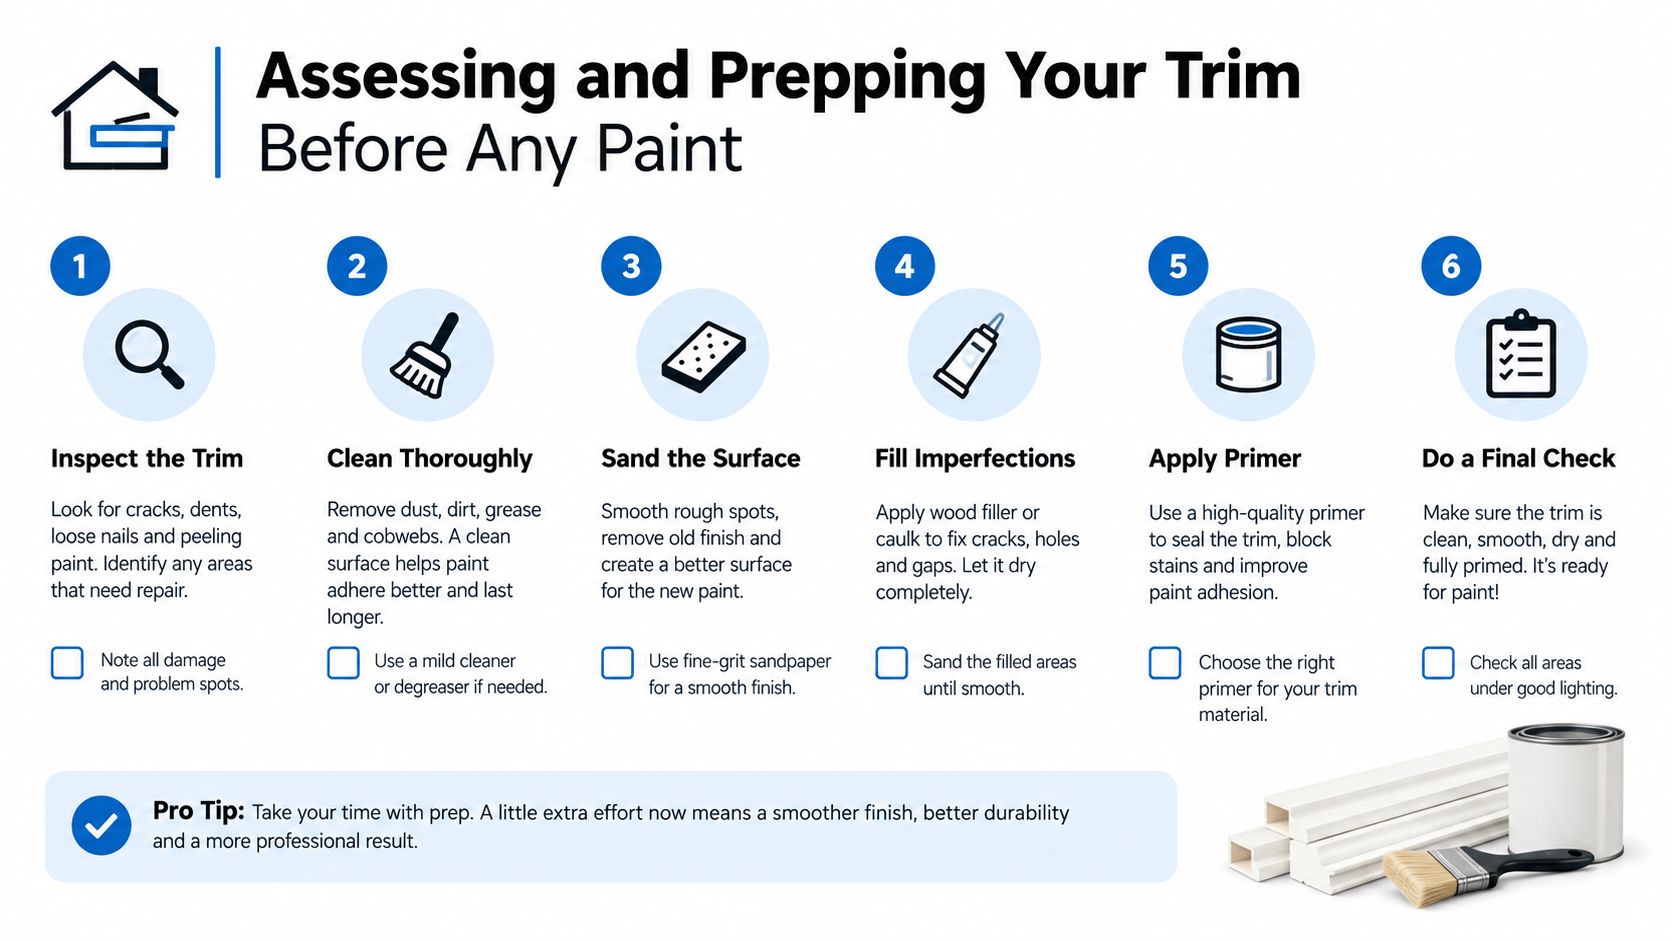
Don't touch the sandpaper until you know what you're painting. Trim may be solid wood, MDF, pre-primed finger-joint stock, or several generations of painted material. Each surface accepts repair products and primer differently, and an old glossy coating may need more abrasion than a factory-primed piece.
Older homes require an additional question: could this finish be historic fabric? The National Park Service emphasizes documenting and preserving distinctive finishes and craftsmanship, including recording interior paint layers for future investigation. In older residences, especially brownstones, rowhouses, and prewar apartments, original millwork may deserve preservation or refinishing rather than aggressive stripping. Historically, interior trim was often finished with shellac or varnish instead of opaque paint, so test a discreet area before assuming the wood should be repainted. National Park Service preservation guidance provides the underlying conservation principle.
Make the preparation decision
Use the surface condition, not a ritual, to choose the prep level.
- Sound painted trim: Wash away grime, lightly scuff the surface, remove dust, and spot-prime repairs.
- Bare wood or exposed MDF: Sand carefully, seal porous areas, and apply a compatible full primer coat.
- Glossy or unknown coatings: Clean thoroughly, abrade the sheen, and prime when adhesion is uncertain.
- Peeling, cracked, or heavily repaired trim: Remove unstable material, fill and sand defects, then prime the whole piece.
- Historic woodwork: Document the existing finish first, then decide whether preservation, refinishing, or repainting fits the material and the home's character.
Kitchen and hallway trim usually needs more than a dry dusting. Hand oils, cooking residue, shoe marks, and cleaning-product buildup can prevent adhesion. Use a suitable degreasing cleaner, rinse or wipe away residue as directed, and let the surface dry completely.
Remove knobs, stops, plates, and other hardware where practical. Mask adjacent walls only after cleaning and repairs, and use drop cloths that stay put under foot traffic. In an occupied apartment, protect floors beyond the immediate baseboard because a brush loaded with paint can flick farther than expected. If the scope involves historic materials, lead-safe concerns, or extensive millwork, review the considerations for hiring a licensed NYC contractor before disturbing old layers.
Filling, Sanding, and Caulking for a Smooth Surface
Small defects become more visible when trim has a reflective sheen. Nail holes, dents, open miters, and the narrow gap where baseboard meets wall all catch side light. Preparation is where a professional finish is built.
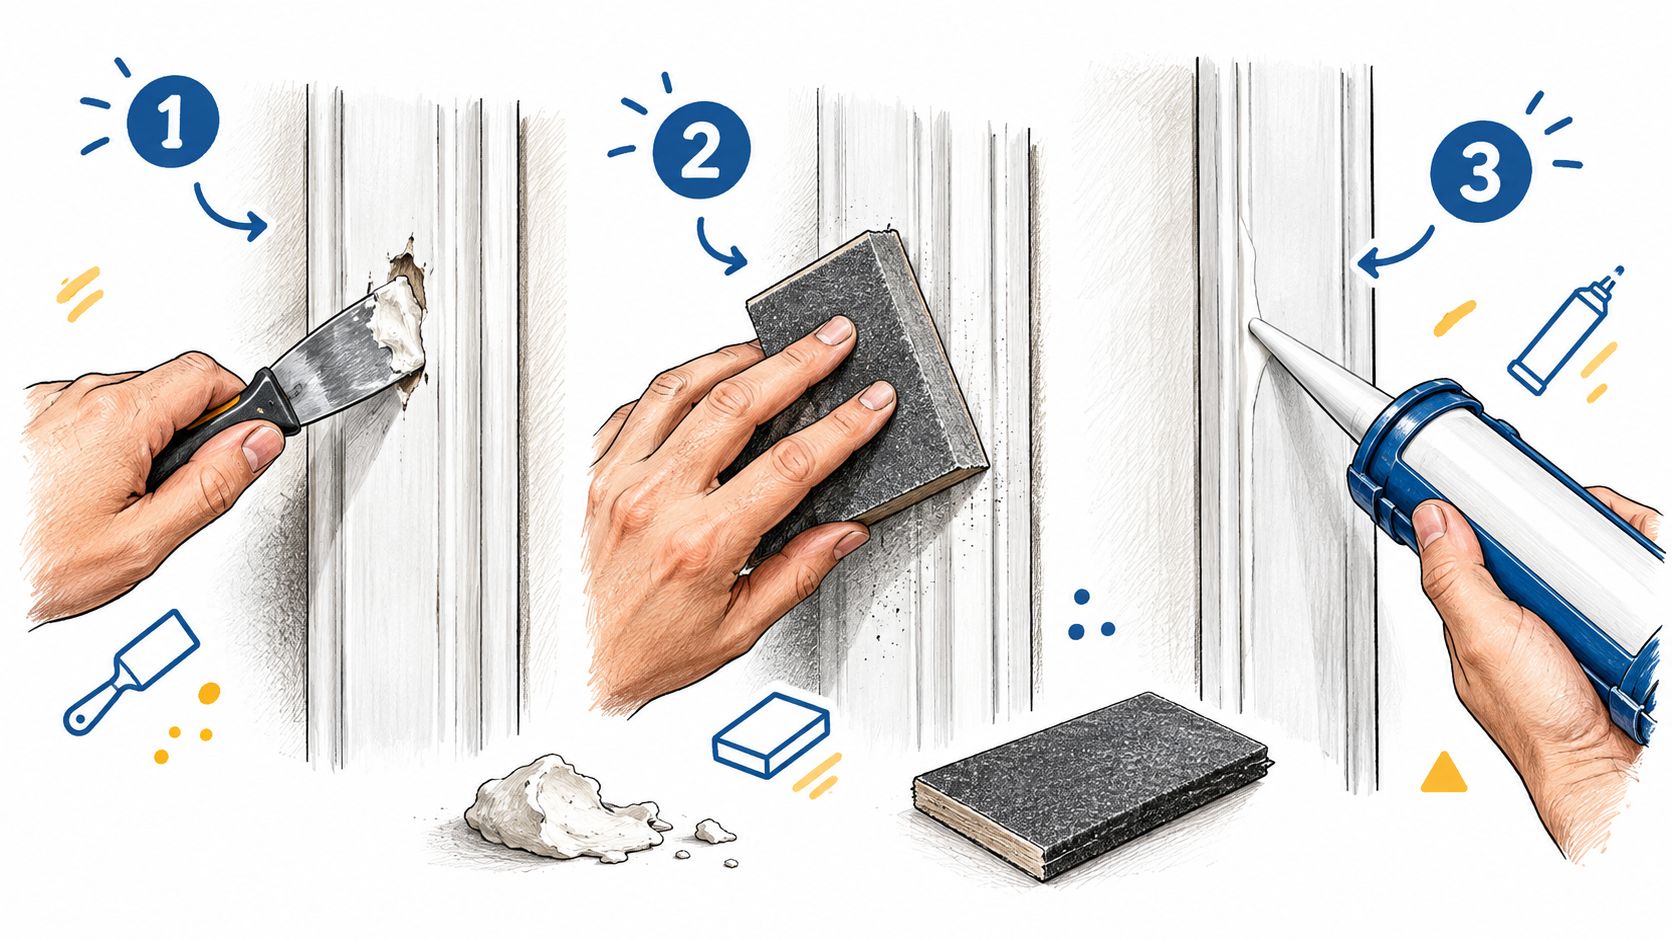
Fill nail holes and shallow dents with a compatible wood or surface filler. Press the material slightly proud of the defect, allow it to dry, then sand it flush. Don't smear filler across an entire face of trim unless the surface needs resurfacing. Broad patches create extra sanding and can leave a different texture under the finish.
Start with enough abrasion to remove loose material and dull the sheen, then refine the surface with a finer paper. A light scuff is appropriate when the coating is intact and only needs a mechanical key. Full sanding is justified when paint is peeling, the surface is heavily ridged, old brush marks are pronounced, or repairs cover a substantial area. Vacuum or wipe away every trace of dust before primer.
Caulk belongs at the joint between trim and wall, along inside corners, and at gaps between joined trim pieces where a flexible paintable seal is appropriate. It doesn't belong over loose paint, wide structural gaps, or moving joints that need a different repair.
Lay a controlled bead
Cut the nozzle narrowly and run a thin, continuous bead. Keep the gun moving rather than stopping over every gap. Tool the caulk immediately with a damp finger or caulk tool, wiping excess onto a rag as you go. A small bead that is tooled flat looks intentional. An oversized bead creates a raised ridge that attracts dirt and can split later.
A baseboard-to-wall gap I often see in rushed apartment jobs is barely noticeable before painting. After a fresh coat, the dark line telegraphs along the entire room and makes otherwise smooth trim look unfinished. Caulk fixes the visual break, but it needs to set according to the product directions before paint goes over it.
Don't caulk after the final coat. Complete filling, sanding, dust removal, and caulking before priming. Then inspect the primed surface from several angles, because primer makes missed dents and ridges easier to spot while there's still time to correct them.
Choosing the Right Primer and Paint Sheen
The right primer decision is conditional. Full priming is valuable on porous, stained, repaired, or uncertain surfaces, but it can waste time on a clean, stable finish that only has minor patched areas. Current trim guidance still emphasizes sanding, spot-filling, and priming, while allowing spot primer over localized repairs when the existing coating is sound. The trim-painting guidance reflects that balance.
| Trim Condition | Primer Needed | Sanding Level | Recommended Sheen |
|---|---|---|---|
| Bare wood | Full coat | Smooth and remove loose fibers | Satin or semi-gloss |
| Stained or bleeding surface | Full coat of suitable stain-blocking primer | Thorough surface preparation | Satin or semi-gloss |
| Localized patched areas on sound paint | Spot primer | Scuff-sand surrounding finish | Satin |
| Pre-primed MDF | Usually spot prime damaged areas, full prime if exposed or porous | Light scuff-sand | Satin or semi-gloss |
| Sound previously painted trim | Usually no full primer | Cleaning and scuff-sanding | Satin or semi-gloss |
| Peeling, heavily repaired, or uncertain coating | Full coat after stabilization | More extensive sanding | Satin or semi-gloss |
The sheen choice is quicker than most homeowners make it. Flat hides flaws but isn't a practical trim finish where hands, shoes, and cleaning contact the surface. Satin offers restrained reflection and is forgiving enough for ordinary repairs. Semi-gloss gives more washability and a stronger visual separation from flatter walls, but it exposes poor sanding and uneven filler. High-gloss is hard-wearing and dramatic, yet it magnifies every surface defect.
Trim conventionally carries more sheen than walls because the contrast helps define casings, baseboards, doors, and architectural lines. That hierarchy still works in matte, color-drenched interiors. My default is satin for a quieter finish and semi-gloss for busy hallways, doors, kitchens, and baseboards that need frequent wiping.
If you're coordinating trim with cabinetry or other millwork, compare the finish system rather than choosing sheen in isolation. Painted and stained finish guidance for cabinetry can help frame that decision when multiple wood surfaces meet in the same renovation.
Brush Techniques for Crisp Lines and a Durable Coat
Use a quality angled sash brush sized for the trim profile. A narrow brush gives control on small casings, while a slightly fuller brush carries enough paint for long baseboards without forcing you to reload constantly. Before painting, remove loose bristles and work the paint into the brush instead of dipping the entire length of the filament.
Load the lower portion of the bristles, then tap or lightly wipe one side against the pail. You want enough paint to flow, not so much that it forms a bead under the top edge. Start with the upper edge, paint the face, then finish the lower edge in logical sections. On wood, follow the grain. Keep a wet edge and avoid brushing back into paint that has started to tack.
For the wall joint, steady your hand with the ferrule close to the surface and use the pointed corner of the angled brush to guide the line. Don't depend on a thick stripe to hide an unsteady cut. A properly prepared joint and a controlled, lightly loaded brush produce a cleaner edge with less buildup.
Lay off the finish
After spreading the paint, make a final light stroke in one direction. This lay-off stroke levels brush marks and redistributes excess paint. Use gentle pressure. Pressing hard pulls paint away from the edge and leaves a thin, uneven film.
Work in manageable lengths, especially on long baseboards. Watch the lower edge for sags, the inside corners for pooling, and the top edge for a raised ridge. Catch drips while the paint is wet. Once the film begins to set, repeated brushing usually makes the defect worse.
Plan at least two finish coats when coverage and uniformity require them. A product may be touch-dry before it is ready for another coat, so follow the label's recoat instruction rather than relying on how the surface feels. The documented benchmarks above show why a trim project may extend across multiple days, especially with deeper colors or poor ventilation.
In an occupied home, finish ceilings and walls first, then paint trim as the final stage. This prevents wall rolling and ceiling work from throwing fresh dust or paint onto completed casings. For a multi-room job, isolate one room, keep tools on a protected tray, vacuum before sanding, and use localized repairs where the existing finish allows it. That workflow keeps the home usable without pretending that full preparation creates no disruption.
Finishing Touches, Cleanup, and Keeping Trim Looking New
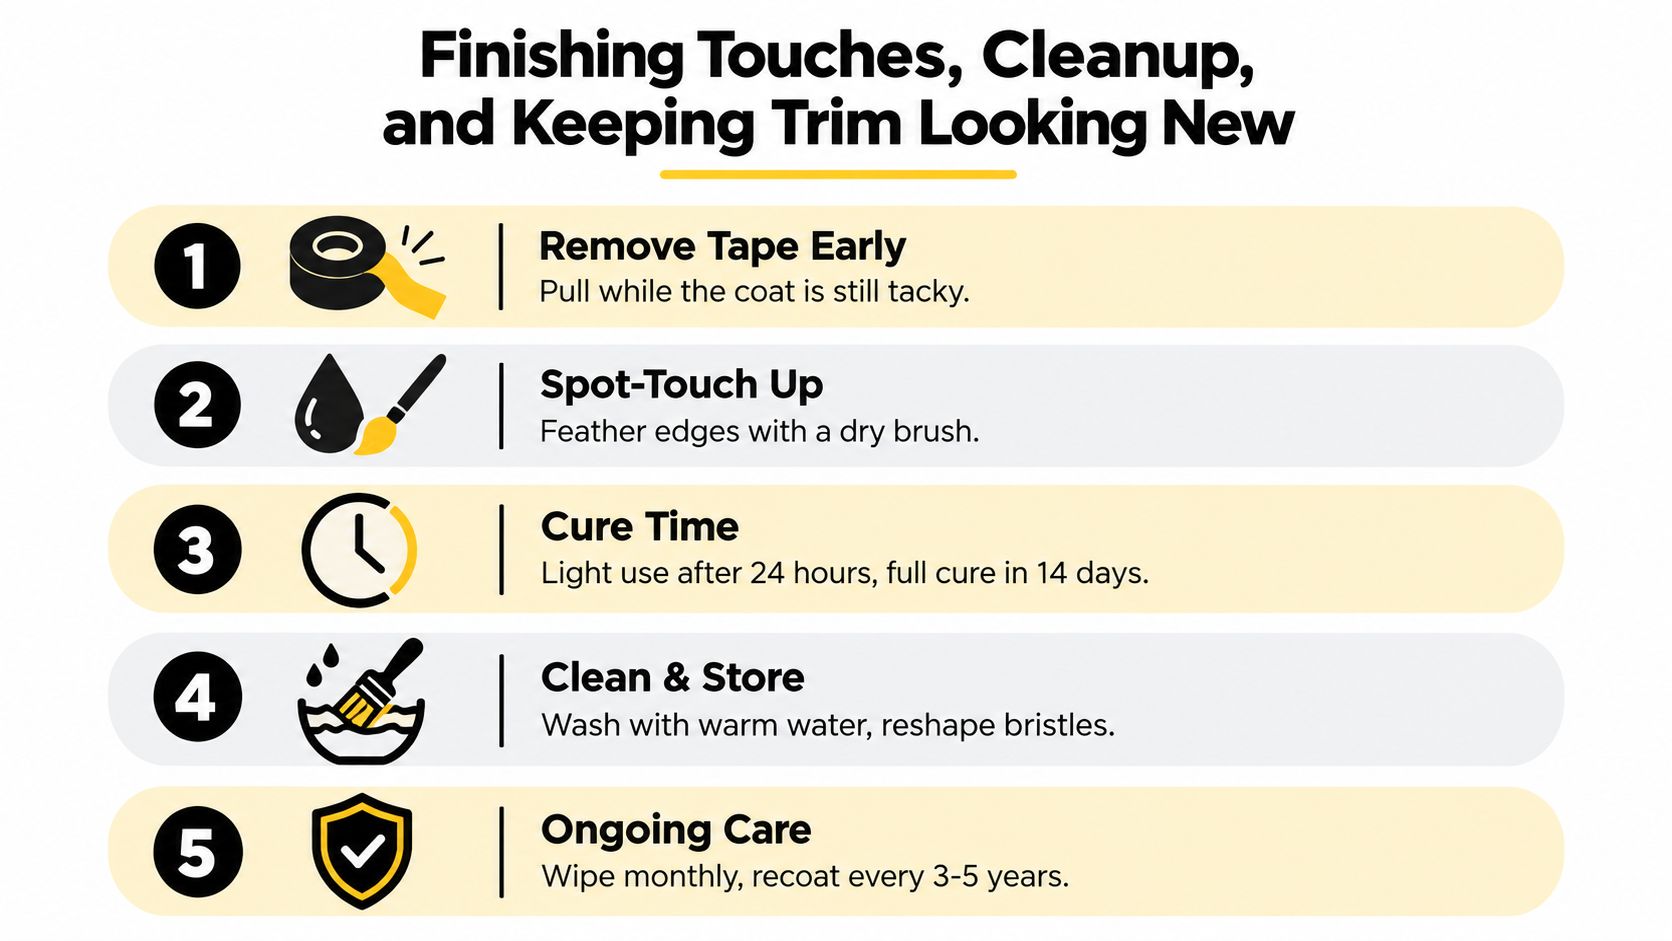
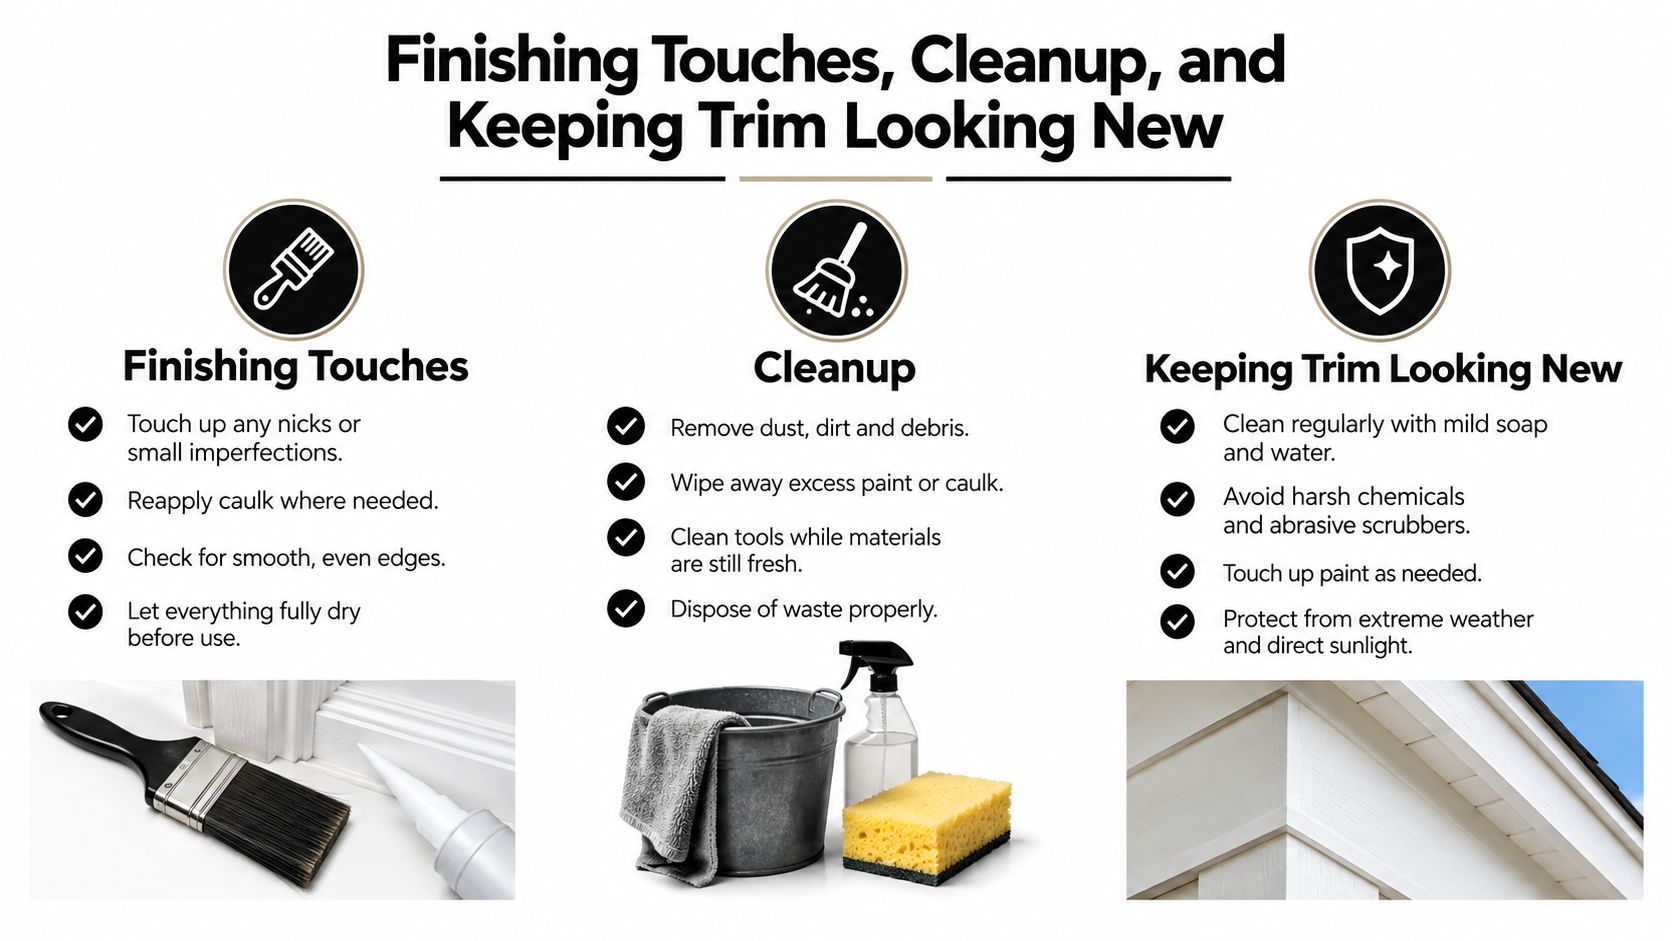
Inspect the trim in natural light before packing up. Look along the length for sags, missed edges, dry brush marks, and thin spots. Remove painter's tape while the edge is still workable, pulling it back over itself rather than snapping it away from the surface. If a line has begun to dry, score the edge carefully before removing the tape so you don't lift the fresh coating.
Keep a small amount of properly mixed paint for later touch-ups, but don't dab a heavy spot onto a thin nick. Feather the repair into the surrounding finish with a nearly dry brush. Clean semi-gloss trim gently with a soft, damp cloth once the coating has hardened enough for normal use. Avoid aggressive scrubbing during the cure period, even when the surface feels dry.
The job-day checklist
- Inspect the substrate: Confirm whether the trim is wood, MDF, pre-primed material, or an older finish that needs preservation consideration.
- Clean and protect: Degrease dirty surfaces, remove hardware, mask adjacent finishes, and secure floor protection.
- Repair selectively: Fill defects, sand them flush, and caulk appropriate gaps with a thin bead.
- Prime by condition: Spot-prime localized repairs on sound trim. Prime fully when the surface is porous, stained, heavily repaired, or uncertain.
- Apply controlled coats: Use a light load, maintain a wet edge, lay off the finish, and respect the product's recoat window.
- Inspect and clean: Remove tape carefully, correct small defects, clean tools, and leave the trim undisturbed while it cures.
Key takeaway: Paint doesn't make poor preparation disappear. It makes surface defects easier to see, especially on satin, semi-gloss, and high-gloss trim.
A free weekend can be enough for a focused refresh when the trim is stable and lightly worn. A full-home repaint, historic millwork, extensive plaster repair, or an occupied apartment requiring serious dust containment deserves a professional plan. Excellent Home Improvement's painting services cover interior surfaces including walls, ceilings, trim, doors, and staircases, with preparation built into the scope.
If your trim needs more than a cosmetic refresh, Excellent Home Improvement can assess the surfaces, handle patching and sanding, and coordinate a clean interior painting workflow around your household. Visit Excellent Home Improvement to discuss the trim, doors, walls, and broader renovation work that your NYC or Westchester home requires.


