Custom Cabinets Install Guide for NYC Homes
Master your custom cabinets install with this NYC-focused guide. Learn measurement, leveling, and trade coordination for brownstones and co-ops.
By Excellent Home Improvement & Remodeling

You've approved the cabinet drawings, the finish samples are sitting on the counter, and demolition is about to expose the truth: the wall isn't straight, the floor slopes toward the window, and the plumbing doesn't land where the plan says it should. That's normal in a New York apartment, brownstone, or prewar building. What matters is whether the installation plan accounts for those conditions before the cabinets arrive.
A successful custom cabinets install is not furniture delivery followed by a few screws. It's a coordinated construction operation involving field measurement, structural backing, moisture control, appliance clearances, countertop templating, building rules, and several trades working in the correct order. The cabinets may be the visible finish, but the quality of the work depends on everything behind and around them.
Table of Contents
- The True Scope of Custom Cabinet Installation
- Evaluating Your Space Before Ordering Materials
- Establishing Site Control and Level Reference Lines
- Structural Anchoring and Fastening Specifications
- Managing Moisture and Substrate Conditions
- Trade Coordination and Occupied Home Logistics
The True Scope of Custom Cabinet Installation
Homeowners often start with door style, wood species, and paint color. Those choices matter, but the cabinets also carry a large share of the project's financial and construction risk. Recent U.S. cost data places custom cabinetry at roughly $500 to $1,200 or more per linear foot, compared with approximately $100 to $300 per linear foot for stock cabinets. The difference reflects made-to-order dimensions, materials, finishes, storage configurations, and the labor needed to fit the room, as documented in recent kitchen renovation cost data.
Cabinets commonly represent about 30% to 40% of a complete kitchen-remodel budget, so a mistake in cabinet dimensions can affect countertops, appliances, flooring, plumbing, electrical work, and the project schedule at the same time. That's why I treat cabinetry as a construction scope, not as a product that arrives after the main work is finished.

Why older buildings change the job
A cabinetmaker can build a box accurately and still deliver a difficult installation. In a brownstone or prewar apartment, the wall may lean, the floor may rise sharply near one corner, and the masonry may hide the only reliable anchoring points. Existing risers, radiator lines, electrical conduits, and patched plumbing can also limit where cabinets and appliances can go.
Custom work must account for those conditions through field measurements, fabrication tolerances, delivery inspection, leveling, shimming, scribing, and trade coordination. Stock cabinets can sometimes absorb irregularities with fillers. Fully custom cabinets reduce filler and improve fit, but they don't eliminate the need for judgment on site.
Cabinetmaking is a process, not a single task
An industry account reports that taking a cabinet from raw materials to a ready-to-ship unit can involve approximately 250 separate processes, including preparation, machining, assembly, finishing, hardware installation, inspection, and packaging, as described in this historical account of kitchen cabinet manufacturing. Every additional design decision creates another point that requires verification.
That complexity explains why approved drawings, appliance specifications, finish approvals, and delivery inspections matter. A missing filler, damaged finished end, or incorrect hinge configuration may not be something an installer can correct in the room. It may require a replacement component, which can hold up the countertop or final inspection.
For homeowners comparing options, custom cabinetry services should be evaluated by more than appearance. Ask how the team handles field verification, shop drawings, remakes, wall irregularities, access restrictions, and coordination with the other trades. The right question isn't only whether the cabinet looks good. It's whether the cabinet system has been planned to survive the room it's entering.
Evaluating Your Space Before Ordering Materials
Fully custom cabinetry isn't automatically the right answer. In many kitchens, the existing boxes are sound, the layout works, and the main problem is a tired finish. In that case, refinishing or refacing may solve the visual problem without introducing the fabrication and coordination demands of a new cabinet package.
The decision should start with the room and the existing boxes, not with a showroom door sample. The 2025 U.S. Houzz Kitchen Trends Study reports that 45% of renovating homeowners selected fully customized cabinets, 32% selected partially customized cabinets, and stock cabinets reached 12%, while refinishing cabinet interiors reached 17%. These figures are available in the 2025 Houzz kitchen trends study. They show that homeowners use several cabinet strategies, rather than treating fully custom construction as the default.
Inspect the existing cabinet boxes
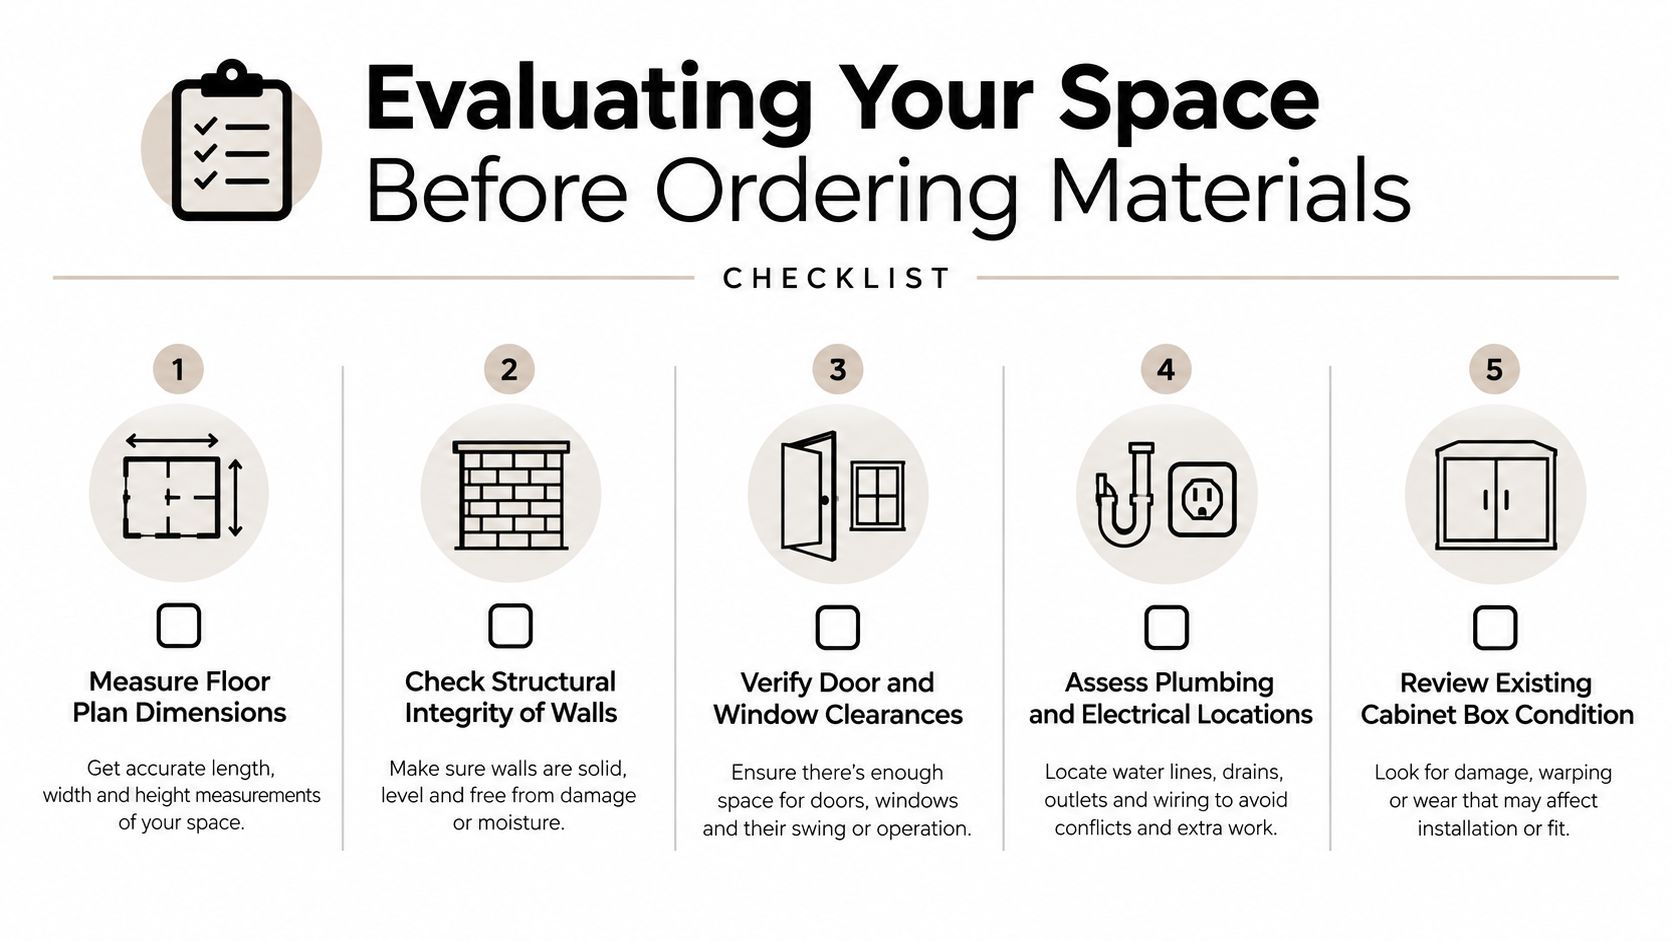
Open every door and drawer, especially the sink base. Look for swelling, delaminated edges, soft particleboard, loose backs, cracked joints, and evidence of past leaks. Push gently on cabinet corners and face frames. A box that moves under light pressure may not be a good candidate for refacing, even if the doors still look serviceable.
Check whether the boxes are reasonably square and whether adjacent units line up. Refacing changes the visible surfaces, but it won't correct a badly distorted layout or a cabinet that has settled because the floor beneath it was never supported properly.
Measure the room like an installer
Record the room at several heights and locations. Don't rely on one wall measurement or an old floor plan.
- Wall lengths: Measure each run at the floor, countertop height, and upper-cabinet height. Differences reveal bows and changes in direction.
- Ceiling and soffits: Record heights at corners and along the cabinet runs. Older ceilings can vary enough to affect crown, fillers, and tall units.
- Openings: Note door swings, window trim, radiator covers, baseboard, and casing. A cabinet can fit on paper and still block an opening.
- Utilities: Photograph outlets, switches, plumbing stub-outs, gas lines, and appliance connections before demolition.
- Access: Measure the building entrance, hallways, stair turns, elevator interior, and apartment doorway. A cabinet that fits the kitchen may not fit the route to it.
Choose the least complicated option that solves the problem
Refinishing makes sense when the boxes are dry, square, structurally sound, and correctly laid out. Refacing works when the cabinet structure is reliable but the doors, drawer fronts, and exposed ends need replacement. Semi-custom cabinetry is useful when the room is mostly conventional but needs selected modifications, such as a reduced-depth unit or a special storage configuration.
Fully custom construction earns its premium when the walls are substantially irregular, the ceiling heights change, existing millwork must be matched, appliances need unusual clearances, or accessibility requires specialized reach ranges and pull-outs. It can also be justified when every inch matters, but only after the installer confirms that the building conditions can support the design.
Decision rule: If the cabinet boxes are sound and the layout works, change the finish first. If the room itself is the problem, custom dimensions may be the appropriate tool.
Establishing Site Control and Level Reference Lines
The first physical step isn't setting a cabinet. It's controlling the site. Before anything is fastened, the installer should verify the approved dimensions against the actual room, identify structural backing, locate the highest point of the floor, and establish a level reference that will govern the installation.
In older New York housing, the highest point may not be obvious. A floor can look flat and still rise enough across a cabinet run to create a visible countertop problem. If the installer starts from the wrong location, every base cabinet can inherit that error.

Establish the control points
Use a laser level or a carefully checked water level to mark a reference line around the room. Then verify:
- The floor's high point, where base cabinets must begin.
- The finished countertop elevation, including the planned countertop thickness.
- The bottom and top of wall cabinets, allowing for trim, backsplash, windows, and hood clearances.
- The location of studs, blocking, or masonry, rather than assuming the wall behind the cabinet is structurally consistent.
- The appliance openings, using the final appliance specifications, not a generic model size.
The reference line is more reliable than the floor or ceiling. Base cabinets should be set from the high point and supported with durable, non-compressible shims. The shims transfer the cabinet load. They aren't decorative scraps intended to disappear behind the toe kick.
Build the run as one aligned system
Set the first cabinet, check it in both directions, and secure it only after confirming its position. Clamp the next cabinet to the first, align the face frames or front edges, and connect the boxes while checking level, plumb, square, and flushness.
Recheck after every connection. A small error at one box can become a large reveal at the end of a long run. Pay particular attention to corners, tall pantry units, and areas where the cabinet meets a wall that isn't straight. Scribing a filler or finished panel to the wall is often cleaner than forcing the cabinet box itself out of square.
Protect the countertop and appliances
Countertop fabricators need stable, aligned cabinets. If the boxes move after templating, the countertop may no longer fit as intended. The same problem appears with dishwashers, ranges, refrigerators, and integrated appliances, whose clearances can be reduced by a wall that leans into the opening.
Leave the appliance specifications on site and compare them with the installed openings. Don't assume a filler can be removed after installation without affecting a door swing, handle clearance, or required ventilation space. Site control is the point where those conflicts are found while they can still be corrected.
Structural Anchoring and Fastening Specifications
Wall cabinets need reliable structural attachment. Custom doors, thick shelves, tall pantry units, and stone surfaces can create substantial loads, and an old wall may contain plaster, lath, masonry, hollow areas, or concealed utilities. Fastening through the cabinet back wherever it happens to land isn't a structural plan.
The Architectural Woodwork Institute guideline calls for fasteners of at least 4.6 mm by 76.2 mm, or #10 by 3 inches, with a bearing head and at least 38.1 mm, or 1.5 inches, of penetration into studs, blocking, or masonry. The specifications are included in this Architectural Woodwork Institute cabinet installation guideline.
Map the backing before drilling
Locate studs or approved blocking before the cabinet reaches the wall. In masonry construction, identify the appropriate substrate and fastener system. Never treat drywall or plaster alone as structural backing for a loaded wall cabinet.
Mark anchor positions on the installation drawing and transfer them to the wall. Pilot holes help prevent splitting, wandering, and damage to finished cabinet components. They also give the installer one more chance to discover a conduit or pipe before driving the final fastener.
Follow a defined anchor pattern
Each cabinet unit or undivided span requires at least four anchors, two upper and two lower. Anchors should be near the ends, with spacing generally no greater than 406 mm, or 16 inches, on center. Wall cabinets taller than 1,219 mm, or 48 inches, require tighter spacing, no more than 305 mm, or 12 inches, on center, according to the same guideline.
The bearing head matters because it distributes the load through the cabinet material. The penetration matters because the fastener must engage structural backing, not just the cabinet back or finish layer.
Finish with a torque and movement check
After fastening, inspect the cabinet for distortion. Tightening one screw too aggressively can pull a box out of square. Check the face, doors, reveals, and adjoining units after the final anchors are installed.
Open and close every door, test drawers, and apply controlled pressure to the cabinet fronts. If the unit moves, the solution isn't more caulk or a larger screw in the same weak location. Stop and correct the backing or anchoring method.
Managing Moisture and Substrate Conditions
A dry-looking kitchen can still contain a serious moisture problem. Sink bases hide old supply leaks, dishwasher connections, and damaged flooring. Brownstones and prewar buildings may also have masonry walls or subfloors that retain moisture after a plumbing failure has been repaired.
Cabinets shouldn't conceal an active leak, damp masonry, swollen subfloor, or unresolved plumbing condition. Before installation, condition the room, inspect the substrates, and document what you find. Furniture-grade interior woodwork commonly targets approximately 6% to 8% wood moisture content in conditioned spaces, while excessive moisture can contribute to swelling, joint movement, finish failure, and door misalignment, as explained in this custom cabinet construction and moisture guidance.
Treat the substrate as part of the cabinet system
Check walls and floors for dampness, active leaks, soft areas, and visible movement. Record deviations instead of hiding them. A wall that is out of plane may be manageable with scribing, but a wall that is wet needs a building repair first.
Use durable, non-compressible shims at supported cabinet points. An unsupported corner can settle after the countertop and hardware are installed, opening inconsistent reveals and placing stress on fasteners. A thin cosmetic shim that crushes under load doesn't solve that problem.
Seal every exposed cutout
Sink-base penetrations, plumbing openings, dishwasher connections, and other cutouts expose cabinet material to water. Seal the exposed edges with an appropriate protective coating or sealant compatible with the cabinet construction. Keep direct water away from finished panels during installation and protect components while other trades work nearby.
A waterproofing mindset is useful even in a kitchen. The principles discussed in this bathroom waterproofing guide apply broadly, especially the need to resolve water paths before covering them with finished materials.
Keep a written condition record
Photograph the floor, wall, sink area, plumbing penetrations, shim locations, and anchor points before close-in. Note existing stains, repaired leaks, uneven masonry, and any condition that the cabinet installer is not responsible for correcting.
That record protects the homeowner and the contractor. If a door moves later, the team can distinguish installation movement from a leaking connection, a settling substrate, or a pre-existing building condition. Documentation doesn't replace good work, but it prevents uncertainty from becoming an argument.
Trade Coordination and Occupied Home Logistics
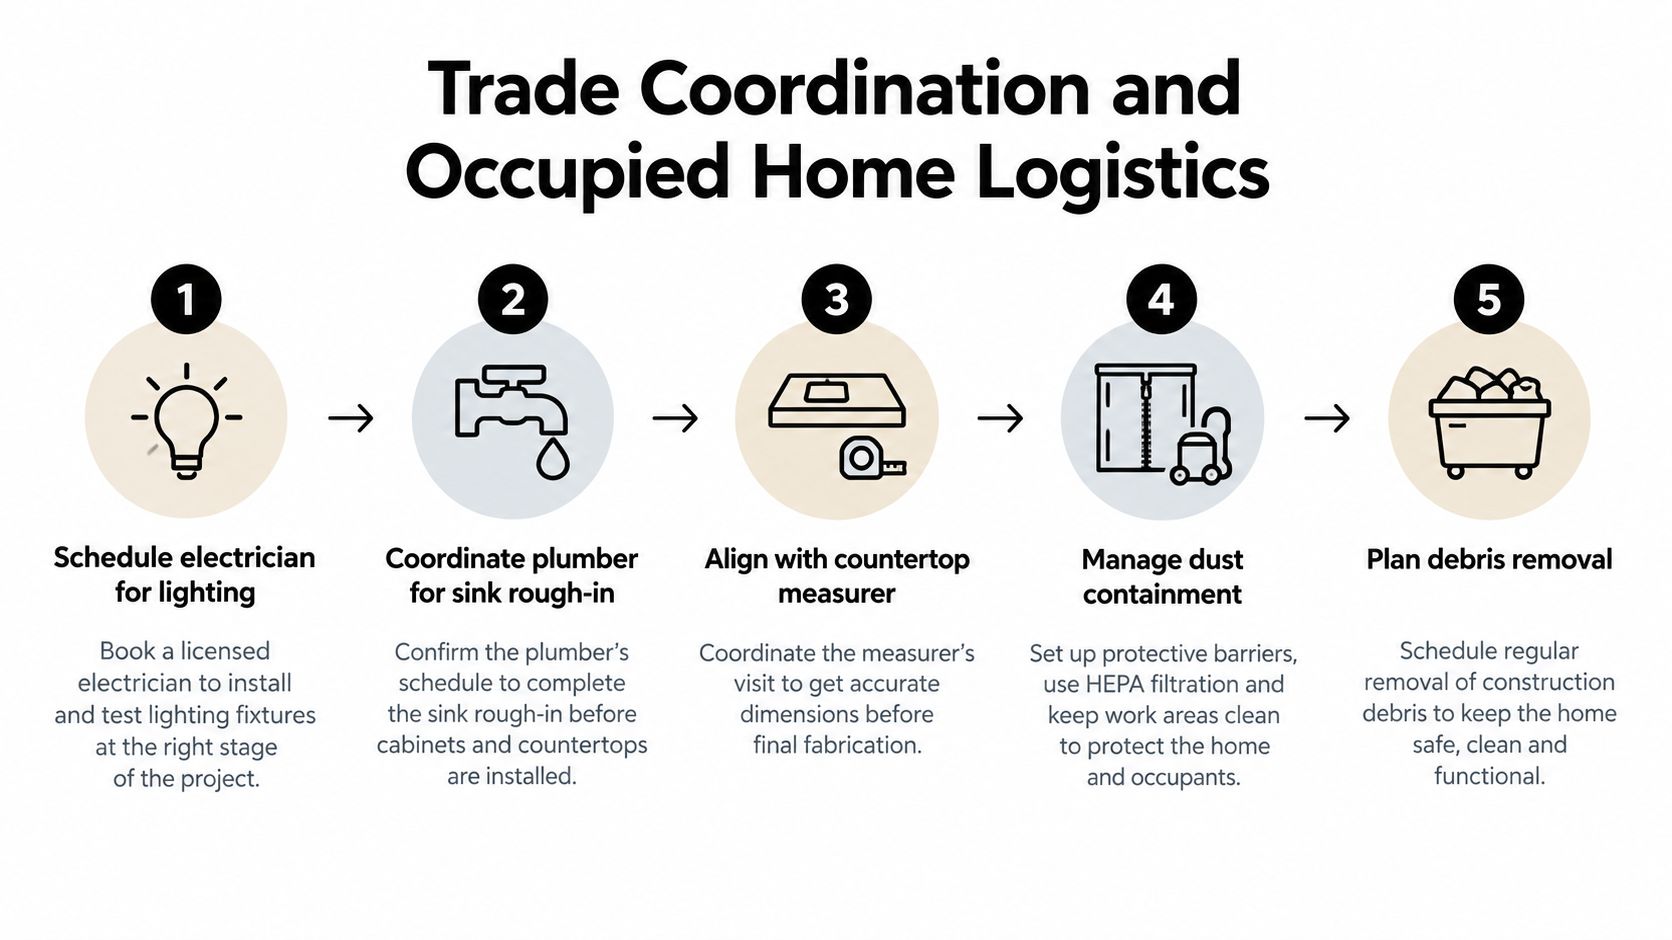
The cabinet installer can't work in isolation. The electrician needs final locations for lighting, outlets, and under-cabinet equipment. The plumber needs the sink and dishwasher positions. The flooring installer needs to know whether flooring runs beneath the cabinets. The countertop fabricator needs stable, aligned boxes before templating.
A useful sequence has clear hold points. Work doesn't move forward just because the calendar says it should.
Use hold points instead of assumptions
- Design approval: Confirm the final appliance models, cabinet elevations, fillers, panels, hardware, and utility locations.
- Pre-demolition verification: Recheck the field dimensions and inspect the walls, floor, and plumbing after finishes are removed.
- Delivery inspection: Count every cabinet, filler, panel, trim piece, drawer, and hardware package. Photograph damage before moving items into the apartment.
- Installation release: Confirm that flooring, structural repairs, rough plumbing, and rough electrical work are complete where required.
- Countertop release: Recheck cabinet alignment, appliance clearances, support points, and finished ends before the countertop fabricator measures.
- Final acceptance: Test doors, drawers, hardware, sink connections, appliance clearances, lighting, and trim before final payment.
This sequence reduces change orders because each trade receives verified information rather than a verbal assumption.
Plan for co-op and condo restrictions
Building rules can control the schedule as much as the construction itself. Confirm the alteration agreement, work hours, insurance requirements, elevator reservations, loading procedures, debris routes, shutdown permissions, and inspection requirements before materials arrive.
In an occupied apartment, protect the route from the building entrance to the kitchen. Use dust containment, floor protection, sealed work zones, and a daily cleanup plan. If the kitchen is the only cooking area, establish a temporary setup before demolition and identify where dishes, food, and small appliances will live during the work.
The 2025 Houzz & Home study reported median spending of $35,000 for a major remodel of a small kitchen, after a 9% increase, and also reported that general contractors were hired by 50% of renovating homeowners while cabinetmakers were hired by 32%. Those figures appear in the 2025 Houzz and Home renovation trends study. The practical lesson is straightforward: the cabinet package sits inside a larger project, and responsibility for coordination must be assigned clearly.
For planning purposes, use a written schedule that identifies who verifies each condition and who pays if a remake is required. A practical kitchen remodel timeline guide can help organize the sequence, but the actual schedule must reflect the building's rules, access limitations, approvals, and material availability.
Excellent Home Improvement offers kitchen remodeling with custom and semi-custom cabinetry, design and material coordination, permitted plumbing and electrical work, and project management for NYC homes. If your apartment, co-op, condo, brownstone, or Westchester home needs a cabinet plan built around real site conditions, visit Excellent Home Improvement to discuss the layout, building requirements, and installation scope before ordering materials.
Excellent Home Improvement coordinates custom cabinet installation with the surrounding construction work, including design, sourcing, permitted trade work, dust control, and final quality checks. Contact the team before demolition so your field dimensions, building approvals, delivery plan, and cabinet schedule are aligned from the start.