How to Repair Cracks in Bathroom Sink: Fix or Replace
Learn how to repair cracks in bathroom sink basins: test for leaks, prep the surface, fill, cure, and know when replacing the sink is safer.
By Excellent Home Improvement & Remodeling

You're brushing your teeth on a Saturday morning when you notice it. A thin line runs across the basin where yesterday there was just white glaze. Maybe a heavy bottle slipped, or maybe you poured very hot water into a cold sink. Either way, you're now wondering whether a small tube of filler will save the fixture or whether you're about to shop for a new one.
That decision comes before you buy anything. Learning how to repair cracks in bathroom sink basins starts with sorting a cosmetic hairline from a structural crack. One can take a careful patch. The other will leak into your cabinet no matter how neatly you fill it.
Table of Contents
- Decide Whether a Crack Is Repairable
- Match the Repair Product to Your Sink Material
- How to Fill a Hairline Crack Step by Step
- Cure Times and Daily Limits on a Patched Sink
- When to Stop DIY and Book a Replacement
Decide Whether a Crack Is Repairable
Is this a surface defect or has the basin itself failed? Answer that first. A hairline that sits inside the glaze, away from the drain, faucet holes and rim, is the only pattern a DIY filler should touch. A crack that leaks, runs through the basin, exposes metal, widens under pressure or sits around a drain or faucet opening points toward replacement or professional restoration.
Run the Paper Towel Test
Dry the cabinet floor, then lay a dry paper towel under the trap. Fill the basin to normal operating depth and leave it in place while you watch underneath with a flashlight. Check the crack edges, the drain seal and the overflow, then run the faucet and check again.
Press gently on each side of the crack. Does it open, shift or flex? Mark any wet spot with a pencil and note where the crack starts and ends. If the towel stays dry through the full test and the crack holds still, you have a candidate for prep work.
A visually small crack that crosses a drain can matter more than a larger superficial chip that sits away from any opening.
That under-sink check matters for inspection too. The HUD NSPIRE sink inspection standard tells inspectors to look beneath the sink for cracks, holes or broken seals that allow leakage. In an apartment or co-op, concealed moisture can damage cabinetry and flooring long before you see it, which is why basic bathroom waterproofing principles apply even to a small fixture decision.
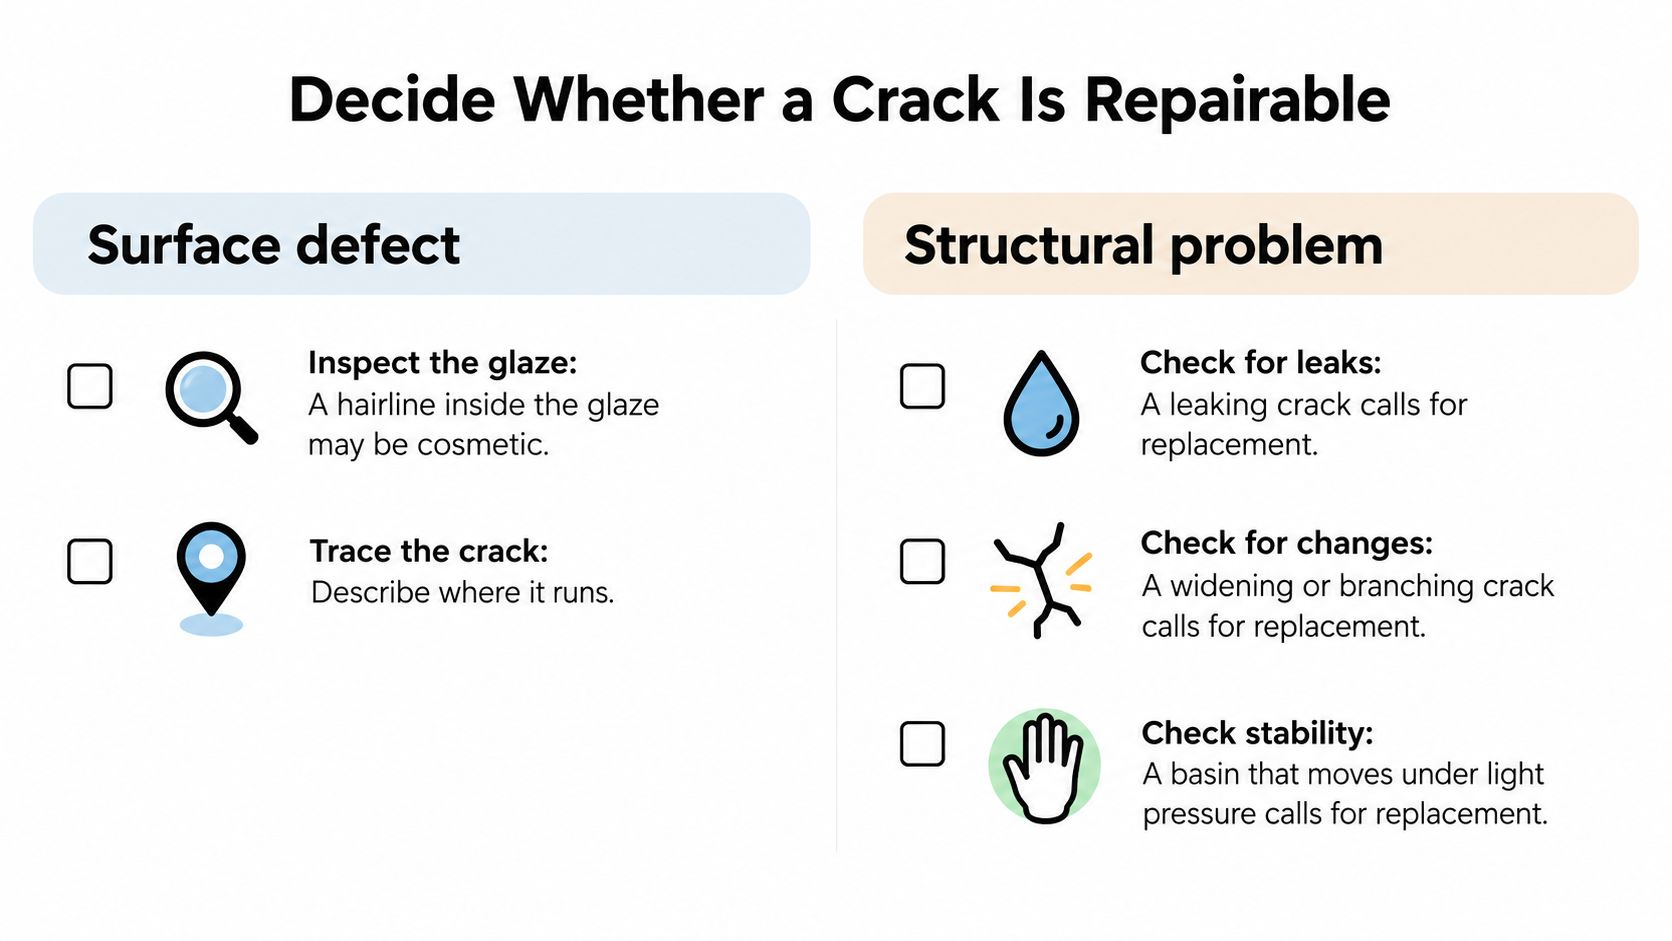
| Crack location or sign | Water or movement | Verdict |
|---|---|---|
| Hairline inside the glaze, away from drain and rim | Dry, no movement | DIY filler candidate |
| Hairline that crosses the basin edge or rim | Dry, no movement | Evaluate with a pro before filling |
| Crack reaching the drain or overflow opening | Any | Replacement or professional restoration |
| Crack near faucet holes or mounting points | Any | Replacement or professional restoration |
| Any crack with seepage under the sink | Wet | Stop DIY work and plan replacement |
| Crack that opens under light pressure | Moves | Replacement decision |
| Chip that exposes metal or a gray base layer | Any | Professional restoration |
Keep that verdict in mind as you work. A patch can look sound from above and still fail underneath if water is already finding a path through.
Match the Repair Product to Your Sink Material
Hold a magnet to the basin before you shop. It'll stick to enamel-coated steel or cast iron and it won't stick to china or most composites. Check for a manufacturer label under the rim too, because a compound that bonds to porcelain can peel off acrylic, enamel or solid surface.
That mismatch is the quiet failure most guides skip. Sinks may be vitreous china, ceramic, enamel-coated metal, cultured marble, acrylic or composite, and each one needs a product that lists that substrate. The plumbing fixture material requirements emphasize smooth, impervious, defect-free surfaces, so a rough, porous patch isn't just ugly. It can trap grime and complicate cleaning.
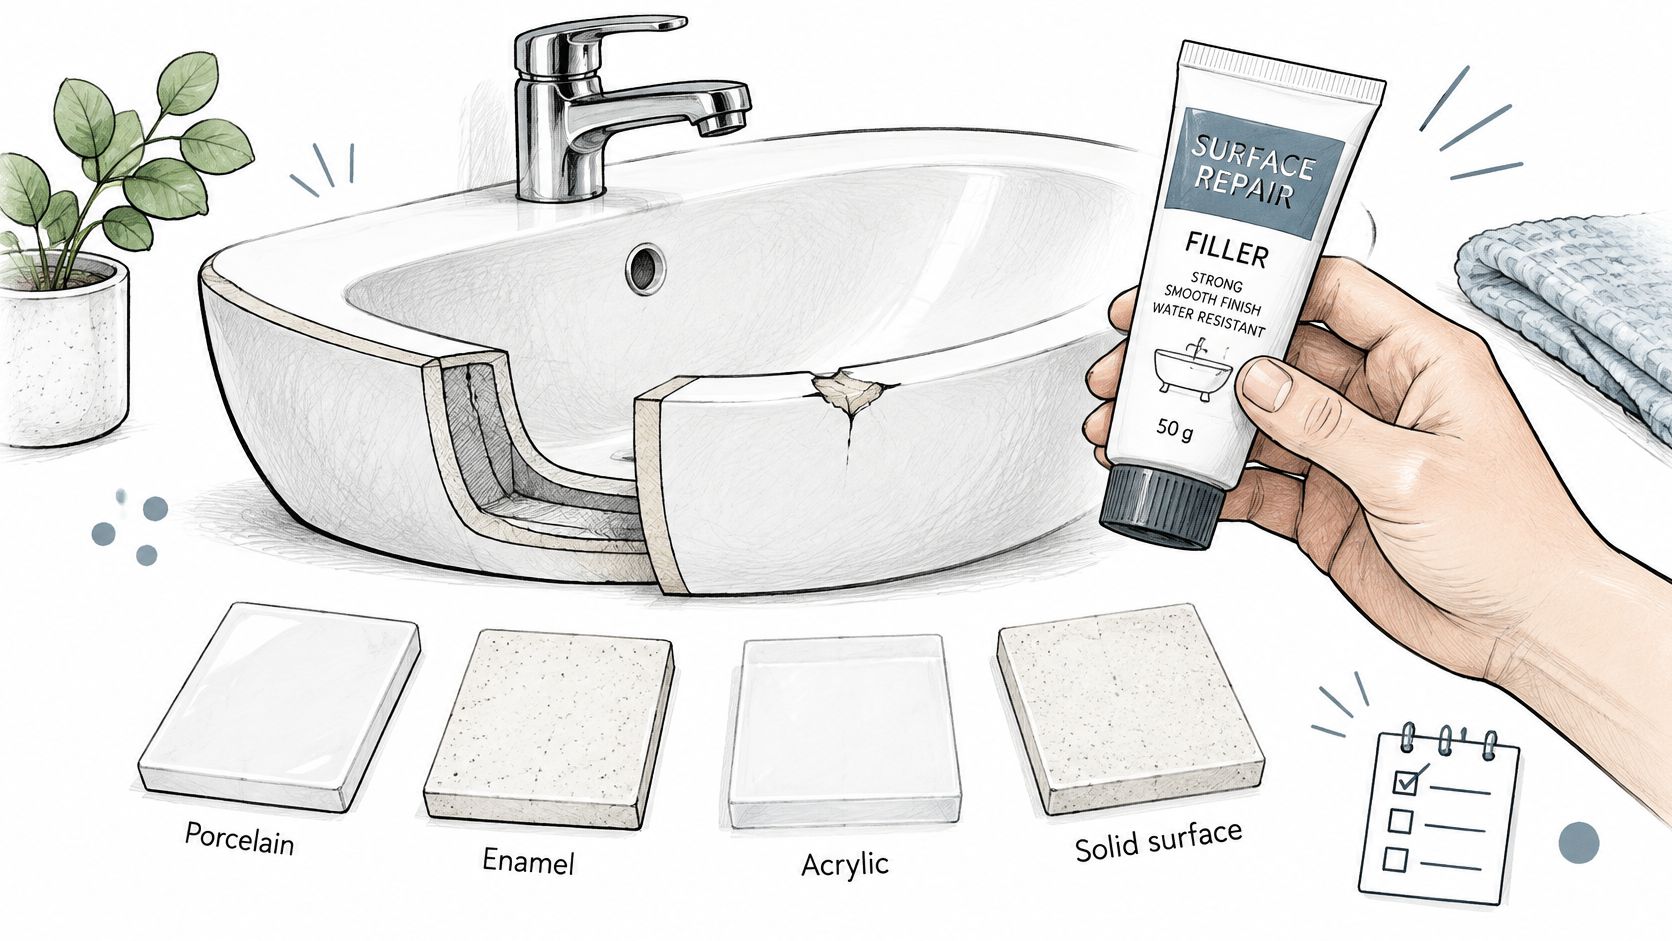
Before you open any tube, put on nitrile gloves and eye protection and ventilate the room. Then match the kit to what you have. If you're also pricing replacements, browsing sinks and tubs by material type helps you confirm what your current basin is likely made from.
| Sink material | Repair product to look for | Prep and key check | Avoid |
|---|---|---|---|
| Vitreous china or ceramic | Two-part water-resistant epoxy or porcelain touch-up kit | Sand lightly and degrease with isopropyl alcohol | Superglue and plain caulk |
| Enamel-coated steel or cast iron | Porcelain epoxy rated for a metal substrate | Check for rust, bare metal needs professional work | Filling over rust |
| Cultured marble | Cultured-marble repair kit matched to the color | Clean, sand lightly, match the gel coat | General epoxy with no marble rating |
| Acrylic | Acrylic repair kit or manufacturer-specified adhesive | Keep heat low and test color on a hidden spot | Solvent cements that can craze the surface |
| Solid surface or composite | Matching solid-surface filler | Sand to remove gloss, then wipe clean | Porcelain epoxy with no compatibility data |
Don't expect a promised service life from any kit. There's no reliable independent durability data across sink materials and humid bathroom conditions, so judge success as cosmetic improvement unless the manufacturer gives you tested compatibility data.
How to Fill a Hairline Crack Step by Step
Work only when the crack is dry, stable and cosmetic. Gather a two-part water-resistant epoxy rated for porcelain, sandpaper in the 400 to 600 grit range, isopropyl alcohol, a plastic scraper, a utility knife, painter's tape and nitrile gloves. For a small stable hairline, that epoxy choice matters more than brand. Guidance on fixing chips and cracks in porcelain sinks specifies a two-part water-resistant epoxy over ordinary superglue, sanding at approximately 400 to 600 grit and 24 to 72 hours before water exposure.
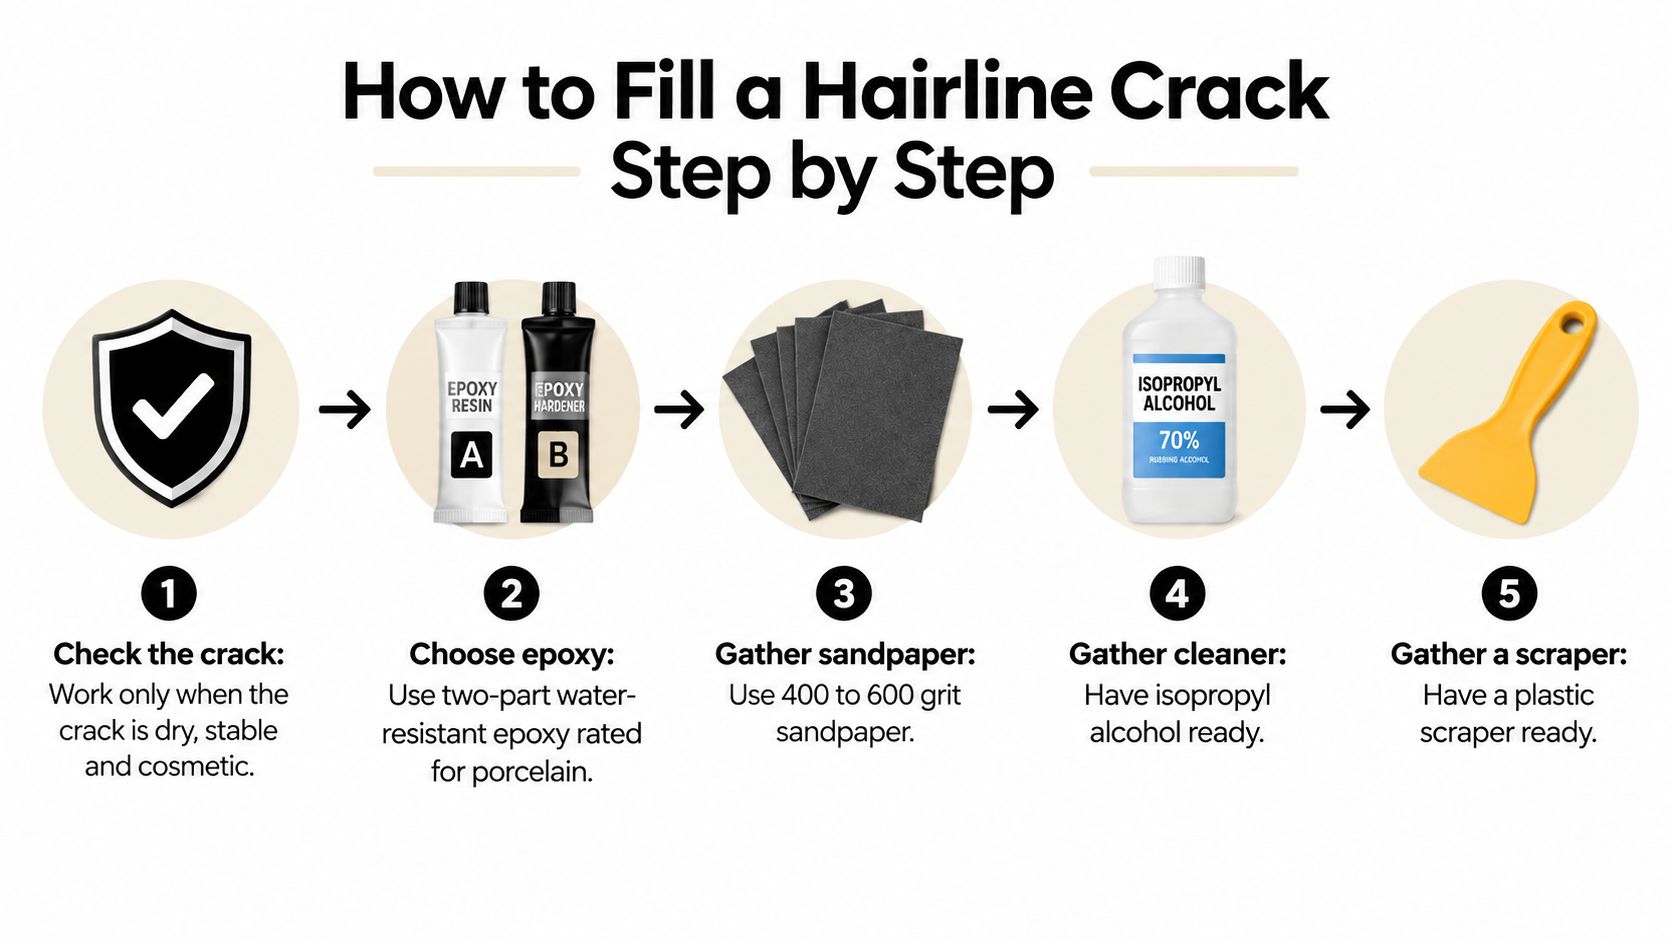
Prep the Basin
- Shut off the supply. Turn off the faucet supply, drain the basin and let it dry completely. Moisture left in the crack weakens adhesion.
- Degrease the area. Wipe the crack and a finger-width around it with isopropyl alcohol and let it evaporate. Soap film and oils block bonding.
- Abrade the glaze lightly. Rough up the glaze around the crack so the resin has something to grip. You're dulling the surface, not grinding it down.
- Open a shallow V-groove. Use the utility knife to widen the crack slightly so filler can penetrate the full length. Don't drill through the basin.
- Tape both sides. Painter's tape along each edge keeps excess compound off the surrounding glaze and saves sanding later.
Mix and Apply
- Mix at the label ratio. Combine resin and hardener exactly as specified and stir until the color is uniform. Incorrect proportions are a common reason a patch never hardens properly.
- Press filler into the crack. Force compound into the entire length, slightly overfilled, so you aren't just coating the visible surface.
- Scrape flush and remove tape. Draw the plastic scraper across before the epoxy sets, then peel the tape while the edge is still clean.
- Cure, sand and touch up. Leave the basin untouched for the cure period covered next, then sand flush and apply a compatible porcelain touch-up coating if the color needs help.
Mix small. Quick-set epoxy can gel in about five minutes, so mixing a large batch wastes material and rushes your application.
That last point trips up a lot of first attempts. You mix too much, it starts to thicken halfway along the crack, and you end up dragging partly set compound instead of pressing fresh filler into the groove. Mix only what you can place comfortably in one pass. If the crack is long, work in two small batches rather than one big one.
Remember what this repair is. It's cosmetic and nonstructural. It seals and stabilizes a surface line. It doesn't rebuild the basin, and it isn't appropriate where the crack reaches the faucet, drain, mounting rim or support area.
Cure Times and Daily Limits on a Patched Sink
A quick-set epoxy can feel firm within the hour, and that hardness fools plenty of homeowners into running water the same evening. Workable for roughly 5 minutes only means you can still shape it. Full strength often requires at least 24 hours and sometimes up to 72 hours depending on temperature, humidity and formulation, as noted in guidance on repairing cracks in porcelain sinks. Using the sink inside that window is the fastest way to ruin a good patch.
| Stage | Typical timing | What is safe |
|---|---|---|
| Working time after mixing | About 5 minutes for quick-set epoxy | Shape and scrape the patch flush |
| Handling strength | Varies by product, check the label | Light handling only, no water |
| Dry rest before water | 24 hours minimum | Keep the basin dry and unused |
| Full chemical cure | 24 to 72 hours, longer in cool or humid rooms | Normal use and mild cleaners |
| Long-term thermal cycling | No published durability data | Temper hot and cold water as a habit |
Why Patches Fail
Prep and patience cause most failures. The product itself is rarely the problem.
- Contamination or moisture: Dust, oil or water in the crack prevents a proper bond.
- Incorrect mixing: Off-ratio resin and hardener can stay soft or brittle.
- Too little abrasion: Filler sitting on glossy glaze has little to hold onto.
- Surface-only filling: Compound that doesn't reach the crack depth lifts at the edges.
- Early use: Running water before full cure weakens adhesion from the start.
No seller can give you a reliable percentage success rate for this work. Published guidance gives product-specific cure times, and an industry-wide service life for patches has never been established. Log the product name, batch instructions, crack location, leak test result and cure period instead, so you know exactly what was done if the line reappears.
Live Gently With the Patch
Treat the patch as a seal, because that is what it is. Factory ceramic restoration happens in a kiln, at firing temperatures and cycle lengths no tube of household epoxy can approach. The cured compound closes the surface line and keeps water out of the crack. Expecting it to behave like the original fired body is how patches get abused into early failure.
Run warm water first so the basin tempers before any hot pour. Boiling water into a cold basin creates the rapid expansion stress that starts straight-line cracks in rigid porcelain, and a patched line is the weakest place for that stress to land. Skip abrasive powders and harsh chemicals, keep heavy objects out of the basin, and wipe it dry so water doesn't sit in the repaired line.
Check under the drain with a dry paper towel after the first week, then monthly. Watch for a spreading hairline, a dull or lifted edge, or a new water mark in the cabinet. Any of those means the patch is losing.
When to Stop DIY and Book a Replacement
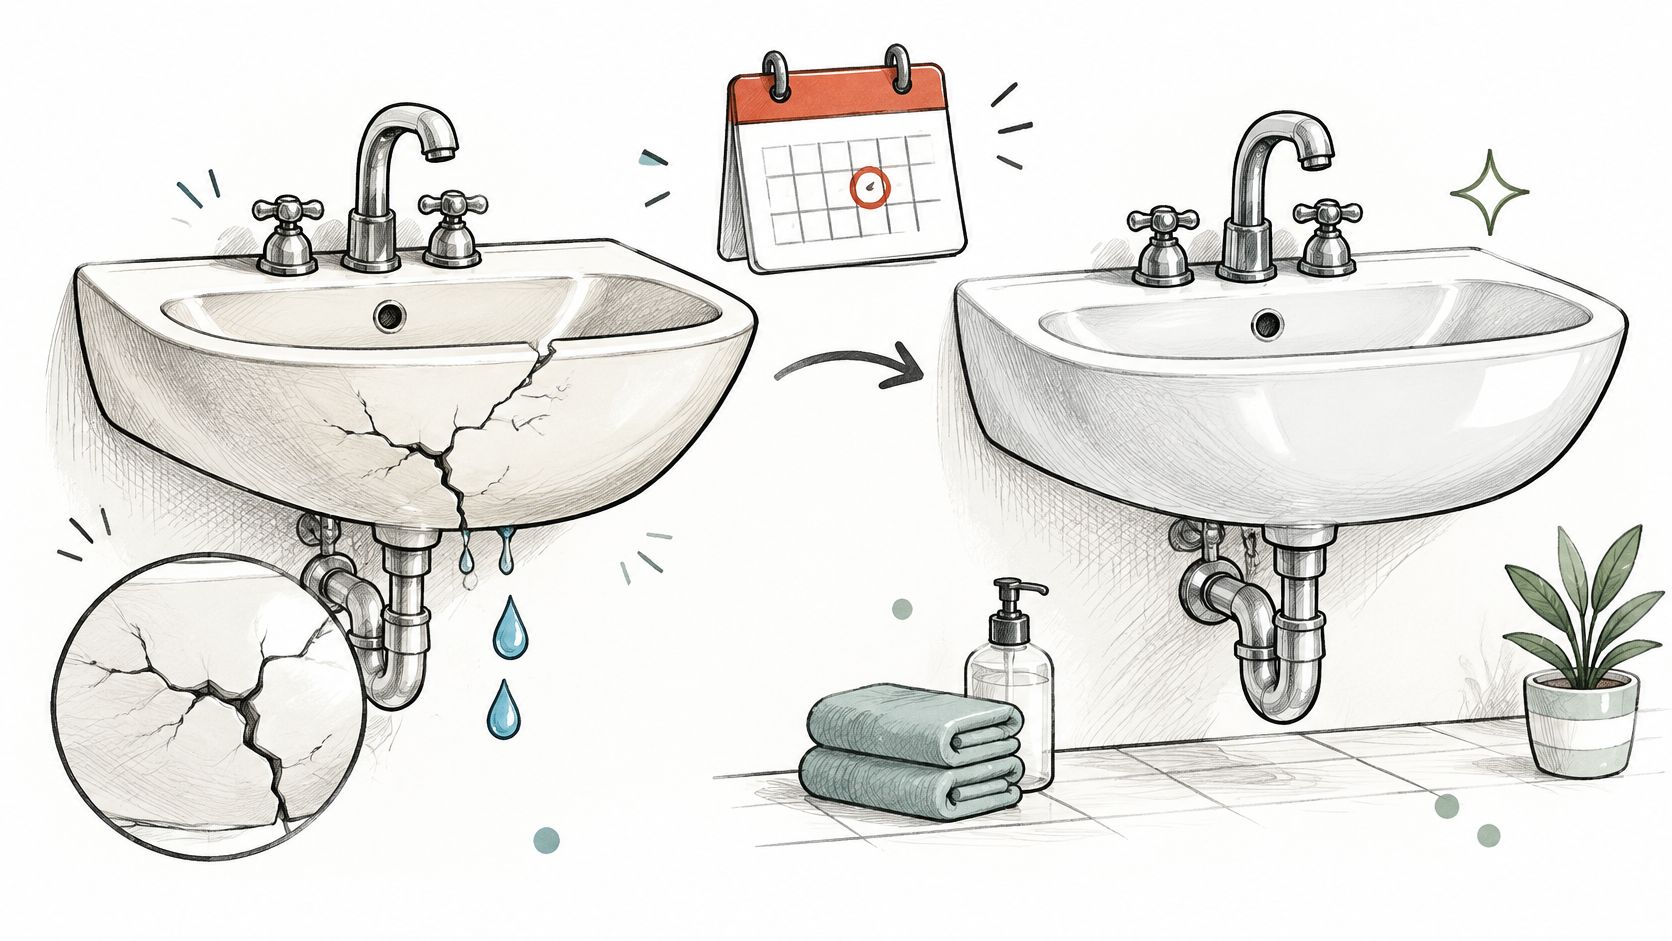
A patch that keeps the cabinet dry is doing its job. A wet paper towel has already given you the answer: the crack is a leak path, and filler over an active leak buys weeks at best.
Treat these signs as the stop line:
- The crack leaks or the paper towel comes back wet
- The crack widens or branches between checks
- The basin moves under light pressure
- Water has reached the cabinet, wall or floor
Once any of them shows up, price the whole picture rather than the tube. Repeated patching plus moisture damage to cabinetry or flooring can cost more than a like-for-like fixture, and hidden damage is usually the expensive part. Published cost-versus-resale reporting puts a full mid-range bathroom remodel at a far higher spend, with the majority of it typically recouped at resale. A single sink swap sits far below that figure, which is why it often beats a second or third round of filler.
In a co-op, condo or older building, check with management before opening plumbing or swapping a fixture, and expect lead-safe practice in any pre-1978 building. When you collect quotes, ask for a written scope that lists the fixture, any vanity change, supply and drain connections, and cleanup. A broader bathroom renovation scope may make sense if the vanity or flooring is already water-damaged. The same leak evidence that decided whether the crack was worth filling now decides whether the sink is worth keeping. Run the paper towel test today and write down where it stays dry and where it doesn't.
If your paper towel test comes back wet, or the crack moves under pressure, don't buy filler and hope. Excellent Home Improvement offers a site walkthrough before any work is scoped, followed by a fixed-price written proposal covering the fixture, connections and any cabinet or floor damage found underneath. Visit Excellent Home Improvement to book that walkthrough and get a clear repair or replace verdict for your sink.